
Hello, and welcome to HoudiniEsq 2.0!
HoudiniEsq 2.0 is a much-improved, streamlined version of the interface. If you are new to HoudiniEsq in general, this will be your starting point. If you are a user of previous versions of the the product, this guide will serve as an introduction point to the various changes present in the new interface.
Upon your first login to the system you will be taken to the Quick Setup wizard. This simple setup will allow you to skip most of the advanced configuration of the system and jump right into using HoudiniEsq as a fully functional practice management solution. If you need to get started right away, you can do so and revisit the setup process later if necessary. This article will serve to help familiarize you with the interface.
In this article, we will be giving an overview of the HoudiniEsq 2.0 interface from the top down.
Once you log in, you will land at the Matter Dashboard menu . From here, the main navigational components are listed below.

Profile/Name: This is your name as it is displayed in your Staff record, along with your Firm Name. Clicking this text will take you to your Profile screen, where you can change your basic information, set up an email account, and Google integration.
![]()
Current Dashboard Options: This section will typically let you switch between sub-menus in a given part of the program. As an example, the image above shows examples of various options available for the Reports menu.
![]()
Global Search & Time Entry: This area will allow you use the Advanced Search to find any record in the HoudiniEsq database. The timer to the left is the Stopwatch. This will allow you to record your time as you work. The icon on the right is the Advanced Document Search, for complex searching of text-based documents in HoudiniEsq 2.0.
![]()
Dashboards: Here we can see the available dashboards in the system. We’ll link to them and briefly describe them below.
- Activity – The Activity dashboard will allow you to see an overview of all recent activity in the system. This includes notices, events, todos, email, notes and documents.
- Matters – The Matters dashboard will allow you to access all current case records in the system which you have access to and any of their related records.
- Calendar – The Calendar will allow you to access all of your Events. You can reschedule and edit them or create new ones with ease.
- Email – The Email dashboard will allow you to access your current Inbox, and allow you to send mail to recipients as well as link current mail to Matters in HoudiniEsq.
- Contacts – The Contacts dashboard will allow you to view all current contacts in the HoudiniEsq system, edit their information and create new Matters for them.
- Billing – The Billing dashboard is comprised of the Pre-Bill screen which will allow you to prepare Events, Expenses and Fees Earned to be invoiced, and the Invoicing screen which will allow you to print, email and apply payments and credits to current Invoices in the system.
- Reports – This is the currently selected Dashboard in the screenshot above. The Reports menu will have quick links to current Performance and Compensation reports, as well as allows you to access Ad Hoc and BIRT reports.
- Settings (Admin Only) – This is where you can configure HoudiniEsq at the administrative level, including editing your organizational settings, creating and managing Staff members and viewing audit/system logs.
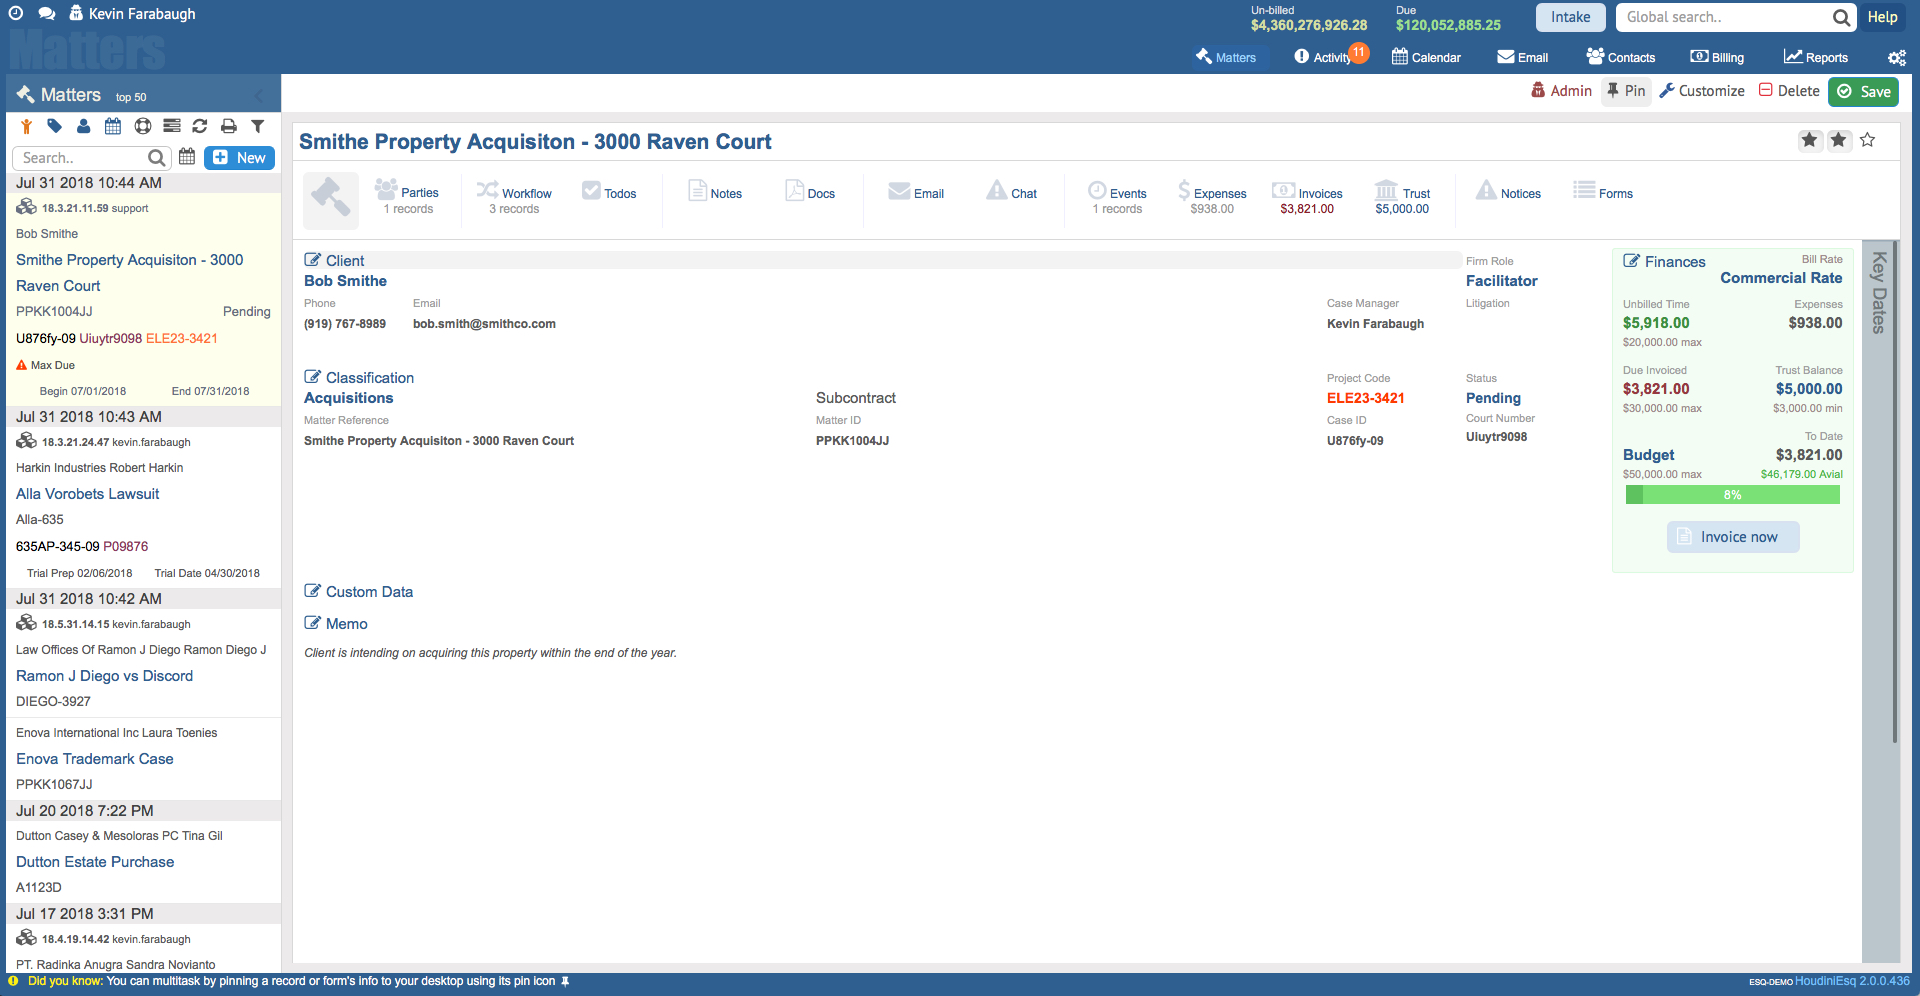
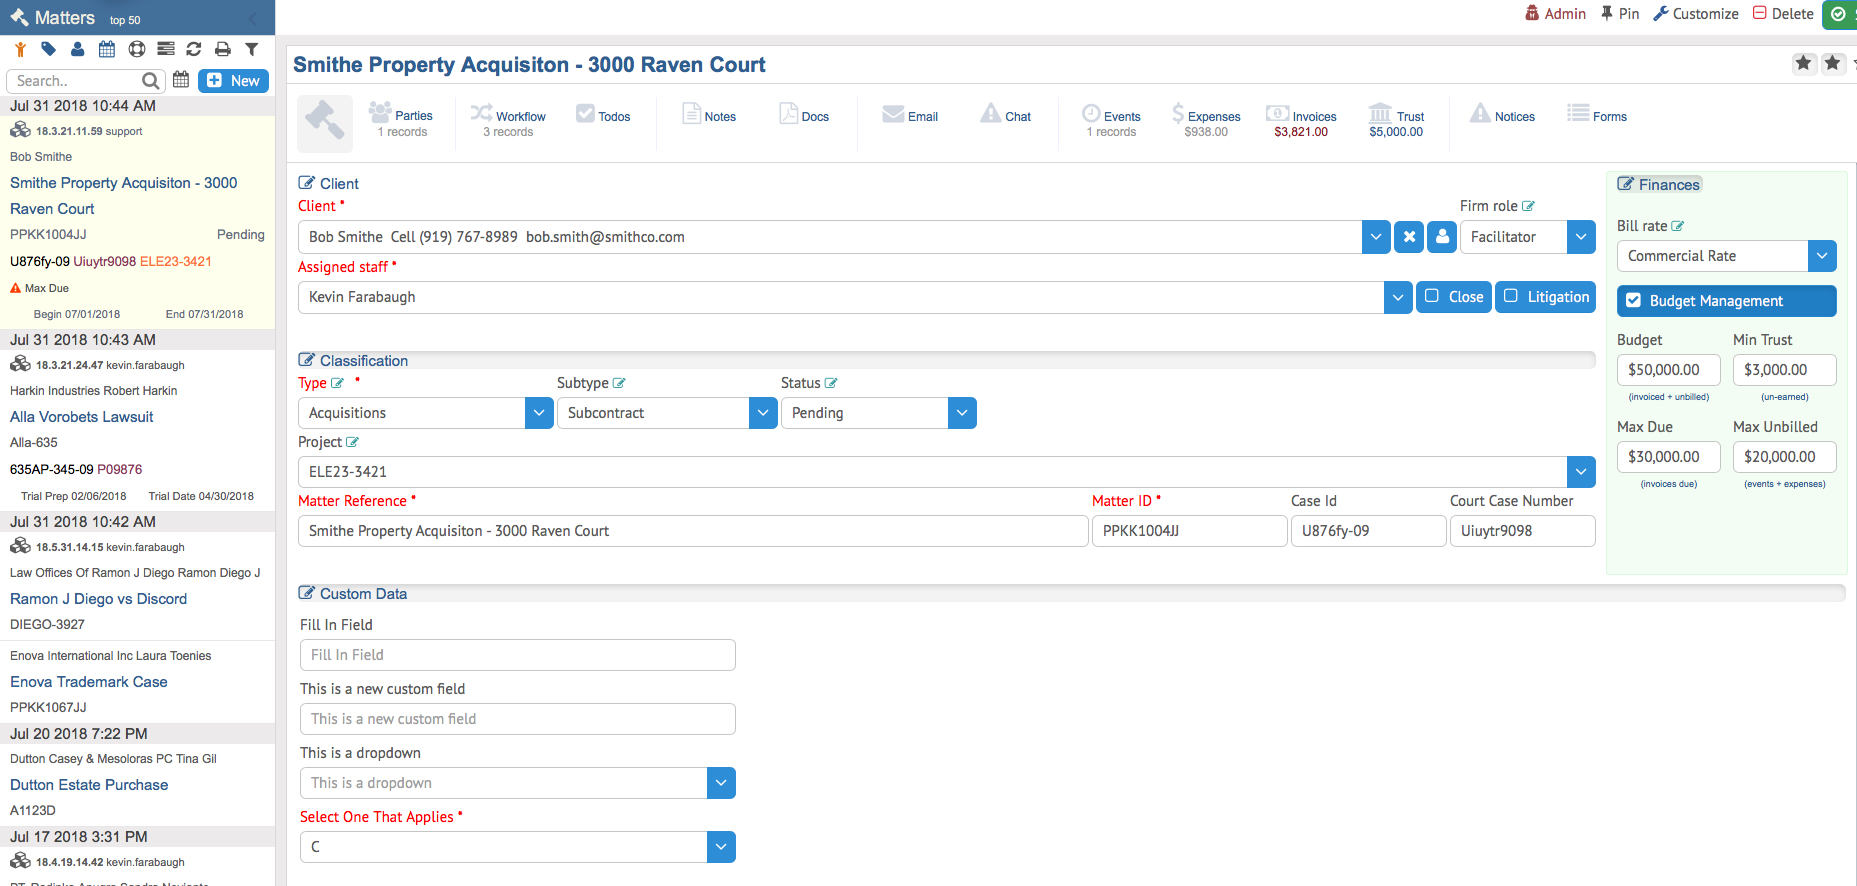
Dashboards: When a Dashboard is selected, the available records will be displayed on the left hand side, with the content of those records to the right. We’ll use the Matter Dashboard as an example here. Options for the selected record will be available at the top right, which include the ability to Customize this form, Delete the record, and Save any current changes.
There are several universal options in every dashboard in the HoudiniEsq system. You can usually find them at the top-left of the current list, seen on the left hand side in the screen above.

My Records Only: This option is toggled on by default for all dashboards. When toggled, it will only display records which you are associated with. This is intended to ensure that you are always viewing your specific records in the system. You can toggle it off to view all records instead by clicking on it.

Group By Type: This option will display records grouped by their selected Type. They will display in alphabetical order descending when this option is toggled.

Group By Client: Records linked to a Matter in HoudiniEsq will always have a Client associated with them. This option will display records grouped by their current Client. These groupings will display in alphabetical order descending when this option is toggled.

Group By Date (Recently Modified First): This option will display records grouped by the Date on which they were last modified, sorted by the most recent first. This is closest to the traditional Dashboard view in HoudiniEsq Classic.

Display Deleted/Closed Matters (Admin Only): This option will display any records which you have either deleted or closed. Primary records (Matters and Contacts) are never truly deleted in HoudiniEsq 2.0; they are only flagged as Deleted and can be restored at any time. However, the ability to do so is only available to Staff members who are a part of the Admin group. Closed Matters can only be re-opened by Admin users as well.

Add Record: This icon will add a record to the current dashboard in HoudiniEsq. You will also see this icon at the top of sub-sections of certain dashboards, which will allow you to add a record for the selected section as well (such as Todos or Documents).

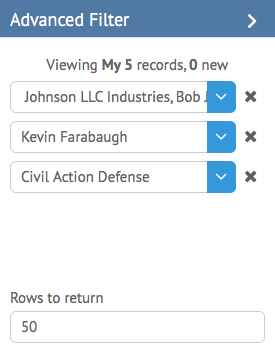
Advanced Filter: This icon will display the Advanced Filter for the current Dashboard. The Advanced Filter provides for more context-specific searching and filtering options for the current Dashboard. This allows for more specific searches. Clicking the icon again will hide the Advanced Filter.
Using the Advanced Filter on the Matter Dashboard, for example, will allow for additional options for filtering by Contact, Staff and Type as shown below. To clear any of the currently selected search options, click the “X” next to the field. Clicking the > and < at the top right of the Advanced Filter will expand and contract the filter options, to allow for more screen space.
From here, we recommend exploring the Activity Dashboard as it is your primary method of keeping up-to-date on new records in HoudiniEsq 2.0.