
HoudiniEsq 2.0 allows you to manage email within the application with ease. You can link incoming email to Matters, send email directly to clients and other related parties, create billable Events from linked email, add document attachments and templates, and more. This article will give a general overview of the updated email functionality in HoudiniEsq 2.0.
To access your email inbox, click the Email icon at the top of the main menu. This will take you to your inbox.
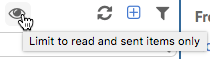
The Inbox will show all recent unread mail, sorted by most recently received first. Once you have read a mail, it will then be marked as Read and will no longer appear in then default Inbox view. Not to worry, you can still view that piece of mail if you click the Eye icon at the top of the list on the left hand side. This will toggle the current view between Read and Unread mail.
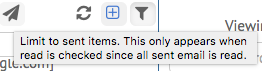
To view mail that you have previously sent, you can click the paper plane icon, which appears when you have this icon toggled.
Clicking the Refresh icon to the right will refresh your current Inbox. The (+) icon will create a new outgoing mail, and the filter icon will open the Advanced Filter options.
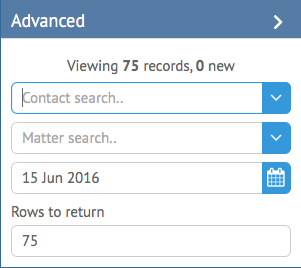
The Advanced Filter will allow you to search emails by a specific linked Contact or Matter, as well as a specific date. Most importantly is the “Rows to return” field; this option will allow you to view more of your mail in the left-hand list, up to 1000. Keep in mind that while this option can help you find mail that is difficult to pinpoint with conventional filters, it also greatly increases the time it takes to load your inbox. Thus, use this option at your own discretion.
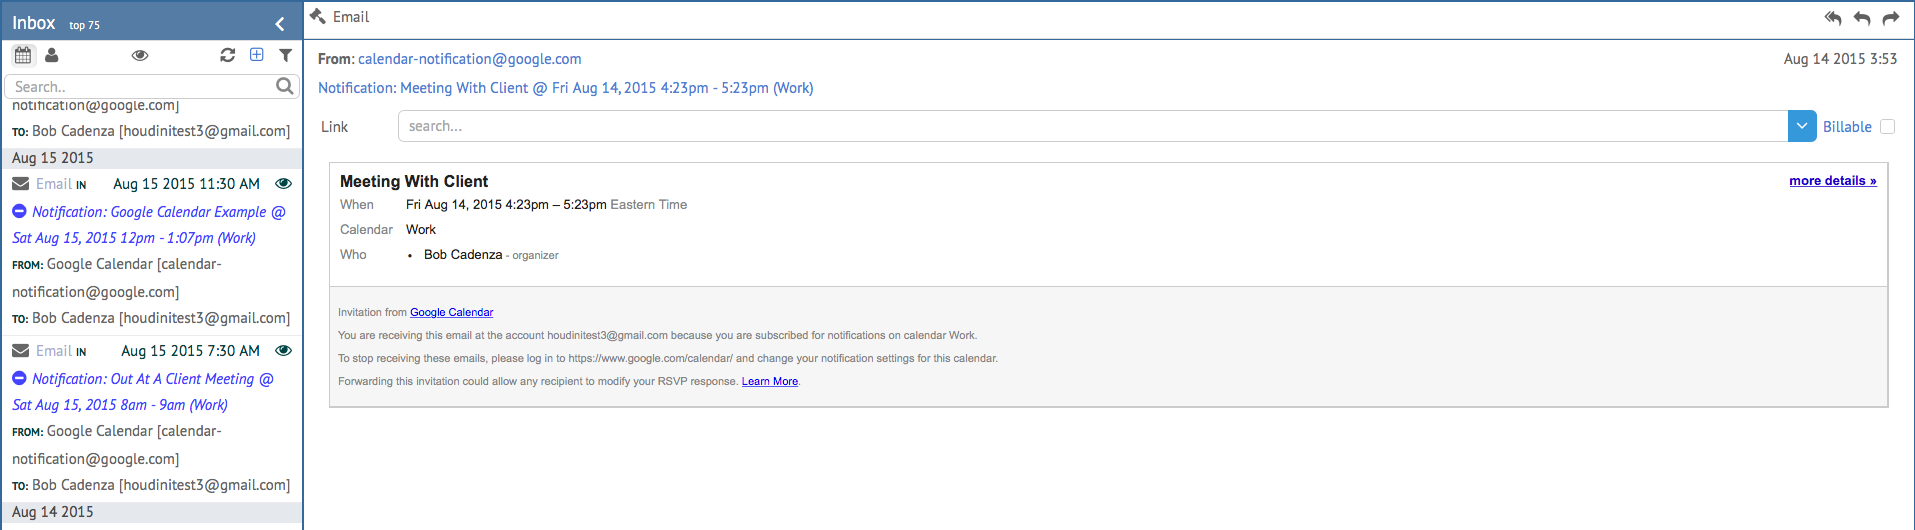
Next, let’s look at the actual email. We’re going to break down each field from top to bottom below:
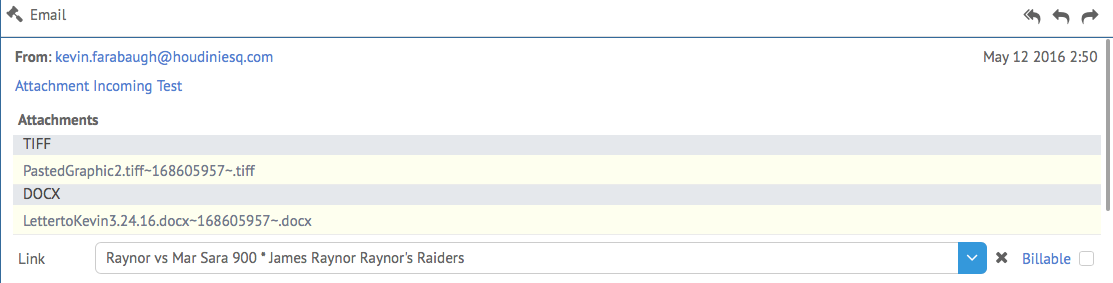
- From: This signifies the sender (or senders) of the email which we have selected. To the top right is the date on which the email was received.
- Subject: The subject line of the email is displayed here.
- Attachments: This will display any attachments to this email which were added. If the email is linked to a Matter, these will also be added to the Docs tab if they are a document (DOC, PDF) as well.
- Link: This field will allow you to link the email to a Matter. Simply type the name of the Matter you wish to link the email to. You can also create a billable Event related to this email by checking the Billable box. Clicking the X next to the field will clear the link.