
For a video guide on invoicing in HoudiniEsq 2.0, click here.
In HoudiniEsq we’ve combined Pre-Bill and Invoices into one section, known as the Billing Dashboard. To access the Billing Dashboard, click the “Billing” link at the top left of the main interface.

To the top left, you will notice the toggle between Pre-Bill and Invoices. Clicking this toggle will switch between the three at any time. First, we’re going to look at the Pre-Bill screen.
![]()
Pre-Bill
The Pre-Bill screen is where you can convert your billable Events and Expenses into Invoices which can be sent to the Client. Rather than having a printed Pre-Bill, like most other practice management programs, HoudiniEsq allows you to review and revise your billable items in a completely paperless fashion. Once you have selected a Matter from the left, the current Pre-Bill items will appear to the right.
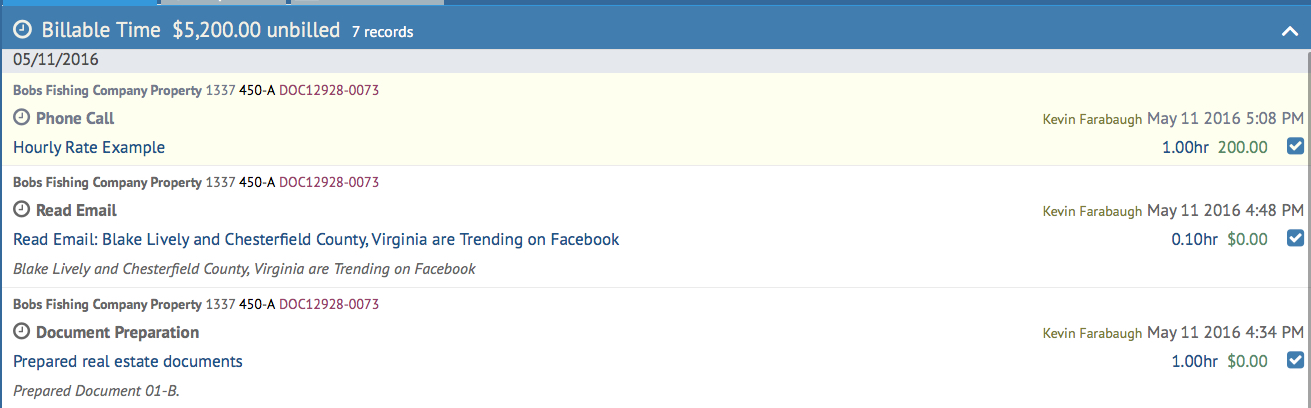
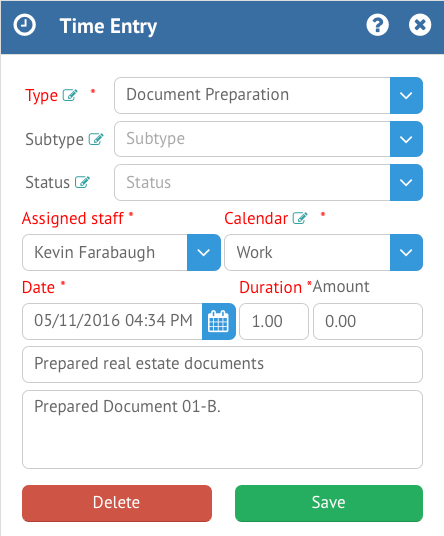
You can edit any of the current entries by simply double clicking on the displayed entries. This will bring up an editable window which will allow you to modify the entry.
The Transaction button at the top left will allow you to quickly add an Event, Expense and/or Trust Earned item. Note that for Trust Earned, you will need to have added a Trust deposit entry (either Trust or Retainer) from the Matter record’s Trust tab.
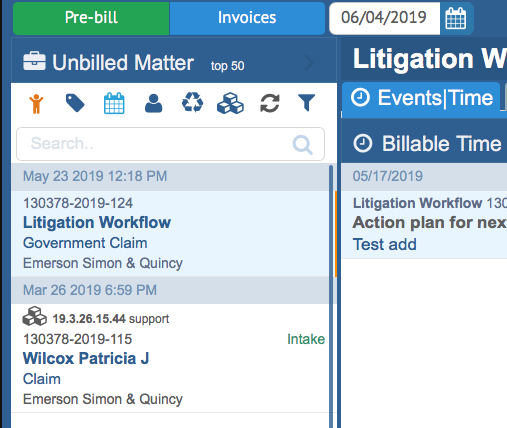
On the left is your list of Matters which have billable entries for the currently selected cutoff period. At the top, the selectable Date field will allow you to adjust the start date of the cutoff period. Additionally, you can use the Batch icon to allow for batch billing of multiple Matters as well.
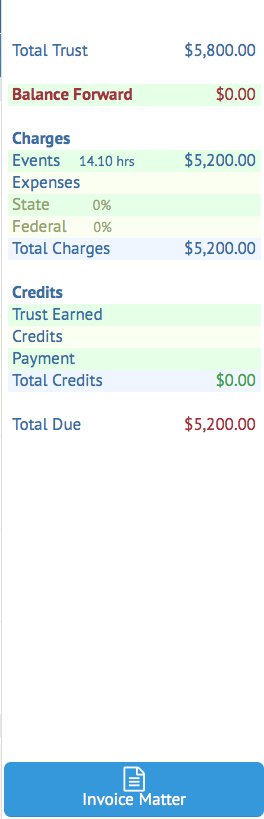
The panel on the right will give you an overview of the totals associated with the current Matter in Pre-Bill. Once you invoice a Matter, it then goes to the Invoices menu as a fully-completed invoice. When ready to review the completed invoices, click the Invoices tab at the top left.
Invoices
The Invoices menu will allow you to print, email and apply payments and credits to current Invoices in the system.
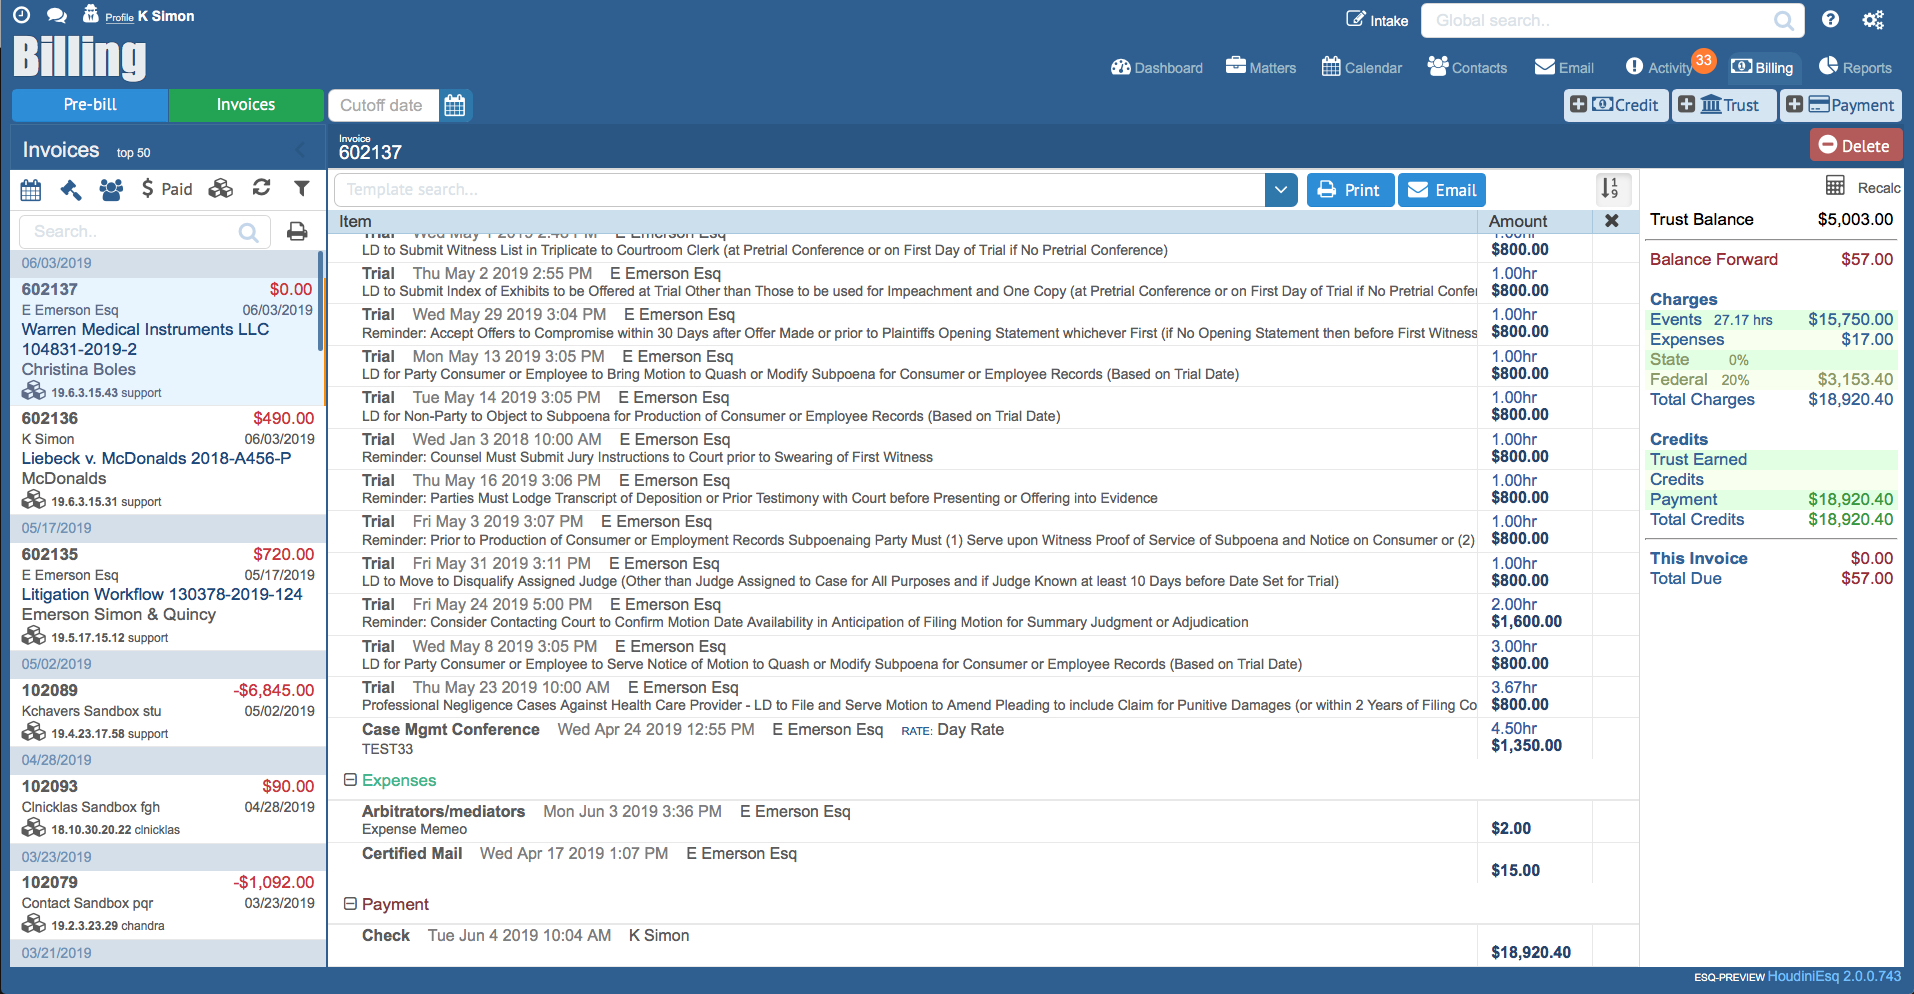
The list on the left will allow you to select a current Invoice. You can also search for a specific Invoice by Matter or Invoice Number as well. The icons at the top left will allow you to print or email a specific Invoice, as well as filter Invoices by Events and Expenses which you created, the Matter they are attached to, or the Client assigned.
Additionally, the $ icon will allow you to show or hide Invoices which have a zero balance. By default, paid invoices are hidden. The Batch icon will allow you to see Invoices generated this login session only. To refresh the invoice list, click the Refresh icon. Additionally, you can open the Advanced Filter for this menu.
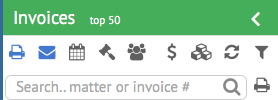
The Advanced Filter is notable because in addition to filtering current Invoices by Date, Client or Matter you can also select a specific Invoice Template from the dropdown menu. You can also select the number of rows to return as well.
Payments
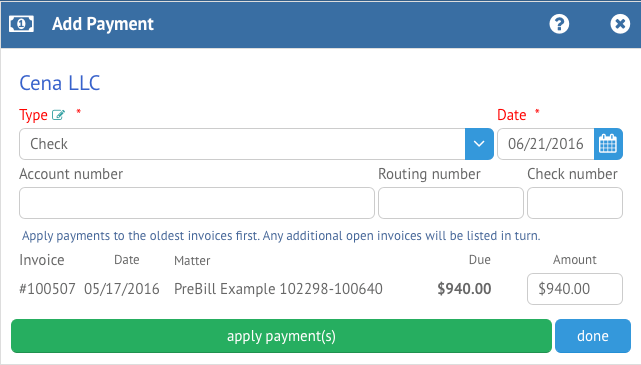
Clicking the Payment icon with an Invoice selected will allow you to apply a Payment to that specific Invoice. The Add Payment form will allow you to select the Payment Type, Date, and also allow for additional information fields. The Amount to be added to the Invoice will be displayed below.
You can apply payments to multiple Invoices as well from this form. After entering the payment information, click Apply Payment(s) to apply, and then click Done when finished. Keep in mind when applying payments to multiple Invoices, you should apply the payments to the oldest invoices first to reflect accurate accounting.
Important Note: In the event that there are multiple invoices with a balance due any payments received need to be applied to the earliest invoices first, and applied evenly, for our billing system to display the totals correctly. It is best to ensure that payments received and credits applied always zero out previous invoices before going forward. Applying payments and credits in a running total fashion is not best practice and is not defensible billing.
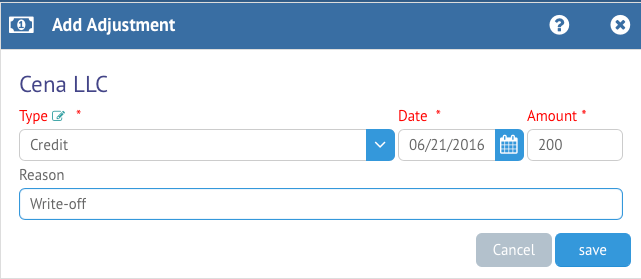
Credits
Clicking the Credit icon will allow you to add an Adjustment to the current Invoice. Adjustments are direct changes to the Total Amount of an Invoice and are not reflected in the line items. You can select a Type, Date and Amount as well as enter a Reason in the fields. Once you are ready to commit the Adjustment, click Save. Click Cancel to return to the Invoicing menu.
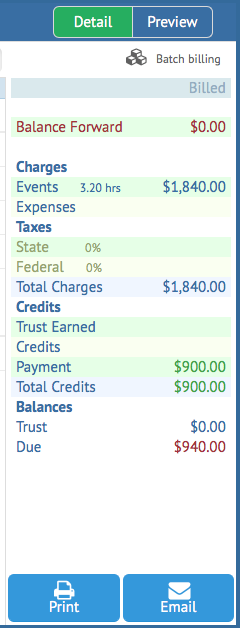
The sidebar on the right will allow you to switch between the Detail view (default) or the Invoice Preview. The Detail view will give you a summary of the currently selected Invoice. Click on Preview at the top to get a preview of the current Invoice. You can also switch between recent batch invoices and older invoices by clicking the Batch Billing icon at the top. Additionally you can Print or Email the selected Invoice with the buttons at the bottom of this sidebar.
Removing Payments and Items
You can remove a payment or item by clicking the “Y” option in the “X” column next to the entry. Keep in mind that removing the item will remove it from the invoice entirely and it will have to be re-added. If the item is an Event or Expense, the Invoice will have to be deleted and re-created.
