In this article, we will be expanding on the simple list view report we created in our previous article. Please read and follow along using the instructions in that entry before proceeding.
You may have noticed that the report we created likely brings back a large amount of records, and takes quite a while to load. While it can be helpful in some cases to have all that data available, sometimes you want a more specific set of information. In this entry, we will be adding some sorting and filtering preferences to the report to help us achieve that task.
First, select the report from the Ad-Hoc reports section and click Design at the top right to open it for editing. You must be an Admin user to do this. Next, select our Data Band and click Design under Properties to add Filtering and Sorting options, see below.
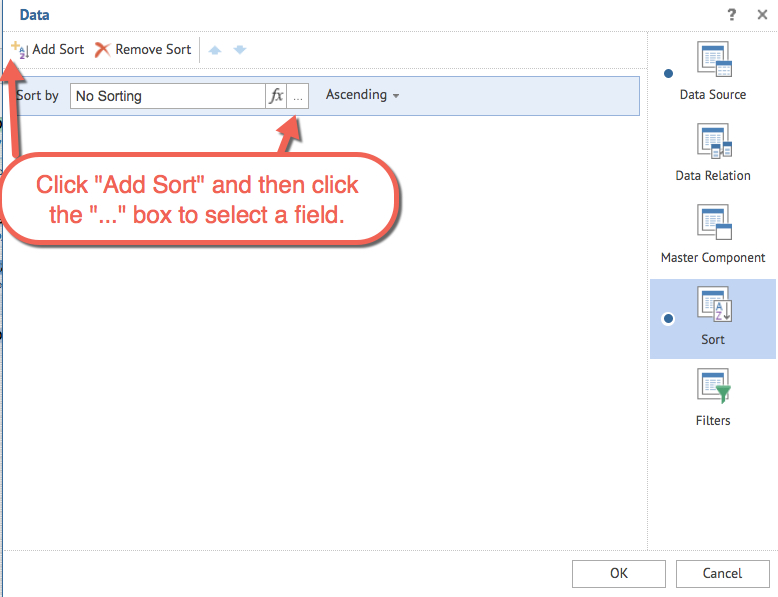
First, select the Sort tab and click the “Add Sort” button. To select a field to sort by, click the “…” button. You can also choose whether this sorting option will be in Ascending or Descending order. Advanced user note: you can also use the “fx” button to add a SQL expression directly as a sorting option.
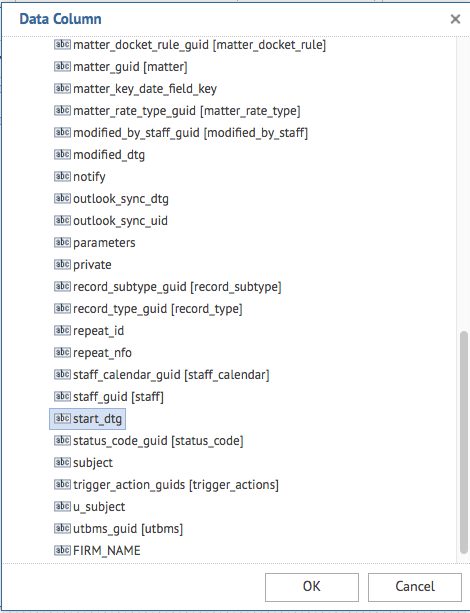
Once you click the “…” button, you will be able to select the field you want to sort by from the Data Source table. In this case, we’re selecting the date (start_dtg) from the Event table to sort by date.
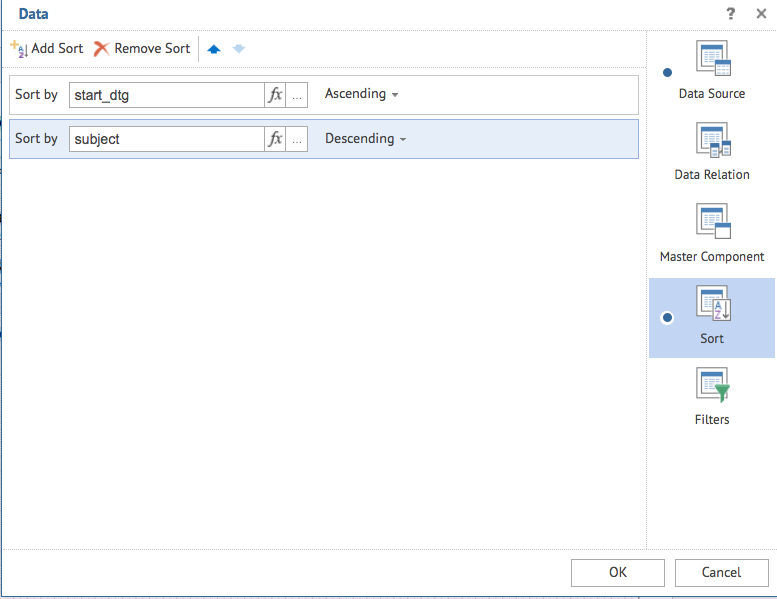
You can add multiple sorting options as well. The precedence of the sorting will be from the top down. In this example we are sorting by date first ascending, then subject descending. You can always remove a sorting option by selecting it and then clicking “Remove Sort” and you can change the precedence with the up and down arrow buttons.
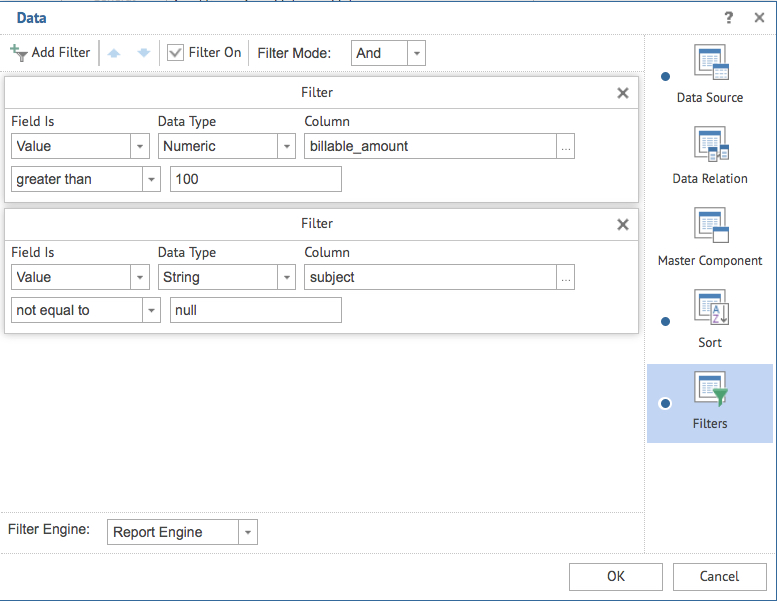
Next, we will add a few filters to refine our results. Click the “Add Filter” button, and toggle the Filter checkbox to the On position. We can filter by Value, which will allow you to select you Data Type and Column as you did with the Sorting order, and then select a condition in the bottom two boxes.
You can also stack filters to further refine your results; as with the Sorting order, the precedence of filter results is decided by their order in this list, top down. In this example, we are looking for Events with a Billable Amount greater than $100 first, then only including Events which have a Subject that is not blank or “null”. You can also directly enter a SQL expression by switching the “Value” toggle box to “Expression” but this is only recommended for advanced users.
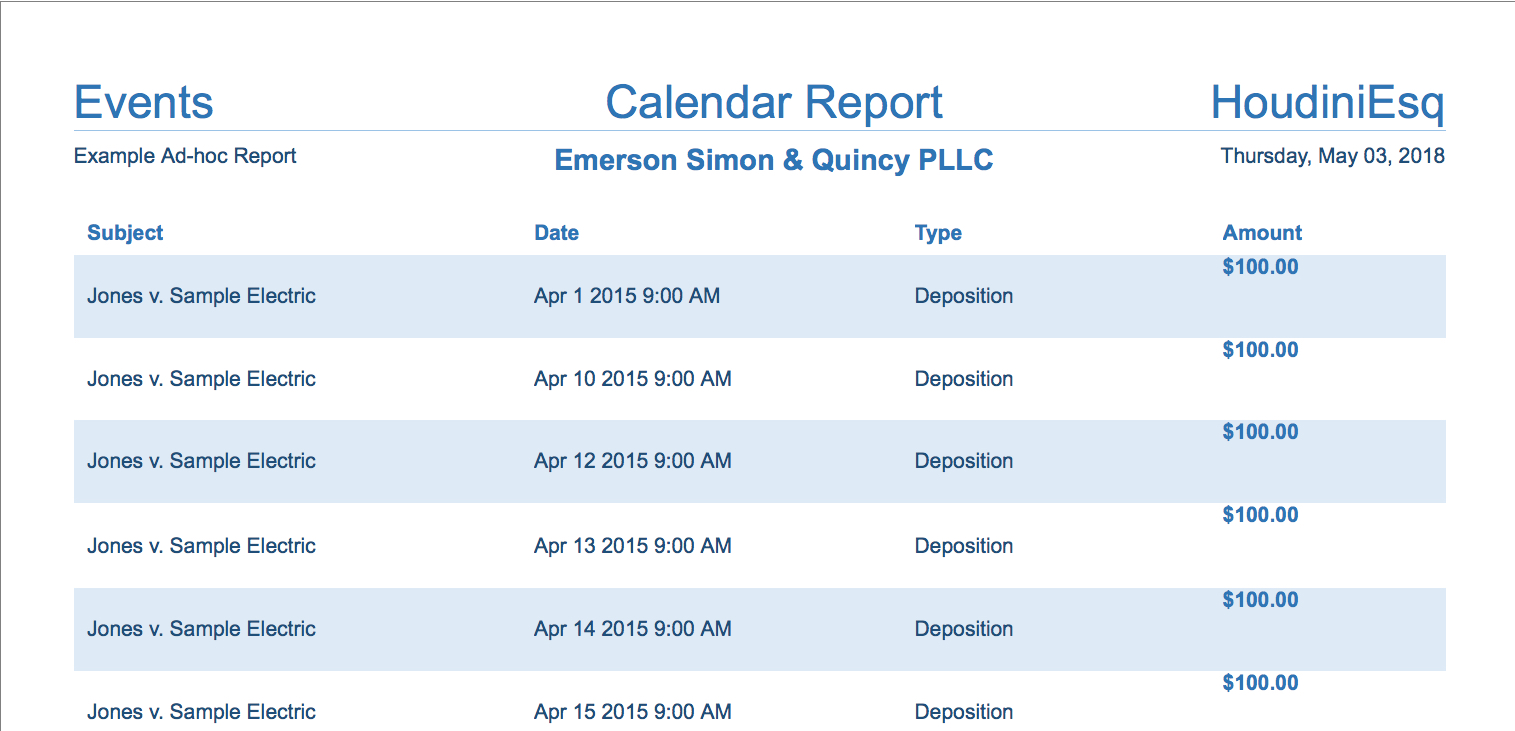
Finally, click OK and click Save in Design mode, then reload the Ad Hoc report list by clicking Ad Hoc at the top. Here is a preview of our new report, which has conveniently sorted all items by date and subject together for easy reading. Feel free to experiment with which sorting and filters work best for you!


