In our previous Ad-Hoc Overview article, we explained the basic functions of browsing, printing and viewing Ad-Hoc Reports. In this article, we are going to dive into creating your first list report from the template report that we provide. The goal of this article is to help you understand the various elements that make up a basic Ad-Hoc report. We will be expanding upon this article in further KnowledgeBase entries to add elements such as charts, graphs, filtering and other elements as well.
First, we will click the Add button in HoudiniEsq to create a new report. By default this opens up our template report in Design view, which allows for editing.
Design View
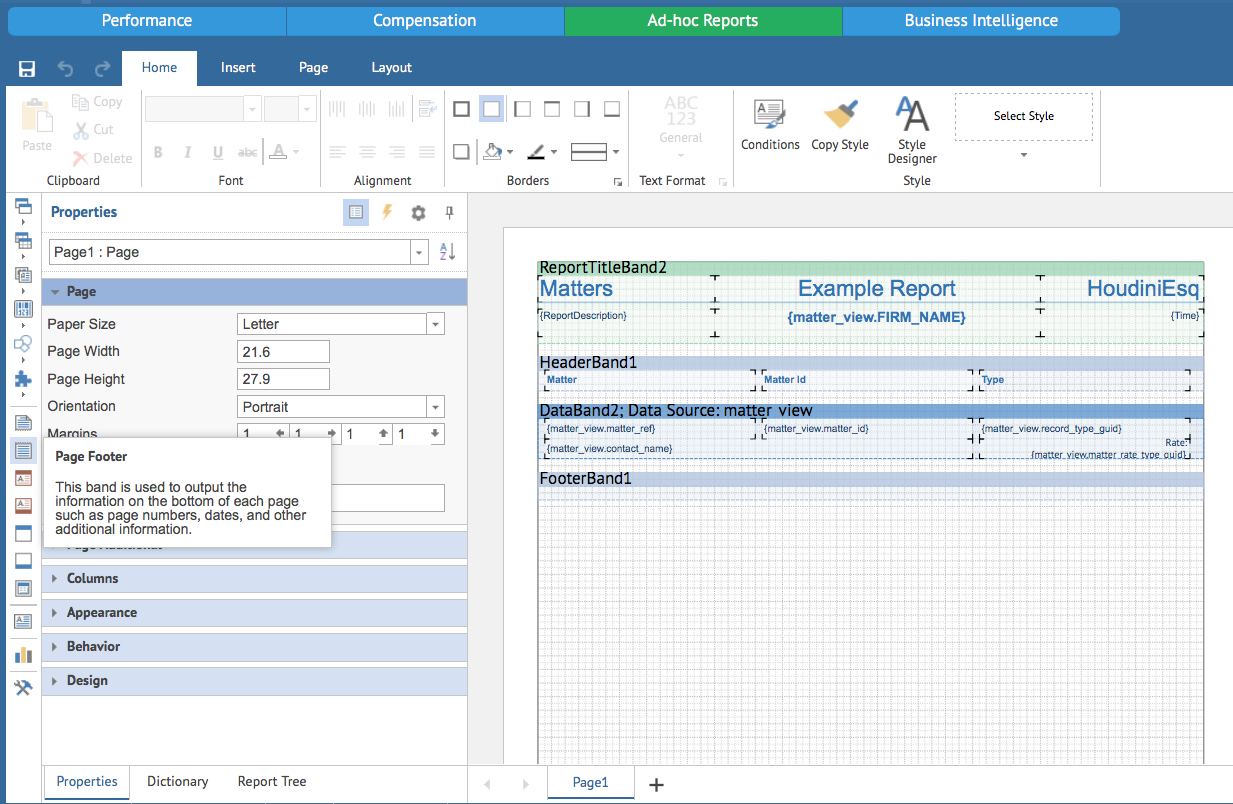
The Ad-Hoc Design View is comprised of multiple options, but in this article we will focus on the essential elements to the report we are currently creating. You can think of the screen as being divided into two sections in Design View.
- Properties – This section allows you to select a specific part of the current report and edit it’s information. The buttons at the left hand side allow you to add new elements to the report (such as text, charts, etc) but selecting them and then selecting an area of the report with your mouse.
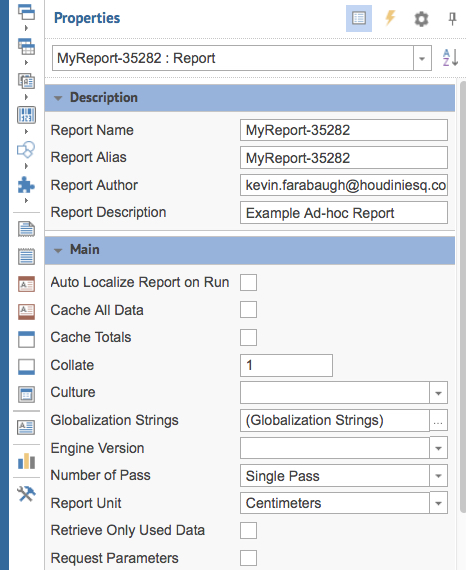 For now, select the title of the report in the drop down above, which will have a generic name currently (such as “MyReport” with a number) and give your report a name. Do not edit any of the other options at this time.

- Data – On the right hand side is our Data view of the report. You can think of this as the actual content of the report. Much as if you were working with a document in a word processing application such as Microsoft Word, the report will be comprised of several sections, or bands, for Title, Header, Data and Footer. You can use your mouse to select and edit elements, and to move or change the size of an element, simply drag and drop as you would any other application. We’ll explain each section briefly below:
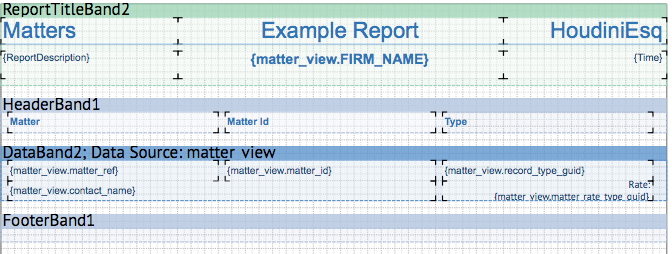 Report Title Band – This is your report title which will be displayed at the top of the report. This can contain anything from images to blocks of text, and even pull references straight from the database (denoted by the {} around them) to display in your report. In this example, we are including the Report Description, Firm Name and current Date as references in the second row of text boxes.Header Band – This section is a header. Unlike the Title Band, it will be displayed at the top of each report page and serves to put the data of the report in context. Use this to title the columns of your Data Band report.Data Band – This is the main content of the report. Each column section in the Data Band will pull a specific piece of information, or field, from HoudiniEsq’s database. The available fields are based on the data source selected in the data band. This data source will be a specific type of HoudiniEsq record, such as Matter, Contact, or Event. The data band will then display all records for that data source based on the fields selected as well as any filters applied as rows on the report. In our example report, we are pulling information about the Matter record, including the Reference, Client, Matter ID, Type, and Billing Rate.Footer Band – Much like the Header Band, this section will be displayed at the bottom of each report page. This can be used for information such as page numbers.
Creating A Simple Report
Now that we have a general understanding of the major elements that comprise an Ad-Hoc report, we can begin to make our own additions to the report. In this example, we are going to be editing the basic report to pull information about Events in the HoudiniEsq Calendar, rather than Matter information.
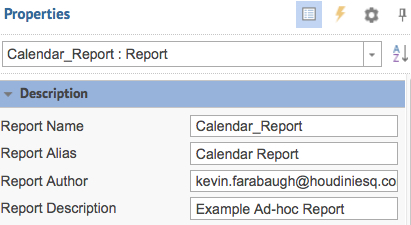
The first step will be to edit the Title of the report in Properties. Select the first dropdown option in Properties that shows the Report Title. We will be naming it “Calendar Report” so edit the Report Name and Description as you see fit. Keep in mind the actual Report Name will substitute the underscore character for spaces, but you can add those spaces back in the Alias.
Next, select the Title Band of the Report. We are going to be changing the title of the report, so select the large text box in the middle by clicking on it, and change the Text in Properties to “Calendar Report” as noted below. Change the Matters text box to Events as well. You can also edit other sections of the Title Band as you see fit, but leave the reference fields as-is for now. We will be explaining those later.

Next, edit the Header Band to reflect that we’re pulling Events in this list. We are also going to create an additional Text column to show total Billing Amount for each Event. Resize the other 3 columns using your mouse to change the size, then add an additional Text column Select the Text option at the left as noted below, then drag the area you want to add the Text box to in the Header Band. We want our columns to represent Subject, Date, Type and Amount.

Next we’re going to repeat the process for the Data Band.

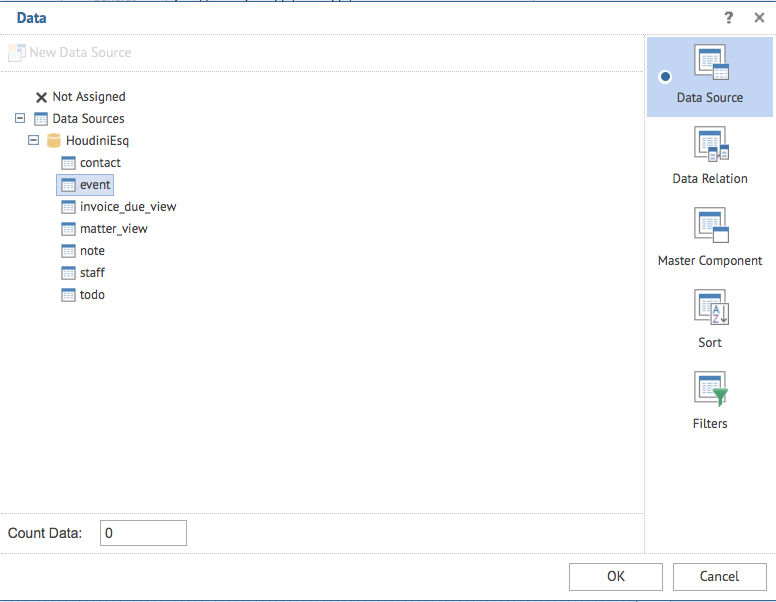
Double click the Data Band to change the Data Source for this band. We want to select Event instead of Matter_View, so do as shown below, and click OK. We can also add Sorting and Filters in this section, but we’ll expand on those concepts later.
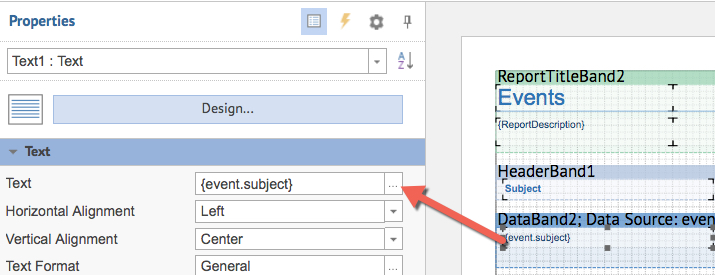
Next, click each Column in the Data Band and change the field expression to pull the appropriate columns. We’ll start with the Subject. Click the first text box from the left, and click the “…” button in Properties to the left as shown below.
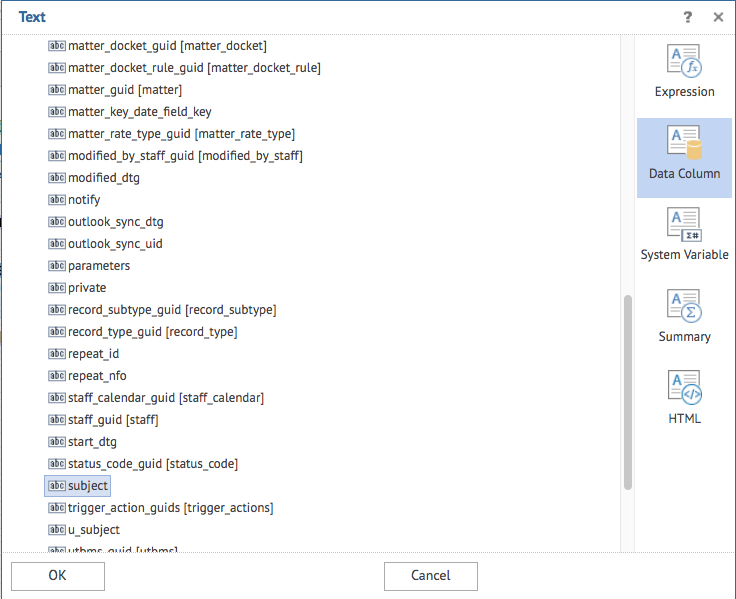
This will allow you to select the field which will be displayed in this column. Select “subject” in the “Event” section and click OK.
Repeat this process for the other text boxes in the Data Band. For Date specifically, we want to select the “start_dtg” field.

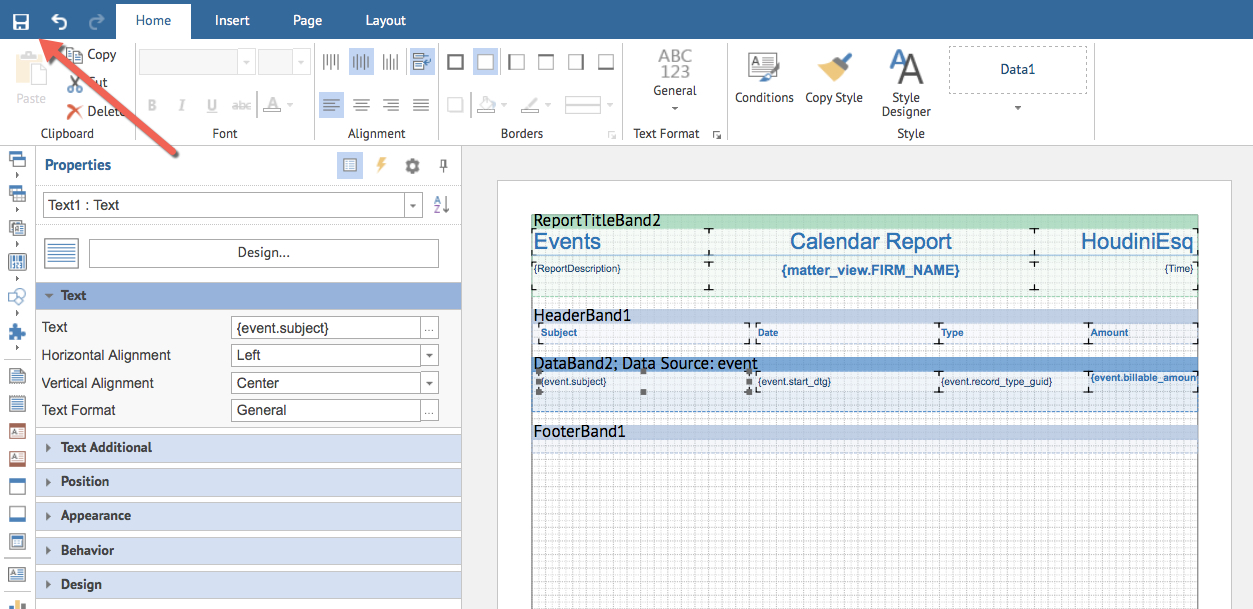
For now, let’s leave the Footer blank. We can add more to it later. Save your report using the Save icon noted below.
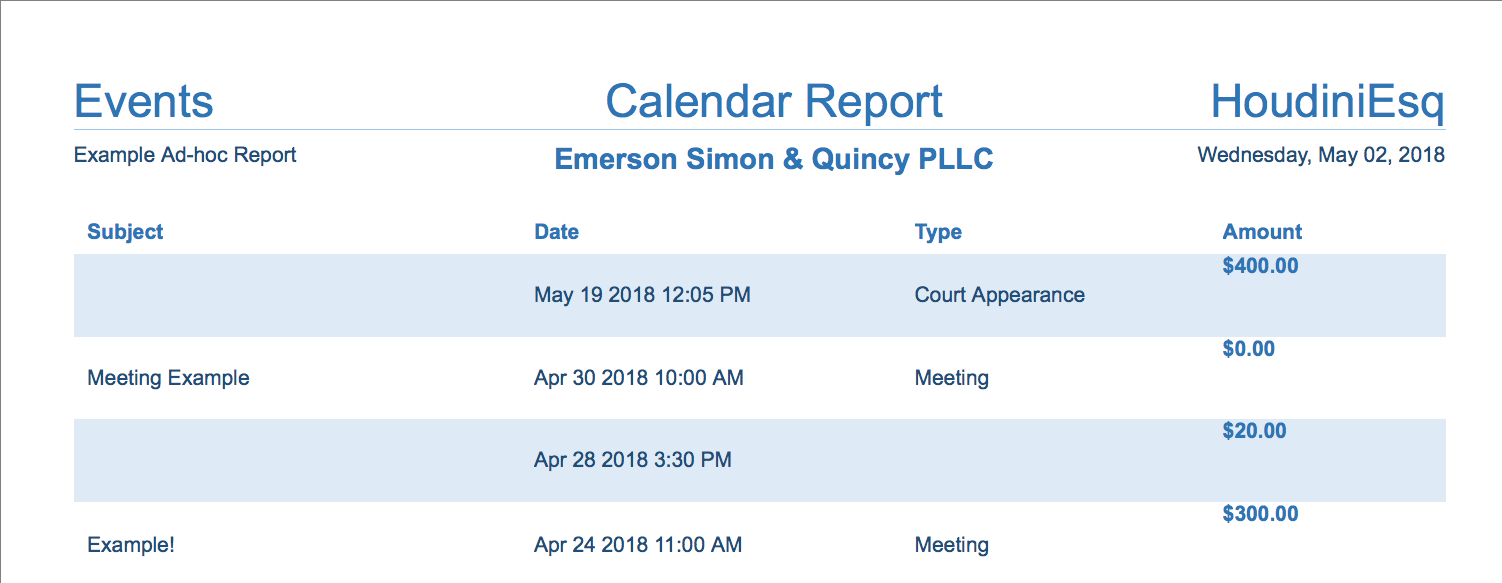
To run your report, click the Ad-Hoc section at the top to reload the Report List. Then click on your report. Congratulations, you’ve created a functional Calendar Report! We’ll be adding additional filters and sorting to this report in our next series of articles as well.