
In this KnowledgeBase article, we will walk through the process of creating a Claims and/or Incident Intake. These are unique types of intakes which will allow you to create a case without outside contact information, and with additional case information unique to a claim or incident report.
Creating a New Intake
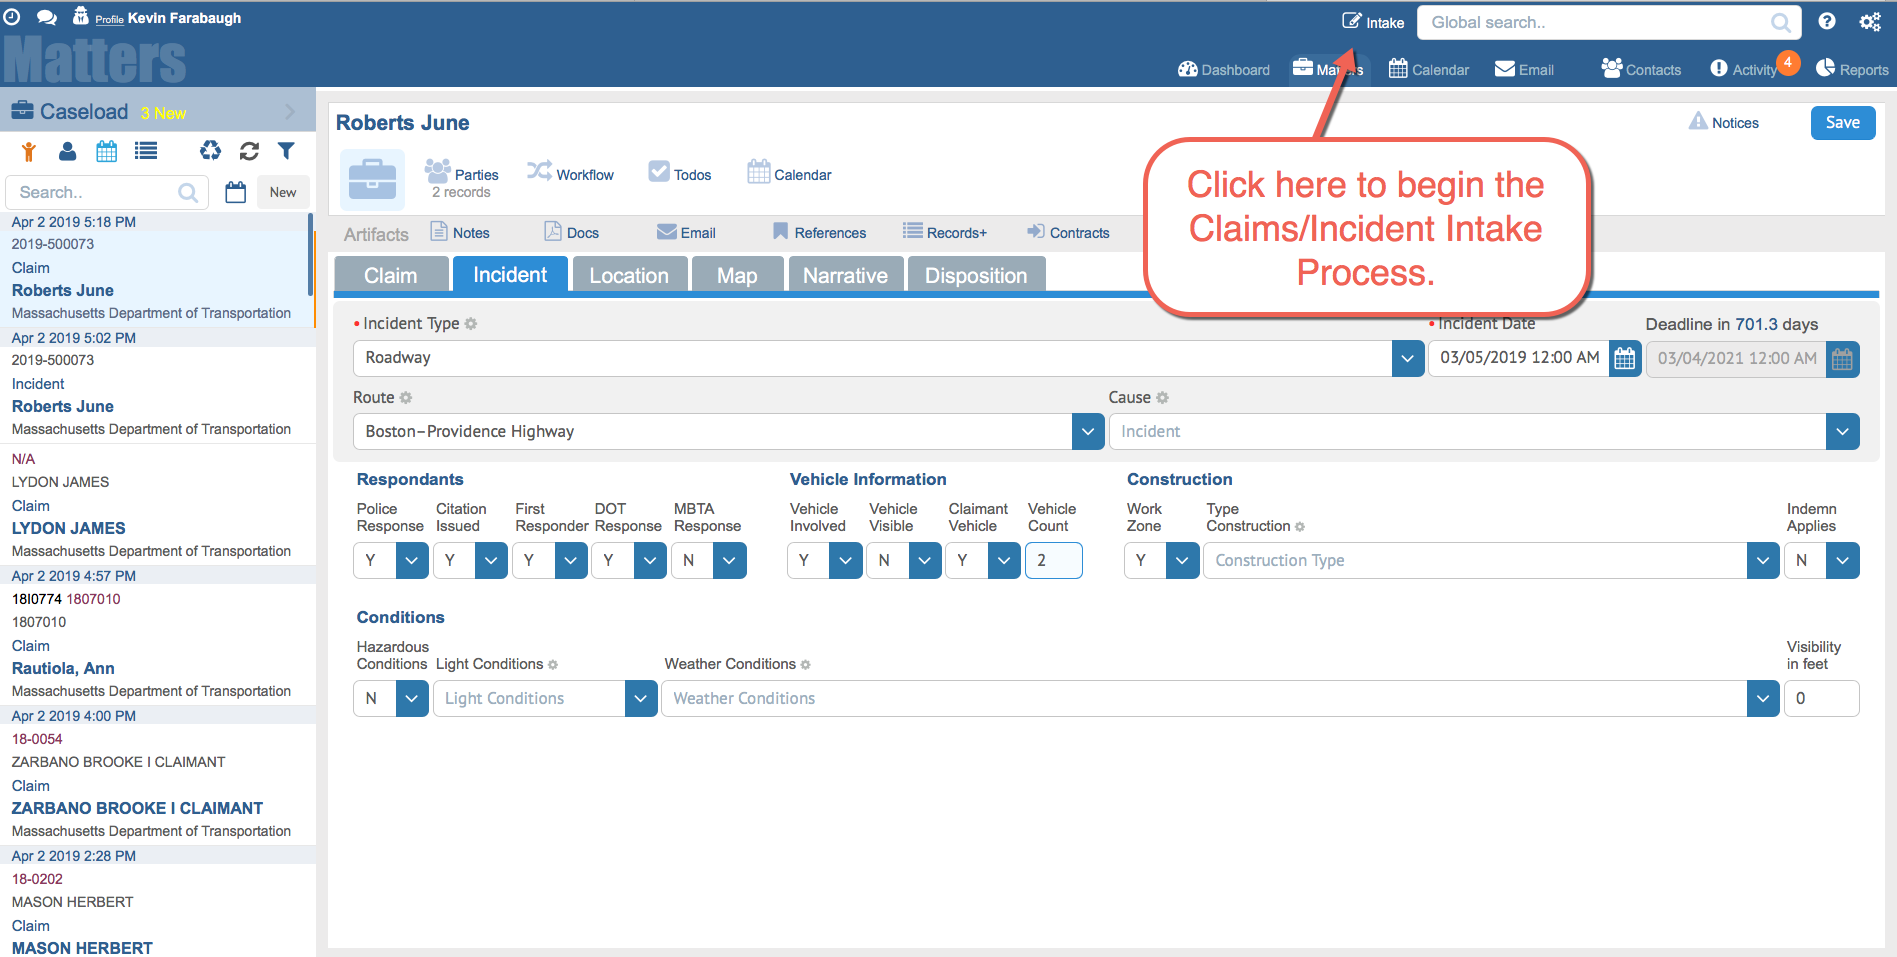
Click the Intake icon in the main menu of HoudiniEsq, as indicated below. The Intake is located at the top right of the interface, next to the Global Search.
You will be able to choose which type of Intake you wish to fill out at this time. The options we are concerned with in this article are File Incident and Open Claim.

The first example we will look at is filing a Claim. Click “Open Claim” to advance to the next step.
Filing A Claim
The Claim intake is made up of several tabs of information. The first we will look at is the Claim tab.
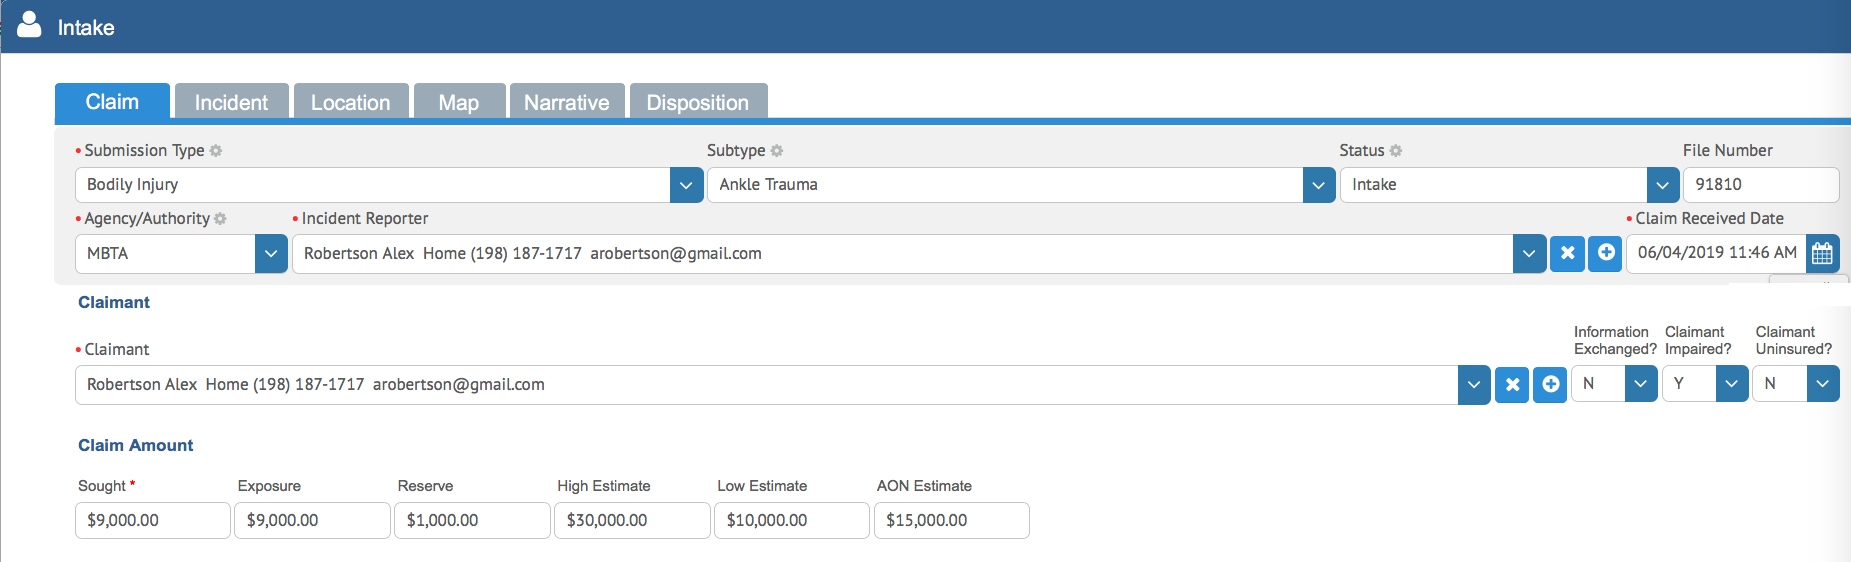
This will allow us to set up our initial Claim information. If you are filling out this form as an Admin, you can add additional values to most dropdown fields by simply entering them and pressing the Enter key. Otherwise, simply select your values as they pertain to your Claim, and click the Next key.
You must complete several key fields to proceed with the claim, however: Agency/Authority, Submission Type, Claim Received Date, Claimant and Incident Reporter (which can be the same Contact). These fields are indicated as required by a red dot next to them, and must be filled out before we can move on as they are vital Claim information.

Clicking on the “Submitter” and “Claims” fields will allow you to add a Contact using the Quick Contact Entry form, or you can opt to simply look up an existing contact by clicking the “Lookup Contact” button. Once finished entering information, click Next.

Next, we will select the Incident tab to fill out specific Incident details. Please fill out all requisite fields to the best of your ability. Depending on which selection is chosen in the Incident Type field, you may have specific options for Route and Cause, or none at all. Ensure you are filling out this information to the best of your ability.
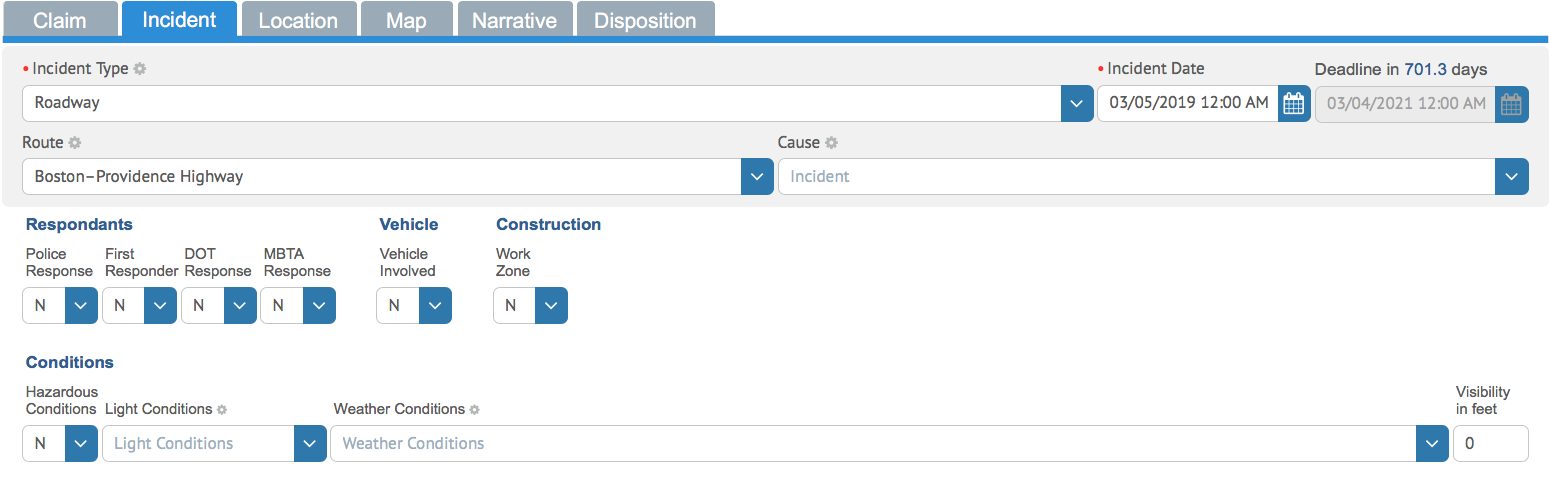
Additionally, answering Yes or No on certain items may allow you to add additional information to support the answer. See the example below, where indicating involvement of vehicles and work zones may display more fields to support this information. Additionally, the “DOT Response” and “MBTA Response” fields are mutually exclusive and selecting Yes for one will set the value of the other to No.

The Location tab will allow you to add location details to the claims/incident report. Again, fill out all details to the best of your ability as this information will be used later in the process. These fields will changed based on the Agency/Authority that was selected in the initial Claim/Incident tab, and may automatically select values based on input.

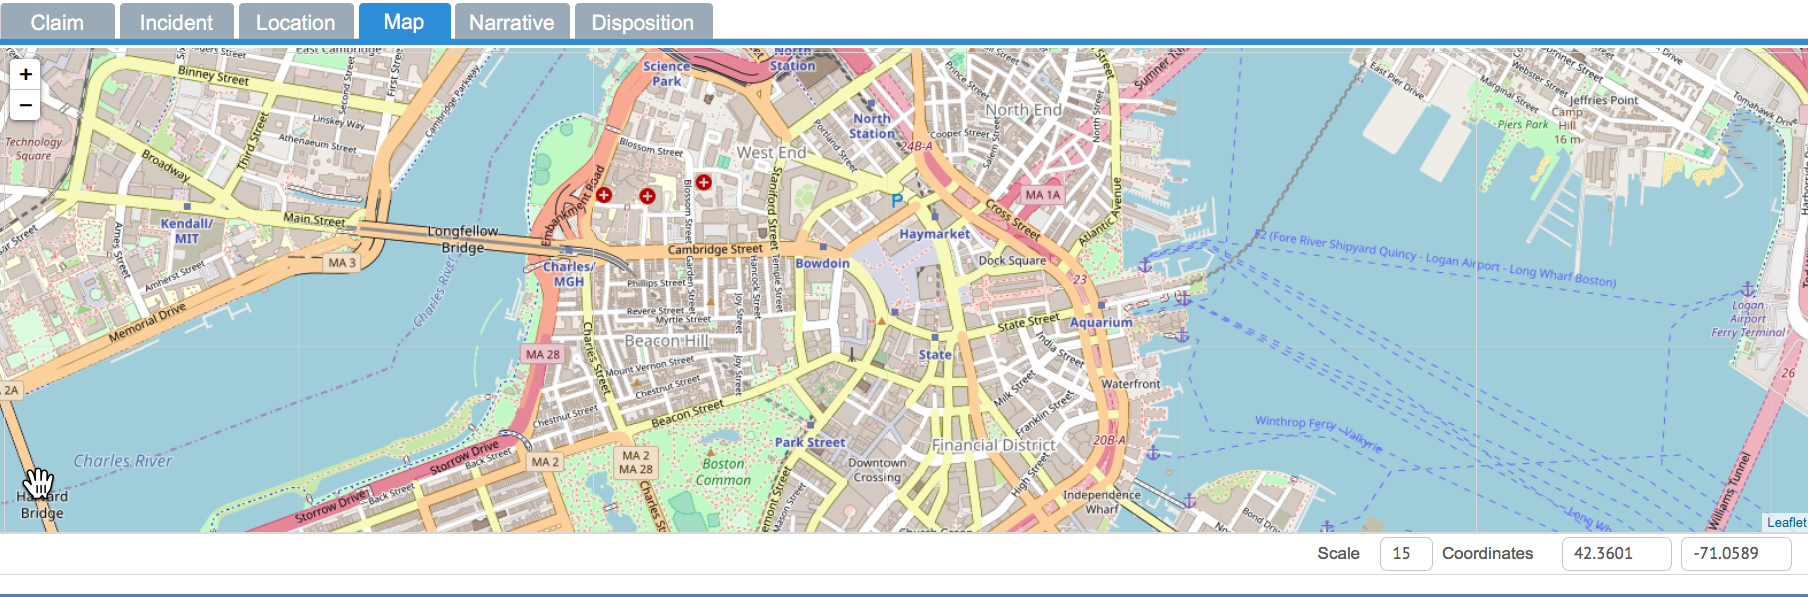
The Map tab will allow you to visualize the information in the report. It includes the ability to edit the scale of the map as well as pinpoint specific coordinate information for the incident report.
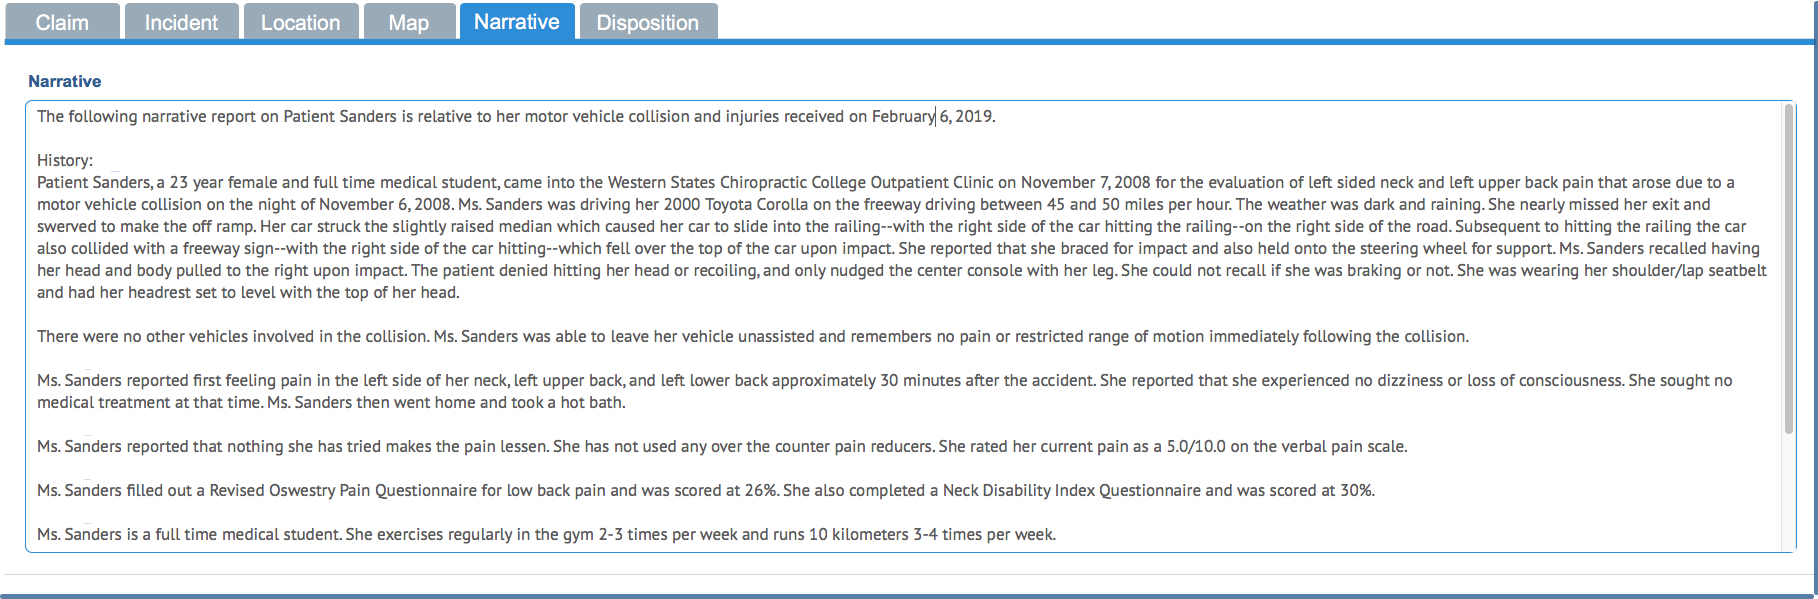
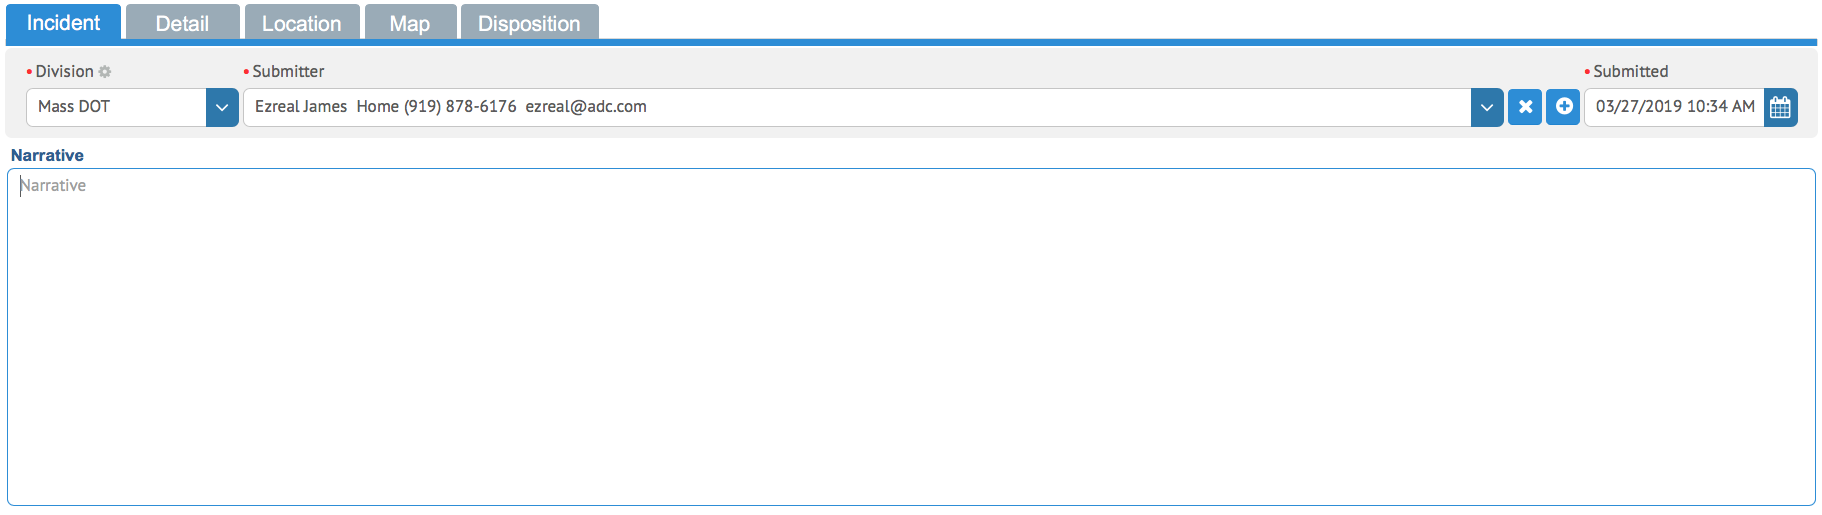
The Narrative tab will allow you to enter in a narrative report for the incident. Please include the full narrative report from an authorized source, as shown below.
The Disposition tab will allow you to fill out additional information on the claim disposition, assign a staff member to the claim, and add additional information should you reject the claim.
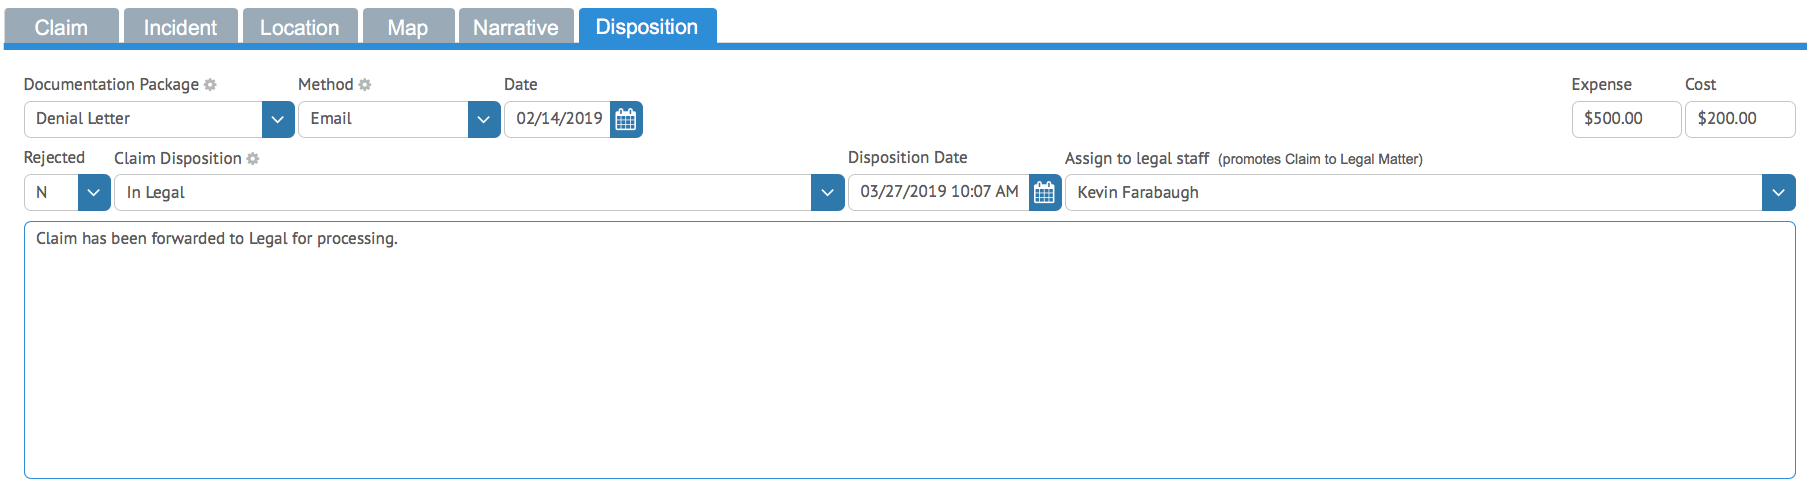
If the Claim Disposition is set to “In Legal” and a Staff member is assigned, the Claim will be added to the HoudiniEsq system as a fully open Matter record. Do NOT do this unless you are ready to move this claim to Legal staff!

Fill out as much information as possible. Once ready to proceed, click Next.
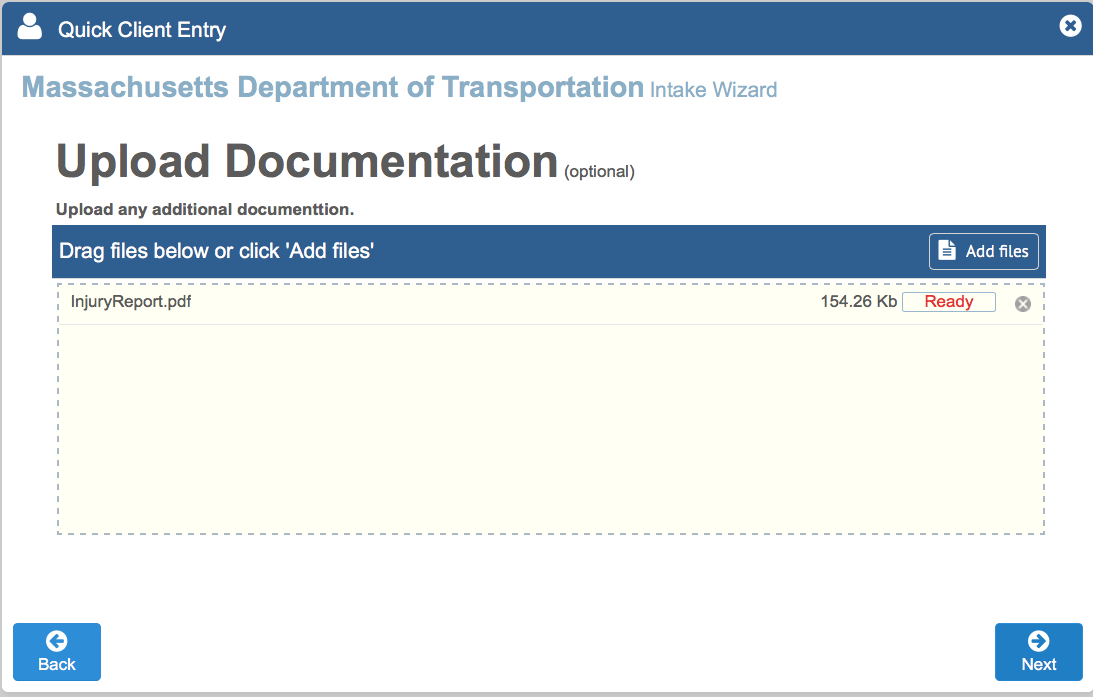
Next, we may upload any additional claim related documents via the Document Upload. Simply drag and drop any related documents and click the Upload button. When finished, click Next.
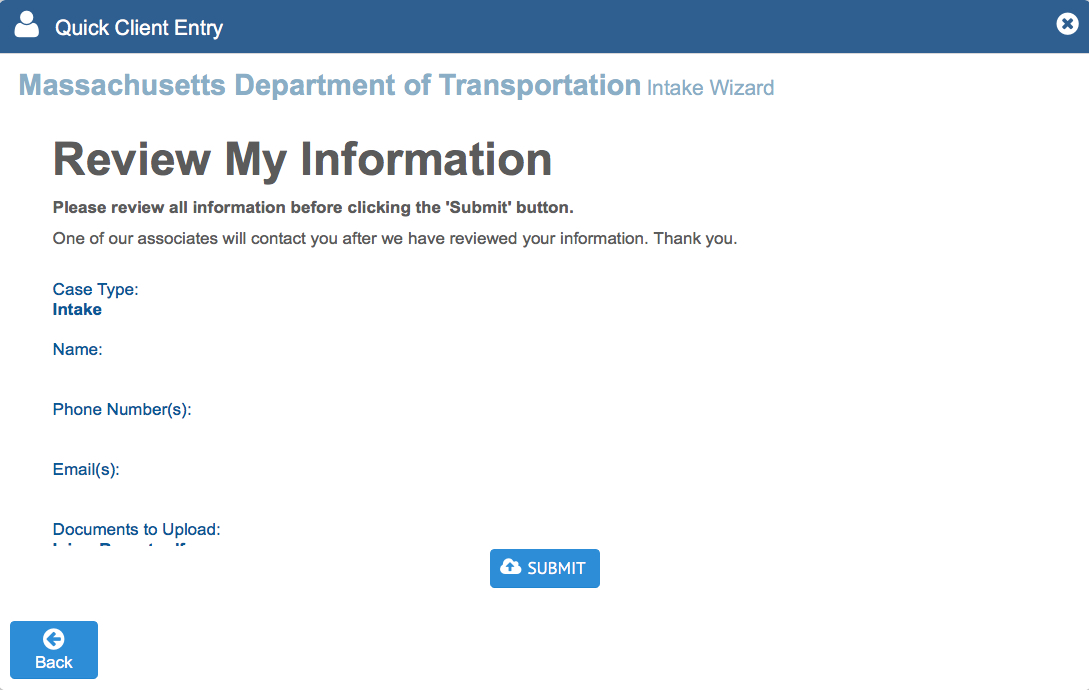
You can review your information before submitting in the final screen. If you need to make any changes, you can click the Back button until you get to the appropriate form. If no more changes are required, click the Submit button.
Filing An Incident Report
Filing an Incident is similar to filing a Claim with the notable except that a Claim form is not required. The Claimant and all related forms are also not required as well, so the process will be much quicker. However all the other tabs are similar, so follow the same process that you would to file a Claim.
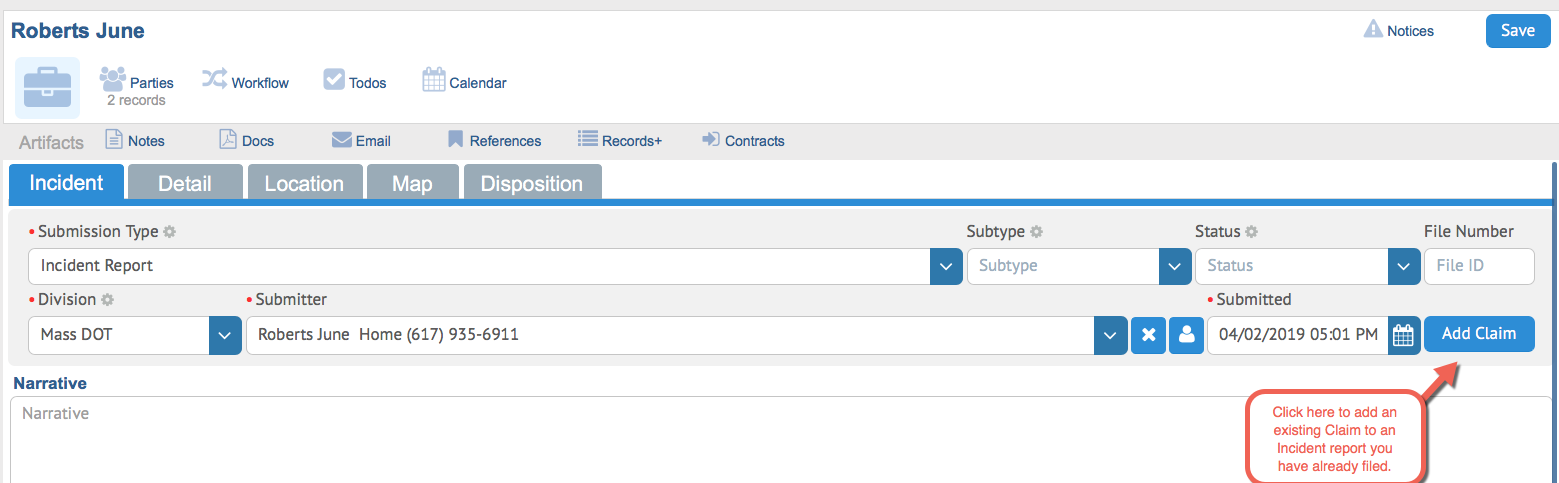
If the person who submitted the incident report decides to file a claim later, you can still attach a claim. On the main Incident form, you will be able to click the “Add Claim” button (as shown below) to file a new Claim to any Incident report.
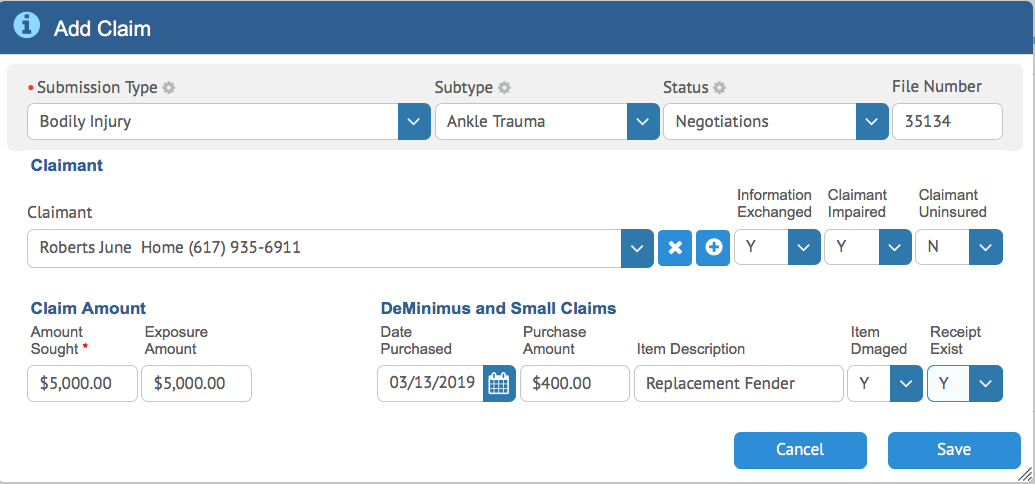
This will open the standard Claims form and allow you to fill out important Claim related information.
Accessing and Promoting Submitted Claims and Incidents
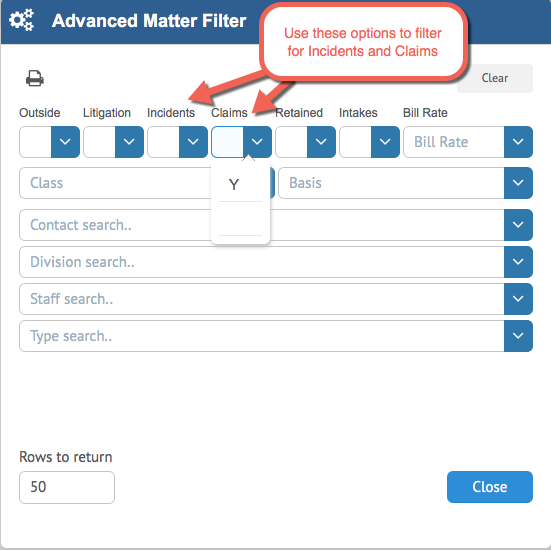
To access submitted claims and incident reports, click the Advanced filter on the Matter Dashboard.

Then, select the appropriate filter for the type of case you wish to view.
A submitted Claim can be assigned to a specific Staff member at any time, and thus become a full-on Matter, at any time by navigating to the Disposition tab as noted above, on any Claim/Incident. Simply select the Disposition tab of the Claim, then set the status to “In Legal”, then select the Staff you wish to assign the Claim to. See below for an example.
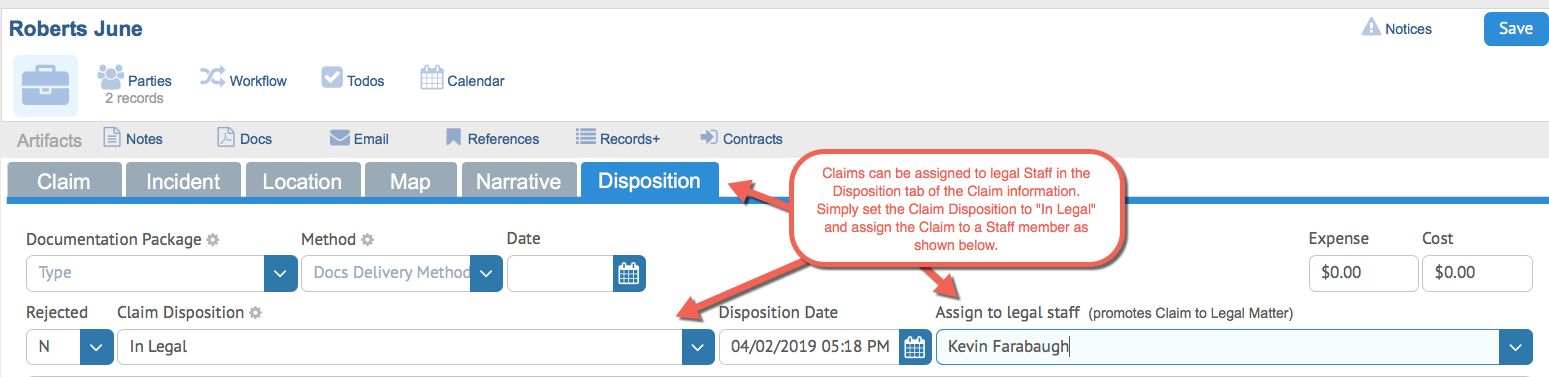
Once you have set the Claims Disposition and assigned the Claim to a Staff member, it will become a Claims Matter. At this stage, the assigned staff can begin the Claims Workflow process to continue further work on the Claim. We will be exploring these processes in this article: Claims Case Workflow & Processing
Enabling Claims
In order to enable this feature, Agency mode must be enabled in HoudiniEsq, and a default Contact must be entered. You can enable these parameters in the Settings dashboard under “Firm Info”. See below for example settings. Please note you must be an Admin user in order to access and enable these settings.
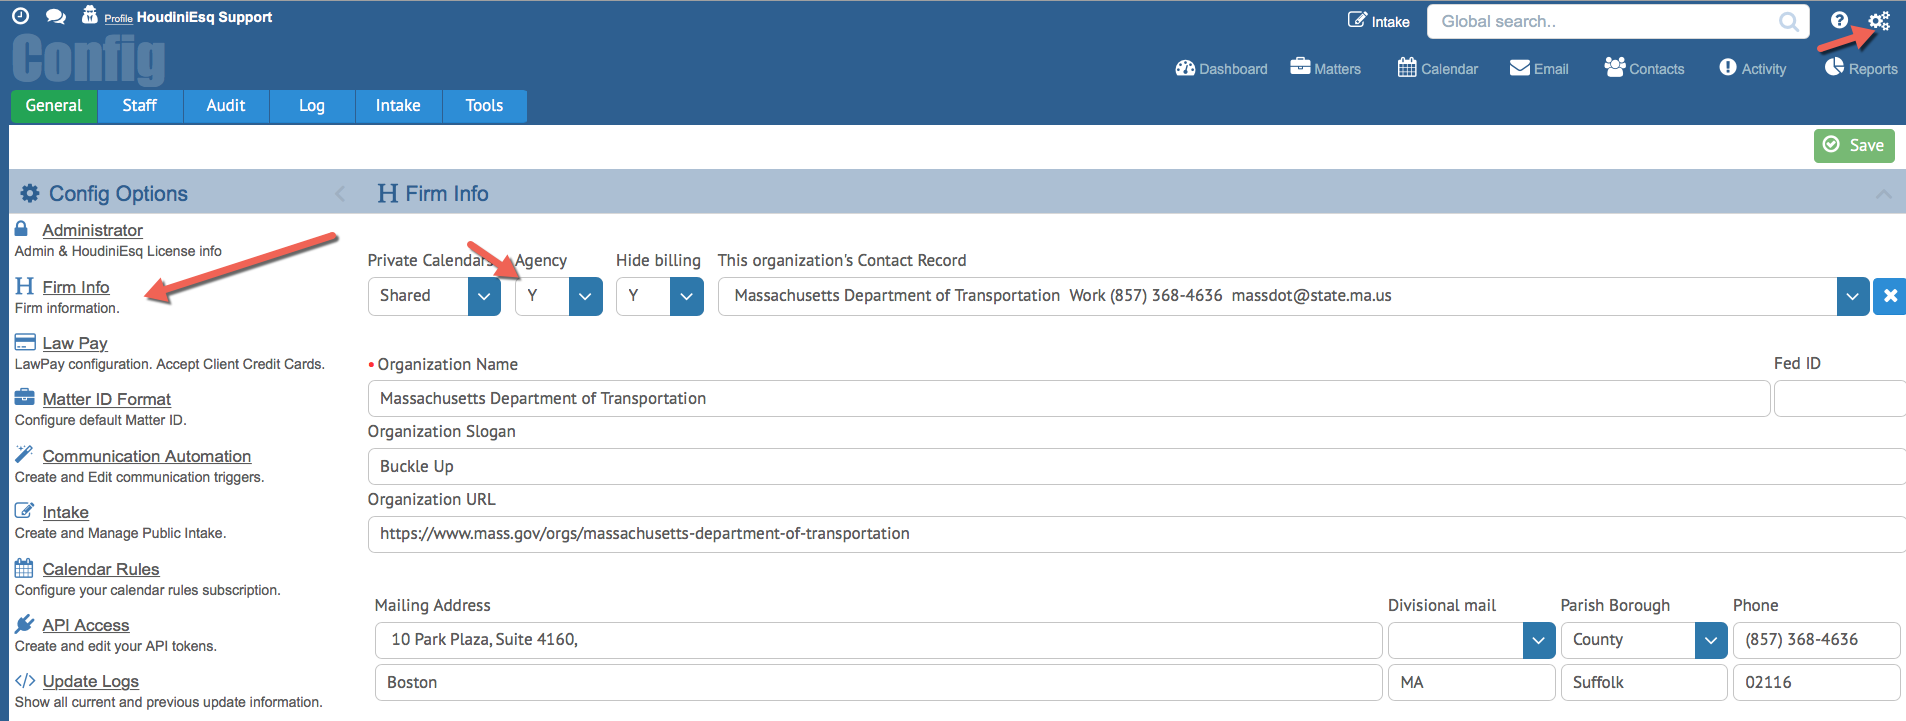
Once these settings are enabled, you will be able to file either a Claims or Incident intake with the Intake button at the top of the screen.