
LawPay provides credit card processing exclusively for attorneys. LawPay is 100% compliant with IOLTA guidelines and the ABA code of professional conduct. It is critical for attorneys to handle credit card transactions correctly. LawPay ensures complete protection of your client trust accounts, in compliance with both State and ABA guidelines for accounting.
Using HoudiniEsq LawPay integration, you can now directly accept credit cards from your clients when applying payments to outstanding invoices, without the need to record the payment in multiple systems. All credit card data is submitted through out secure API, and authorized through credit card companies within minutes.
For a better explanation of how LawPay works visit this site: https://lawpay.com/how-it-works/
This article will walk you through the steps on how to set up and utilize LawPay integration through HoudiniEsq.
Connecting LawPay to HoudiniEsq
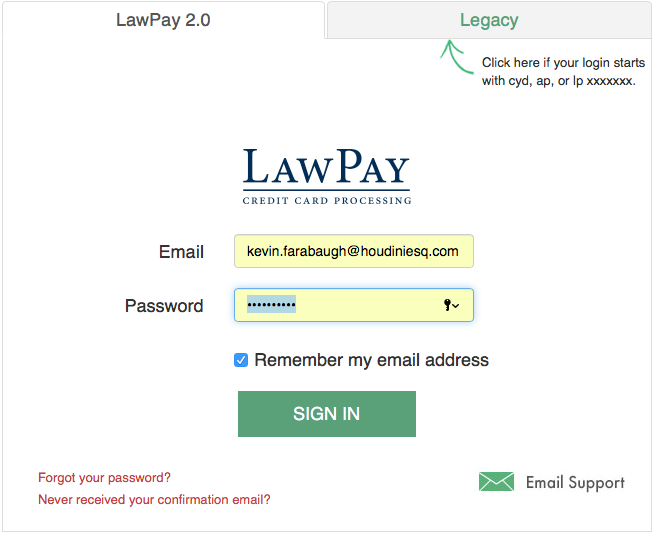
Log into your LawPay account:
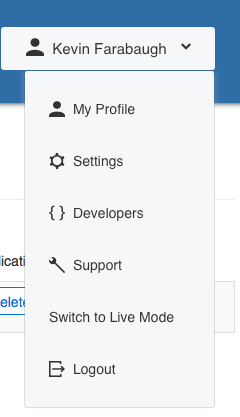
Once you have logged in to LawPay, click on your user name in the top right-hand corner then select “Settings”:
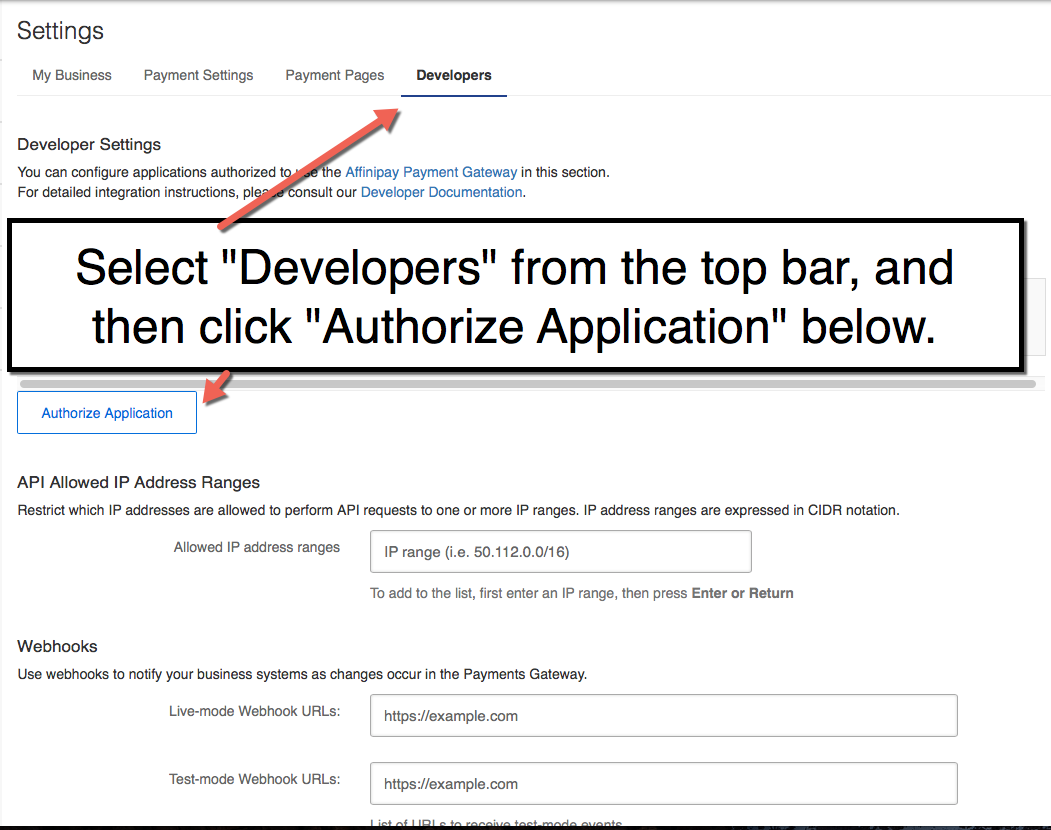
On the Settings screen, click the “Developers” tab. Then, click the “Authorize Application” button.
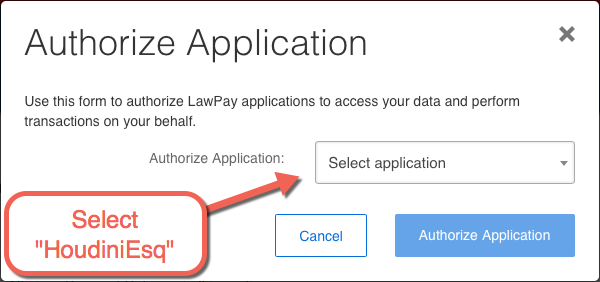
In the “Authorize Application” pop-up, select “HoudiniEsq” from the “Select application” dropdown then click the “Authorize Application” button.
You will now see HoudiniEsq listed under your Authorized Applications.

Please note: Be sure and turn off Email Verification in the Operating Account settings of LawPay as well. HoudiniEsq uses the contact email address for authentication as part of the implementation automatically, so having the setting required by LawPay is unnecessary and can prevent you from posting payments.
Connecting HoudiniEsq To LawPay
Next, we will set up the integration from the HoudiniEsq side. Log in to HoudiniEsq 2.0 and click the gear icon at the top right to access the Settings menu. You must be logged in as an Admin user in order to do this.
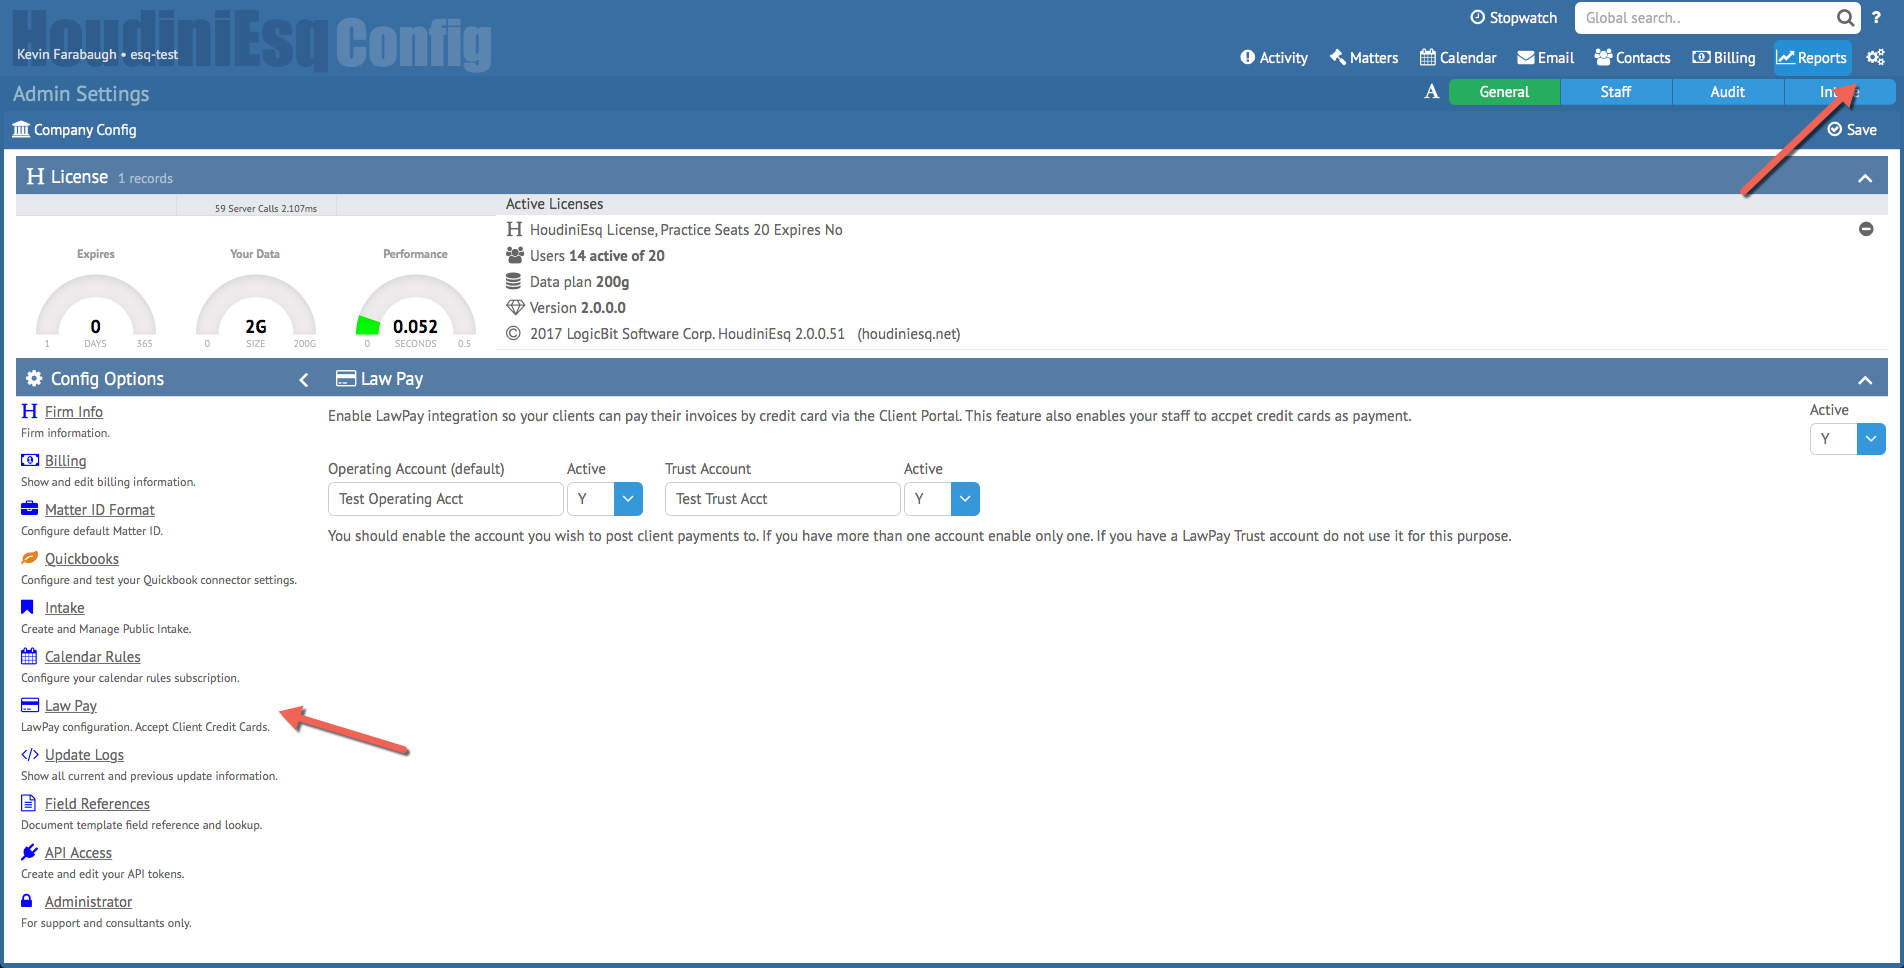
Next click the LawPay section in the General tab of the Settings menu.
Click the Authenticate button to authorize HoudiniEsq for use with LawPay. You may have to log into LawPay to complete this process.
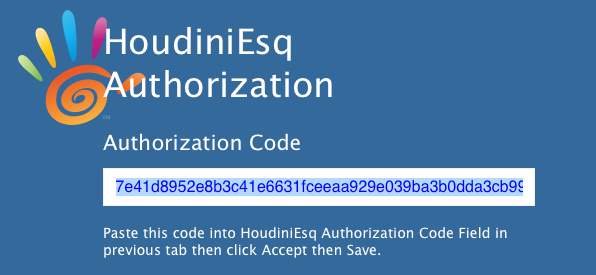
After completing the authorization through LawPay you will be present with an Authorization Code. This code is to be copied and then pasted into the corresponding box which appears in the Settings menu in HoudiniEsq, and is generated automatically.

Copy and paste the authorization code into the box in the HoudiniEsq Settings menu, and click Accept.
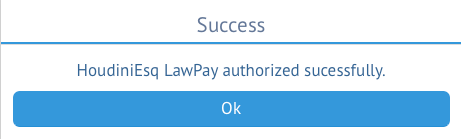
If the processes is successful you will receive a confirmation box. Click OK to continue. Note: You may have to log back into HoudiniEsq to apply LawPay based payments after performing this process. To do so, click the Refresh icon on your browser bar or simply hit F5 on your keyboard.
Next, set up your LawPay account preferences
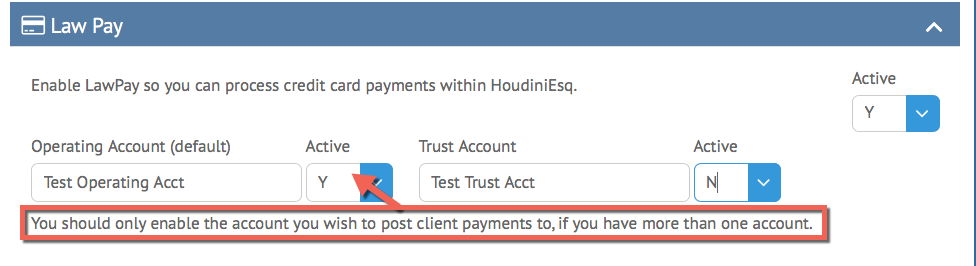
Enter the name of your Operating Account or Trust Account and set the Active toggle to “Y” next to the one you wish to use to process payments. Please note that you should only enable one of these accounts for payments. You can toggle them as needed
Applying Payments In HoudiniEsq
 You can apply LawPay payments to any current active Invoice in HoudiniEsq. Go to a Matter in the Matter Dashboard and select the Invoices tab. Click the “Pay Now” option as noted in the image above next to the Invoice you wish to apply a LawPay payment to.
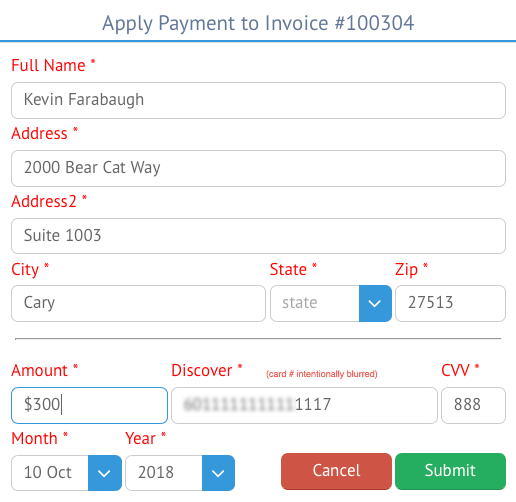
Then, fill out the details as noted above. Be sure the information is correct and matches the card with which you are using to apply the payment, as this information is verified by LawPay. When ready to apply the payment, click Submit.
Verifying the Payment
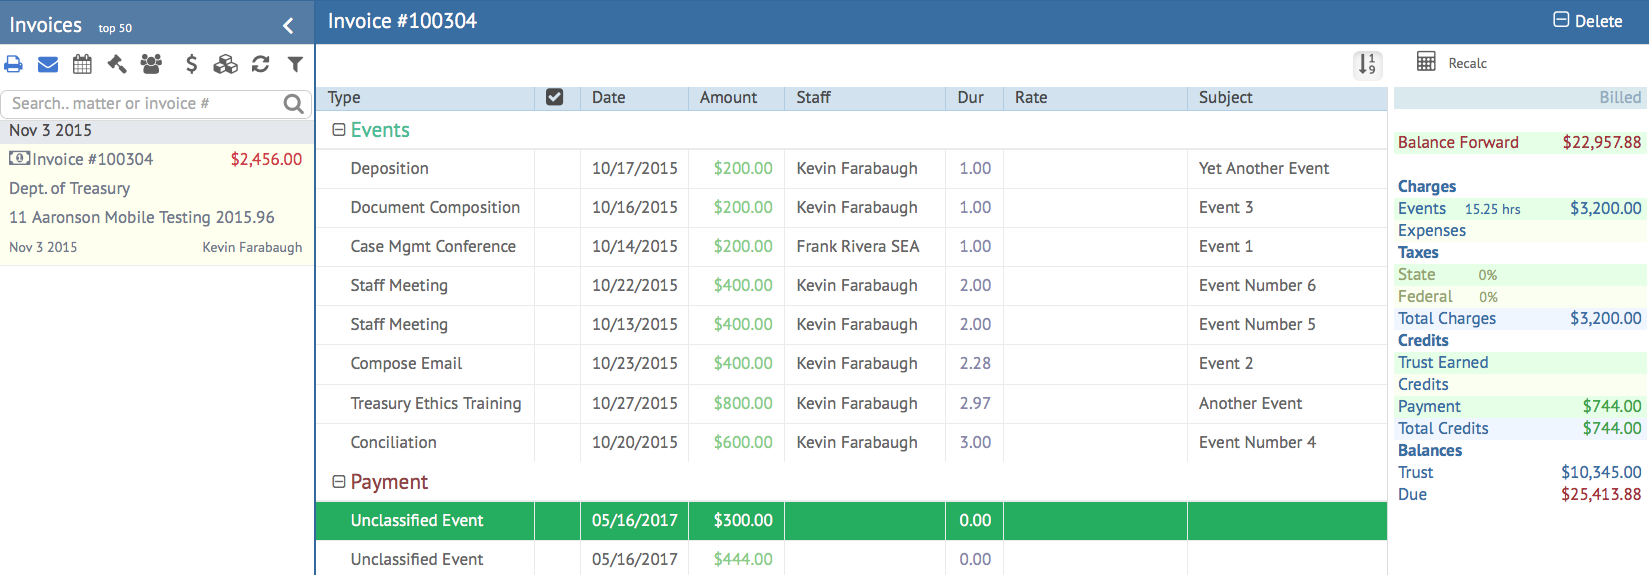
Once submitted, the payment will immediately be posted to the selected Invoice in HoudiniEsq. This will be noted in the Invoicing section of the Billing Dashboard. You can also double-click on the Invoice the payment was applied to in the Matter Dashboard to view the specific item more quickly. The payment will be noted at the bottom of the invoice along with any other previously applied payments.
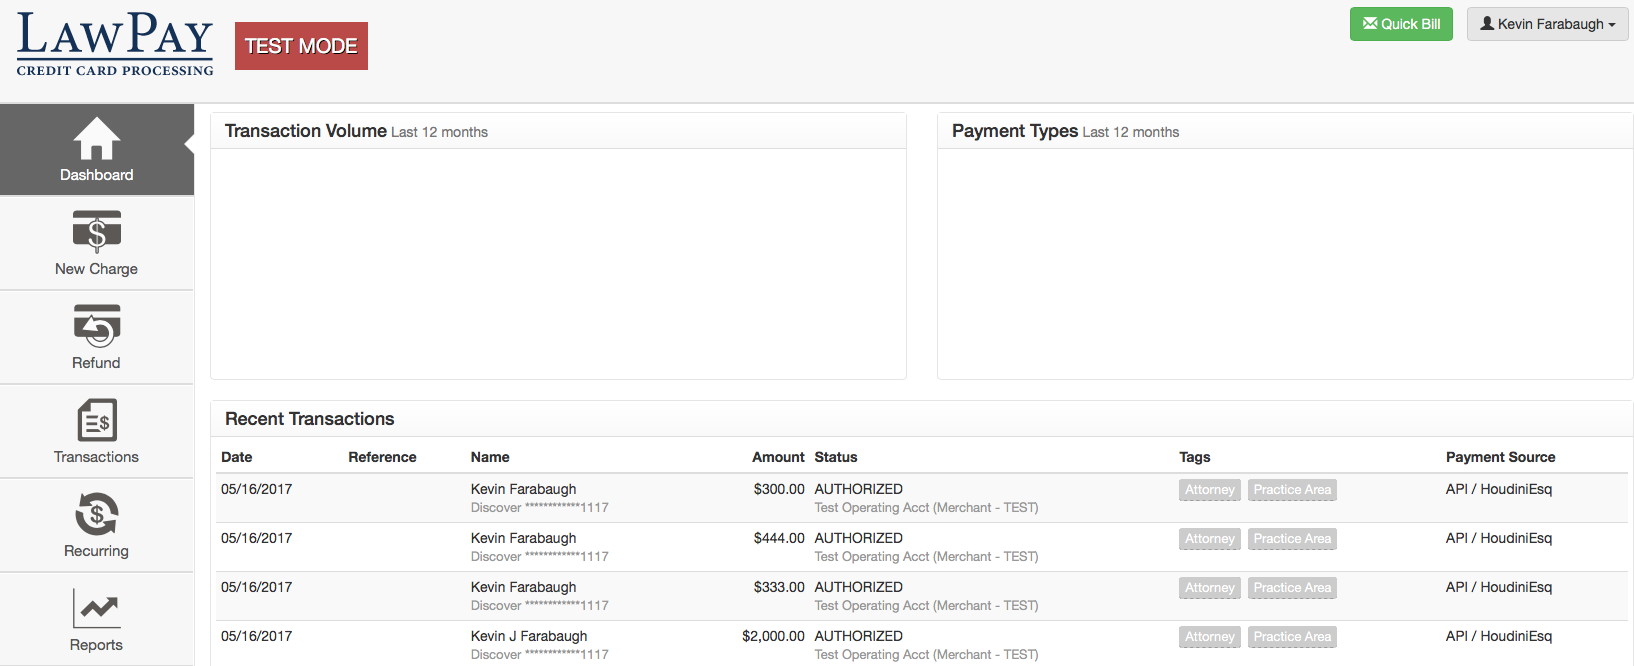
Additionally, the payment will be recorded in LawPay’s Dashboard and Transactions sections once it is verified with the credit card company. This may take up to 5-10 minutes as the card is authorized.
Payment via Remote Client Access
Enabling LawPay integration will also allow your clients to pay their invoices via Remote Client Access. Simply set up RCA on the specific Contact record for any clients which have current invoices, then have your clients log in with their RCA credentials. They will be able to pay invoices using the same process detailed above.
