
Adobe Acrobat Plug-In Overview
Overview
Welcome to an overview of the HoudiniEsq Acrobat Plug-In. You must have Adobe Acrobat, the version that allows you to create and modify PDF files. This plug-in doesn’t work with Adobe PDF Reader.
- Installation Notes
- Using the Plugin
- Opening Documents
- Saving Documents
Installation Notes
To install the HoudiniEsq Acrobat Plugin, simply download and run the installer: http://houdiniesq.com/downloads/plugins/houdiniesqadobe-1.0-windows-installer.exe.zip
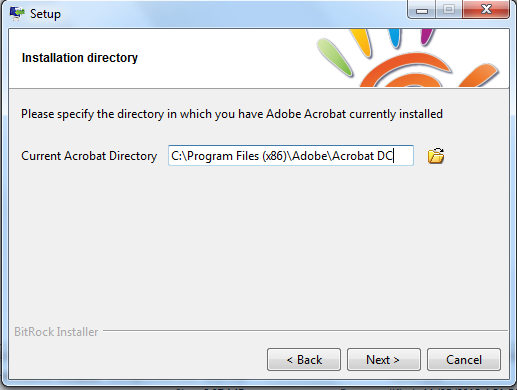
After the initial screen you will be prompted to specify the directory of your Adobe Acrobat installation. The default value is for Acrobat 11.0, but if you are using a different version, you can specify it in the field. Typically all you will have to do is edit the last part of the path to specify the correct directory; below, we have modified the field to show the correct installation path for Acrobat DC.
You can also click the folder icon to search for the correct directory yourself. Make sure you are choosing the base directory for Acrobat, and not the subfolders.
Using the Plugin
After installation, you will see HoudiniEsq functionality in the HoudiniEsq tab (pic is from Adobe Acrobat X).
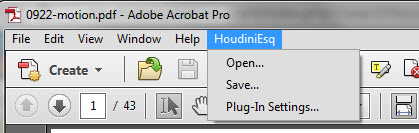
You can configure the plugin, Open or Save a document. Let’s click on “Plug-In Settings” to configure Adobe Acrobat to connect to HoudiniEsq first.
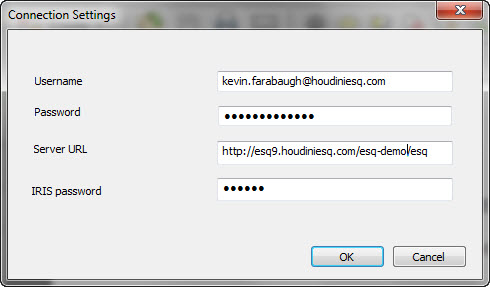
Type in the instance name (the address in your browser where you connect to HoudiniEsq) along with your login name, password and IRIS password and click OK. You will get confirmation that the connection was successful, otherwise re-enter your settings.
Opening Documents
To open a document in the Acrobat plugin, select the Open option from the HoudiniEsq menu in Acrobat.
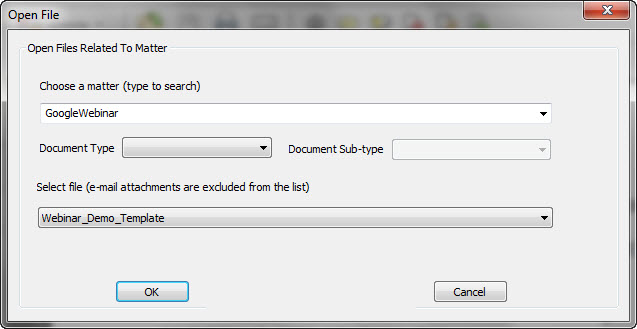
To open a file from the HoudiniEsq server, you need to start typing a matter reference and hit “Enter” key to search; the system will return matters that match the searching criteria. After you select a matter form the list, the file drop down list will be enabled with a list of files for the selected matter. Select a file and click Open.
Saving Documents
To save a file to HoudiniEsq server, click Save from HoudiniEsq menu.
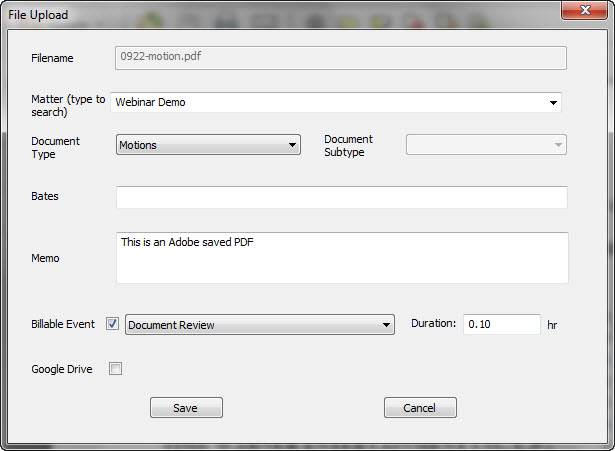
- Document Type dropdown is the list of document types available in your system. It will be automatically filled in if the document has a type associated with it. You can create document types in the Setting. Document Subtype dropdown will automatically appear if the selected document type has subtypes defined.
- Matter field will be filled in automatically if the file is already linked to a matter in HoudiniEsq. Otherwise, please search for the matter that this file is related to.
- You can add text in the Memo field.
- You can enter a Bates number if applicable to this document as well.
- Check “Billable Event” checkbox and select a task name and the time you spent if this is a billable event. The system automatically creates a time entry for you.
- If you have Google Drive sync setup you can sync this document there as well.
Click Save to save the file. You will get confirmation if it is saved successfully.