Today no other device is as ubiquitous as our mobile phones. We are entertained by them, they are our vital communication link to our world and an essential tool for our business.
This article covers HoudiniEsq Law Practice Management for iOS. For Android tap here.
HoudinIEsq for iOS runs on any iOS device running iOS 7 and above including but not limited to iPads, iPods, and iPhones. The Android version will run on any compatible Android device running Lollipop or higher.
HoudiniEsq Mobile Law Practice Management
The following topics are covered in this article.
- Prerequisites
- Logging In
- Loggin Off
- The Home Screen
- Working with List
- Editing a Record
- Adding a Record
- Form Fields
- Making Quick Entries
- Note Form
- Event Form
- Todo Form
- Notices Form
- Email Form
- Matter Form
- Contact Form
- The Pre-Bill View
- Managing Exhibits
HoudiniEsq Remote Access Prerequisites
SaaS users: HoudiniEsq for iOS and for Android works with any HoudiniEsq SaaS account.
On-premise users: If you have a on-premise license you must be running HoudiniEsq 2.0 or better.
HoudiniEsq for iOS and for Android is a native mobile application. As is the case with any mobile device, when you are out of the office or on the go the device It is not part of your local network. Therefore using your computer name or localhost as a URL will not work when out of the office. You can only use HoudiniEsq for iOS and Android if the port 80 on your router has been port forwarded to the computer hosting HoudiniEsq (Host Computer). Your router must have a static IP address and domain name if you wish to reach the host computer remotely. If you already access HoudiniEsq remotely using your browser when away from your office then you are all set. If you use a URL containing localhost or are using a local machine e.g. “myComputer” in the current URL to login into HoudinIEsq then you will have to configure the host machine and your router to use a static IP address and domain name with port forwarding.
Logging In
When you first launch HoudiniEsq for iOS you will be presented with the following screen.
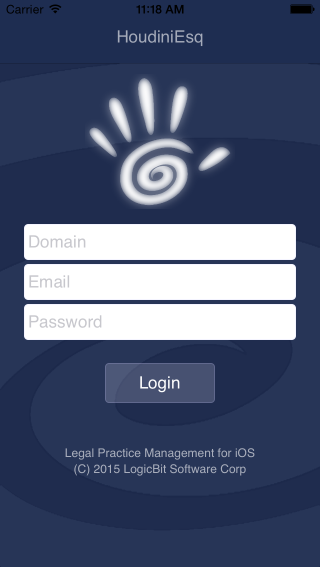
The Domain field is the same URL you enter in your browser’s URL bar when you login to HoudiniEsq remotely. For example http://HoudiniEsq.net/myLawFirm or http://esq5.HoudiniEsq.com/myLawFirm. If you have a SaaS account you need to enter only the domain portion of the URL. This is typically the Law Firm name. Using the URL in the above examples you would simply enter myLawFirm in the domain field.
When you have completed all the fields and tap login you will be presented with a screen that will allow you to view and accept our Terms of Use agreement. The image below is what the screen looks like. Before proceeding please read the Terms of Service agreement by tapping the Read Terms of Service button. The email address you entered in the login screen is displayed on this screen and will be recorded when you tap the I Accept the Terms button.

If you have successfully logged in before HoudinIEsq for iOS will automatically take you to the App’s home Screen. You do not have to enter your credentials again.
Entering new Credentials: If for any reason the login fails or you need to enter different login credentials simply restart the App (see Logging Off below). Once the login screen appears quickly tap the hand logo at the top of the screen. This will stop the auto login procedure and erase any stored password on the device. You can then enter new credentials.
Logging Off
By default HoudiniEsq for iOS and Android does not log you off automatically since it is a personal device. To close the App or restart it, double tap the home button on your device. This will display all your open Apps. Swipe Up to remove the HoudiniEsq for iOS App. This will close the App not delete it. To log back in tap the HoudiniEsq for iOS icon on your device.
If you have successfully logged in to HoudiniEsq for iOS in the past you will automatically be taken to the App’s home screen. You do not need to re enter your credentials.
The Home Screen
The HoudiniEsq for iOS and Android home screen is where the rubber meets the road. From this screen you can see at a glance your entire schedule for any month, how many new upcoming events there are, any pressing todos, important notices, and any new email.
IMPORTANT: The inbox feature only works if you have an email account setup under your profile in HoudiniEsq.
Color is used sparingly throughout the App. If you see color it typically is used to draw your attention to something important.
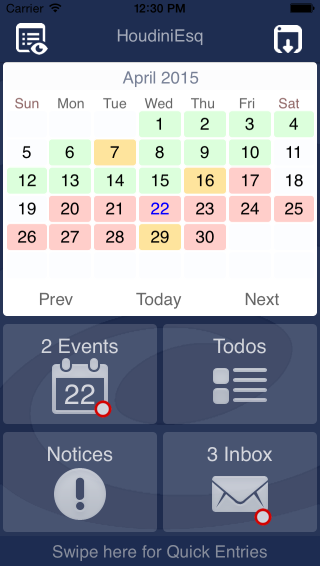
The calendar
The top portion of the App displays a monthly calendar. You can change the view one month at a time by tapping either Next or Prev below the calendar. Tap Today to return the calendar to the present month.
Color is an important aspect of the calendar. Color is used to signify just how busy you are on any given day. There are three colors used. Green signifies that you have a pretty light day with just one event scheduled. Orange indicates that you have two events scheduled while Red indicates that you have 3 or more events scheduled on that day. No color signifies no events scheduled on that particular day.
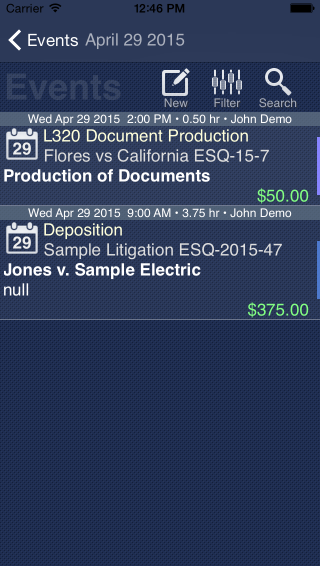
Drilling Down: To view the details on any day or to add an event for a given day simply tap the date on the calendar. When you tap a date you are presented with an event list that has been filtered by the selected date as depicted in the image below. Please note, this is not the only way in which you can enter or view events. Adding events and the list are covered in more depth in later sections.
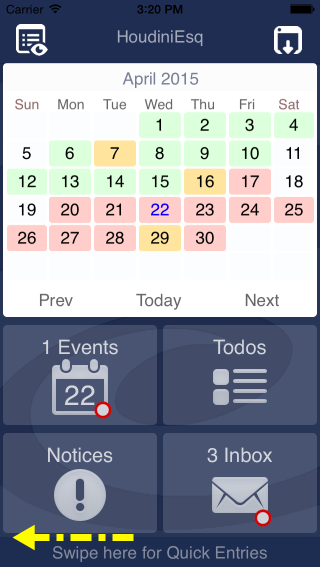
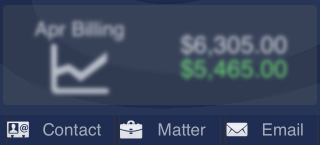
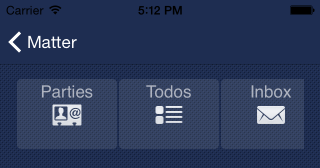
The home screen is not limited to events, todos, notices and your inbox. You can also view matters, contacts and pre-bill on your home screen. To view more information swipe the home screen up or tap the more icon located in the upper right hand corner of the App. The following image shows the expanded home screen exposing all seven home buttons.
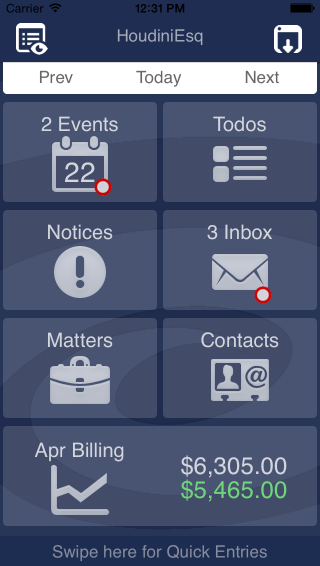
The home screen is a vital part of your workflow. The seven home buttons not only provide you with a means to access its associated data, it also provides you with an alert using a red dot indicator when there are upcoming events, incomplete todos due today, important system notices and any new unread email.
IMPORTANT: The inbox feature only works if you have an email account setup under your profile in HoudiniEsq.
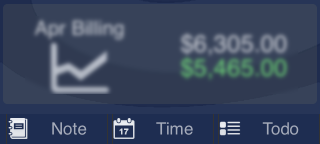
In addition the home screen provides a convenient way to search or add a matter or contact. You can even view you monthly billing tally and drill down to view specific pre-bill items such as matters with billable events and expenses.
At the bottom of the home screen there is a bar that you can use to quickly add records by swiping left to reveal the quick edit menu. With a swipe of you finger you can quickly add an event or time entry, a todo, matter, contact, note or send an email. The quick edit menu is covered in more detail in later sections but it is important to note that this feature is located at the very bottom of the home screen where it says “Swipe here for Quick Entries”.
The HoudiniEsq for iOS and Android App also includes an Exhibit feature. This feature is covered in more detail in later sections but it is important to mention that you access the Exhibit feature from the home screen using the exhibit icon located in the upper left hand corner of the App.
Working with List
In HoudiniEsq data is presented in list. These list allow you to scroll through records, filter, search, view, edit and add new records. The following image depicts a list with two events. All list have similar behavior so we will use the Event list for this discussion.

Tapping an item in the list will open the record’s associated entry form in edit mode. The only exceptions are in the case where an item in the list can not be edited in the mobile App. An example is Invoices and Documents. You can not edit a Invoice or a document that is associated with a Matter.
Scrolling: You can scroll through the items in the list by swiping your finger up or down.
Refreshing: To refresh any list pull down on the list to expose a blank area above the list. You will see a progress bar appear when you have pulled down far enough. This will inform the App to refresh the list.
If you have applied a filter to the list this is how you clear the filter, you simply pull down to refresh the list.
At the top of every list is a titlebar which includes the name of the items in the list and two or more icons. In this example, the name of the list is “Events”. The icons are New, Filter and Search. In some instances this titlebar is obscured by search criteria. For example, from the home screen, when you tap the Events, Todos, Notices or Inbox buttons the list’s titlebar will look like the image below. You will notice that an entry field and clear button now occupies the titlebar area of the list. This is to signify that the list is being restricted to some search criteria. In this example, we are instructing the list to show only items for ‘Today’. To return the list to its default view simply tap the clear icon.
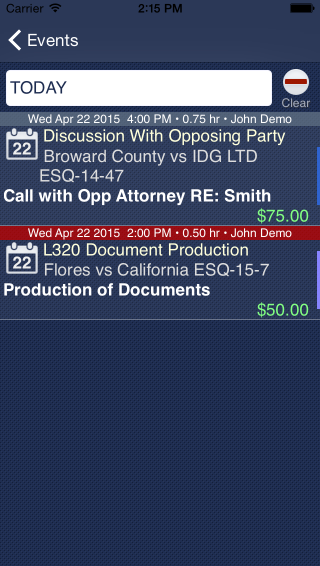
Every item in a list has a header. It is typically grey with white text but can be another color to alert you to a past due todo or an event that is about to take place as is the case in the above image and example. You will notice that the Event for Wed Apr 22 2015 at 2:00 PM occurred just 15 minutes ago hence the color red. If this was a Todo list a red item header would signify that the todo is past due and has not been completed by the time the specified by the creator of the todo.
Color is used sparingly throughout the App. If you see color it typically is used to draw your attention to something important.
IMPORTANT: List are limited in the number of rows that they can return. As you can imagine, legal firms have thousands upon thousands of records. It wouldn’t be efficient to fill list on a mobile device with limited resources. Hunting and pecking is for the birds, not legal professionals. Search or Filter to find the data you seek.
Filtering: The Filter option allows you to filter the list by specific data elements. Each filter screen is unique to its associated list so each may appear slightly different depending on which list the filter option is invoked on. In this case tapping the Filter icon from the event list brings up the following form as depicted in the image below.
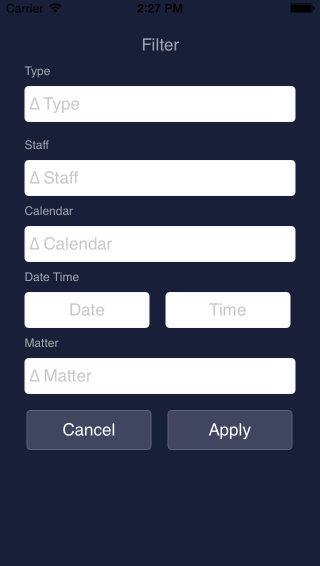
You can select one or more items to filter the list by. When you are satisfied with your criteria tap the Apply button to return to the filtered list. You can repeat the process if you wish to refine your criteria. To clear the filter being applied to any list simply pull down on the list to refresh it. This will inform the App to refetch the data using the list’s default criteria.
So when is a filter appropriate? When you need to search by date, classifications, relationships or assignments instead of just text. For example searching for a event type by a particular staff on a given date.
If after applying a filter you do not see the records you are looking for it could be one of three reasons:
1) You need to refine your filter
2) You are not privy to the information you seek e.g. security constraint
3) A search my be better suited because your filter returns no results
Searching: Searching is an efficient way to find what you seek. To search for specific items tap the Search icon in the list’s titlebar. This will result in the titlebar being replaced with an entry field and clear icon. The following image shows the search option applied to a list.
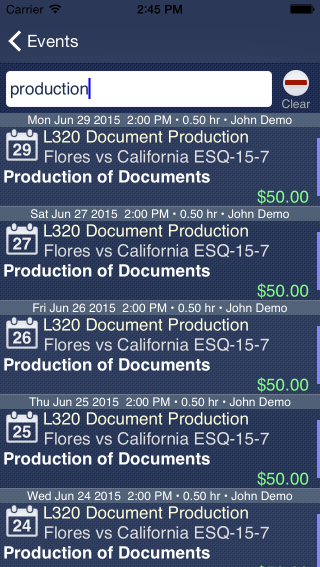
In this example we search for any events that I’m associated with that have the word production in the topic/subject or memo fields. For other record types different fields are used using a search. For example, for contact records the company name, last and first name, phone, email, address are searched. For matters the case name and reference are searched, etc. You wouldn’t use search to find records by date. A filter would be the appropriate way to filter by date.
To clear the search criteria and return the list to its default criteria tap the Clear icon located above the list.
To return to the previous screen throughout the App, tap the left arrow or the word displayed in the upper left hand corner of the App. In this example you would tap <Events but the word could be different on other list and in some instances the word <Return is displayed. It depends on where you are in the App.
Editing a Record
In order to edit a record you must first located the record using the appropriate list and either the search or filter functions. Once you have located the record you wish to edit tap the item in the list to open the record.
To cancel simply return to the previous screen. To return to the previous screen tap the left arrow or word displayed in the upper left hand corner of the App.
Please note, each entry form is covered in detail in later sections.
Adding a Record
To add a record you have two options. You can navigate to the appropriate list and tap the New icon in the list’s titlebar or you can use the Quick Entry feature located at the very bottom of the home screen.
From a list all you have to do is tap the New icon. The associated entry form will be displayed. If the New icon is not visible in the titlebar of a list then you can not add a new record of that type from the list you are currently viewing.
To cancel simply return to the previous screen. To return to the previous screen tap the left arrow or word displayed in the upper left hand corner of the App.
Please note, each entry form is covered in detail in later sections.
Form Fields
Forms are used to enter and view data in your records. Some forms have many fields while others have few. Some forms have tabs to view associated records while others can be swiped to reveal more data. What is important to note is the type of fields you will come into contact with when using HoudiniEsq for iOS and Android.
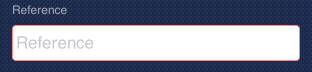
Required Fields: Required fields are entry fields that must be filled in before the record can be successfully saved. You can identify required fields by their red border as depicted in the image below.
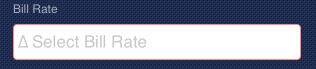
Lookup Fields: Lookup fields do not require you to enter any text directly in the field. When you tap one of these fields you are presented with a list of choices. This list has the same functionality as discussed previously except that this list is limited to a specific list of choices. You can identify a lookup field by the hint text located in the field that begins with ∆ and text referring to what you will be looking up e.g. ∆ Select Bill Rate as depicted in the image below. In this case, this lookup is also required.
Date and Time Fields: You can not manually enter a Date or Time. You must select a date and time using the date and time selector. When you tap a date or time field the date time selector is presented. If you open the date and time selector but do not make a selection the date field will not change. This makes it safe to view the date time selector and not alter the date field unless you specifically select a date. A date field by default always displays the current date and time if the field is empty.
Memo and Description Fields: Memo and description fields can hold up to 30,000 characters.
IMPORTANT: These fields do pose a problem on iOS on the smaller iOS devices. The alphanumeric keyboard has no close keyboard function or button. Typically one would tap the return key provided to move onto the next field or tap another field which would close the keypad but this means that you could not place a carriage return in the memo or description field. HoudiniEsq for iOS and Android solves this problem by listening for the return key tap. A single tap on the return key enters a carriage return as one would expect into the field. An immediate second tap on the return key actually closes the keypad.
Please note, each entry form is covered in detail in later sections.
Making Quick Entries
As discussed previously, there is more than one way to add records in HoudiniEsq for iOS and Android. The most efficient way depends on where you presently are in the App. For example, if you are viewing a matter record and wish to add a new event it would be best to add the event from the event list of the matter then from the event list itself. If you returned to the home screen and tapped events then the New icon you would have to select the matter the event is associated with. However, if you tapped the New icon form the event list of the matter record you don’t have to select the matter because the App already knows that you wish to associate the newly created event with the presently selected matter. So as you can see, efficiency depends on where you are in the App when you wish to add a new record.
One common scenario is your at the home screen, typically this is where you spend most of your time when using the App since you will routinely check the home screen for important notices and your calendar. To quickly add a Note, Send an Email, Enter a Todo, Schedule Event or Record Time, etc swipe left on the bar at the very bottom of the home screen as depicted in the image below.
This will reveal the first three options of six. Note, Time (Event), and Todo. Tap either to reveal the associated entry form and to add your new record.
Swipe left once more to reveal Contact, Matter, and Email. Tap either to reveal the associated entry form and to add your new record. To view the other choices swipe the bar right.
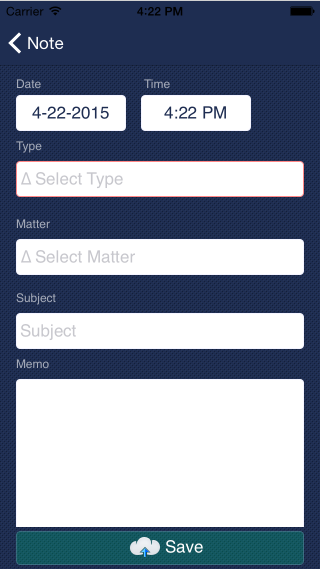
Note Form
There are a hundred things you do each and everyday. Some are important while others are not. What is critical is that you record thoughts, correspondence and information that is related to a case so you can refer back to this info at a later date. One area where you can record important information is with a note.
A note must be associated with a matter so this from should only be used to record information pertaining to a case. You do not use a note record to record time, in HoudiniEsq time is recorded as an event.
The following image depicts the Note Form.
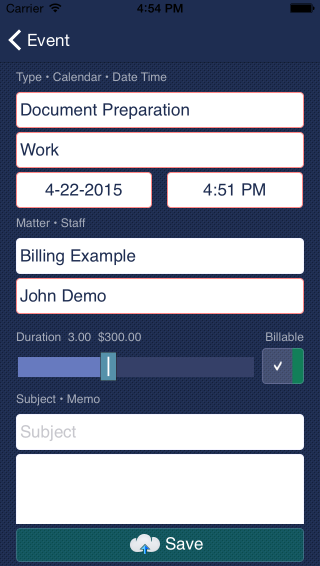
Event Form
Calendared and scheduled events are stored as event records in HoudiniEsq. This is also true of time. Since anything you do on behalf of your client has a start time and a duration, it only makes sense that time be an event as well. This accomplishes several things.
1) You never have to keep a separate list that later has to be converted into a billable item since any event can be billable and invoiced.
2) You can view all time on a calendar.
3) You can schedule billable events in the future or with HoudiniEsq triggers and workflow automation features eliminating the possibility of billable items falling between the cracks.
4) These entries are defensible because they are precise, not a recollection of billable time you may or may not have accomplished on a given day at a given time.
The event form is no more complex than any of the forms we have seen thus far. You will notice however that the duration slider includes the billable amount as depicted in the image below. The slider will only calculate if a Matter and Bill Rate have been selected.
You can tap the billable button if the time is billable.
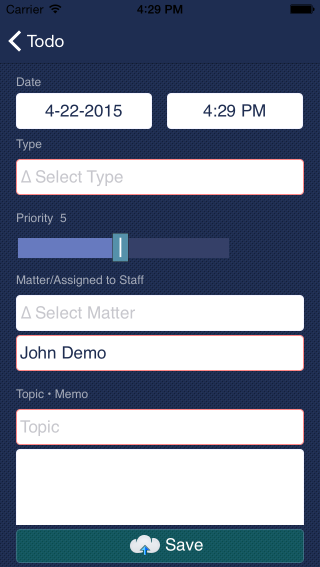
Todo Form
A todo is a task that needs to take place by a given date and time. Todos have a priority and can be assigned to others or to yourself. When a todo is assigned the todo remains on both the assigners’ todo list as well as the assigned staff member’s todo list.
A todo does not need to be associated with a matter.
The following image depicts the Todo Form.
Notices Form
Notices are items that appear on your GTD in HoudinIEsq and were previously called items to review. You can’t add a Notice record manually. Notices are system generated when a user performers a task or a trigger of workflow automation performs one or more task. An example where you might receive a notice is when a staff member has uploaded or created a document for a matter you are a matter member of. In this case you would receive notification.
The following image depicts the Notice Form.
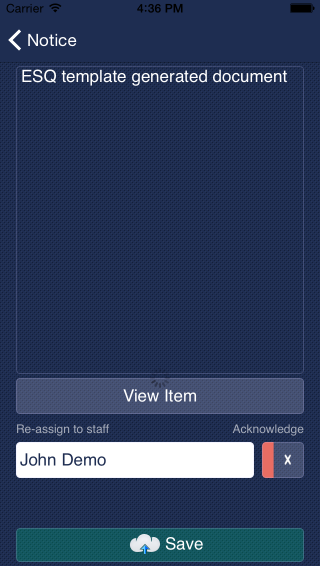
When you receive a notice on your HoudiniEsq for iOS App home screen you tap the Notices button which will reveal the Notices list. Select the Notice you wish to edit to reveal the form depicted above.
What is important to note is that Notices remain on your notices list until you Acknowledge them. To acknowledge a Notice you simply tap the Acknowledge button and tap save. If you wish to pass along this notice to another staff member you would tap the Re-assign to staff field with your name in it to bring up the list of staff. Select the staff member, tap acknowledge and tap the Save button. The staff you selected will receive the notice on their home screen as well as in the enterprise desktop GTD screen.
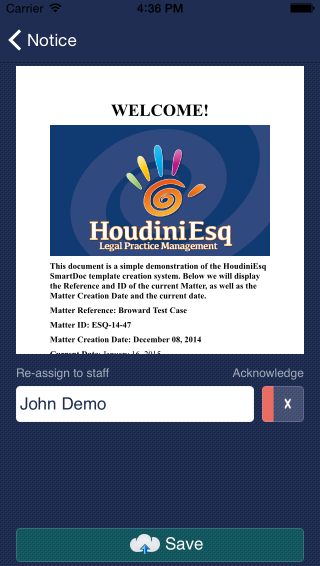
In many instances the notice is regarding a piece of information or a document. If this is the case you will see a View Item button below the notice text. Tap this button to view the associated item this notice is regarding. In the example above the notice is regarding a document. Tap the View Item button to reveal the notice’s item detail as depicted in the image below.
Email Form
If you have an email account setup under your profile you can view unread email in HoudiniEsq for iOS and Android. You can view your email as the sender intended. You can optionally link the email to a matter which will then in turn become full text indexed. You can reply to the email and optionally CC others. To delete the email tap the Junk button.
To record billable time for reading or corresponding tap the billable button. Please note, you must first select the matter the email is associated to. Tap the Link or Send button to complete the task and create a billable event.
IMPORTANT: Viewing attachments or tapping a link in the email may open the item replacing the email. To view the email once again you will have to exit the email form and re open the email.
The following image depicts the Email Form.

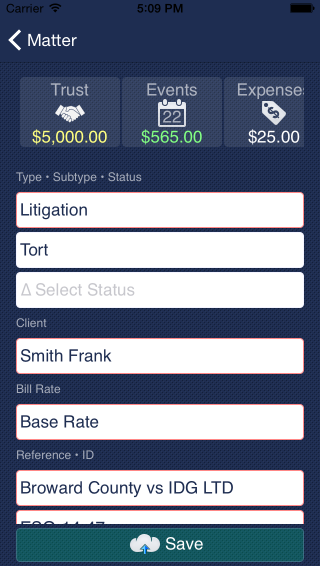
Matter Form
A Matter is a synonym for a case file in HoudiniEsq. The following image depicts the Matter Form.
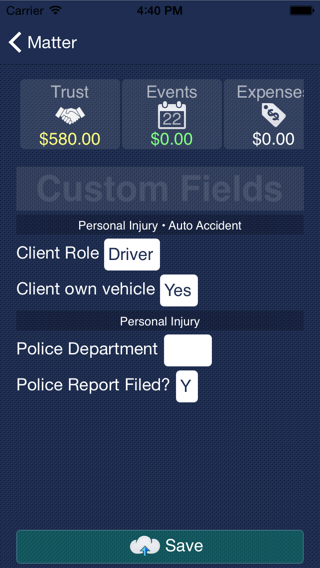
If you scroll to the bottom of the for by swiping up you can view any associated Custom fields if they exist.
IMPORTANT: Custom fields are not editable since they typically are associated with workflow which is not implemented currently.
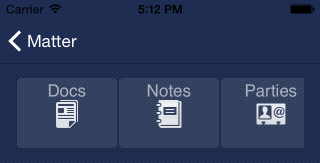
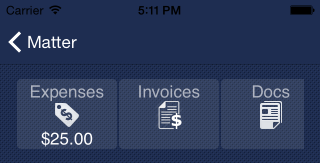
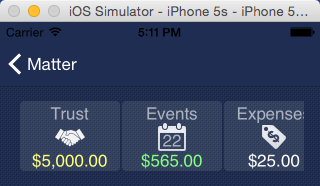
At the top of the Matter form you will see a scrollable menu of associated records such as Trust, Events, Expenses, etc. Swipe right or left to reveal items. To open a list displaying associated records to the currently open matter tap the button. The images below depict your options. A Detail button is added to the beginning of the menu any time you view a matter’s related record list so you can easily navigate back to the Matter’s form.
To return to the default view tap the Detail button that appears in the menu.
Contact Form
The following image depicts the Contact Form.
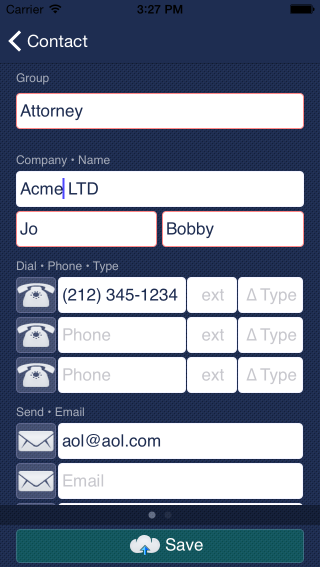
Tap any Phone icon to call the contact using your device. This will start the stopwatch. More on the stopwatch below. Tap the Email icon to open the email form and correspond with the contact via email.
IMPORTANT: The inbox and email features only work if you have an email account setup under your profile in HoudiniEsq.
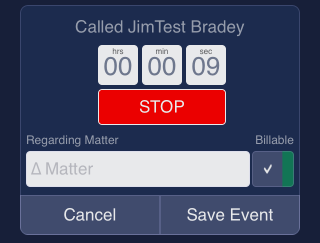
Recording Time for a Phone Call
If you tap any phone icon on the contact form you can call the contact at the displayed number using your device. When the call ends HoudiniEsq for iOS will display the stopwatch. You will notice that the stop watch has recored the length of the call. You can then optionally create a billable event for the phone call by selecting a matter then tap the Save Event button.
The following image depicts the in App Stopwatch.
From the Contact form you can view all matters that this contact is related to by swiping left to reveal the related matters list for the selected contact. This is great for conflict checking. The following image depicts the related matters list.
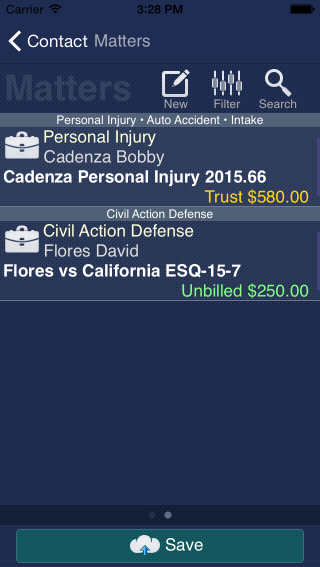
You can tap any of the listed matter record in the list to view the matter details.
The Pre-bill View
From the home screen you can tab the pre-bill button to reveal the pre-bill list. This list displays all matters with un-billed events and expenses per matter. The following image depicts the Pre-bill list.
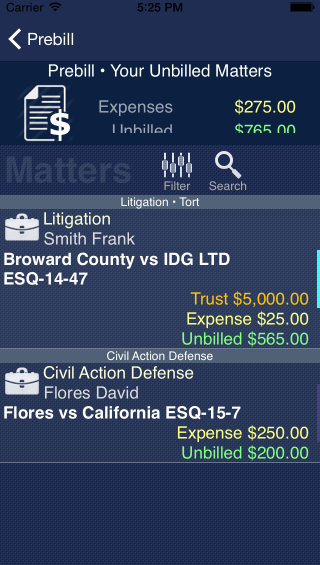
Un-billed Events
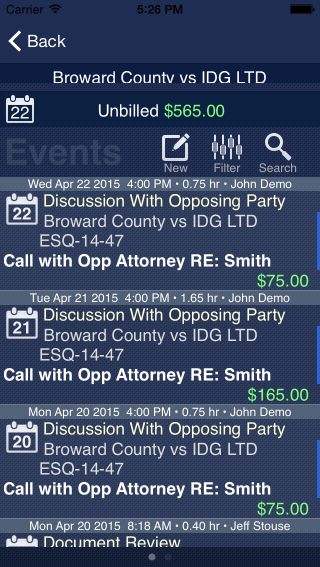
You can drill down to reveal the individual billable events and expenses by tapping an item the Pre-bill list. The image below shows the billable events associated with the selected Matter.
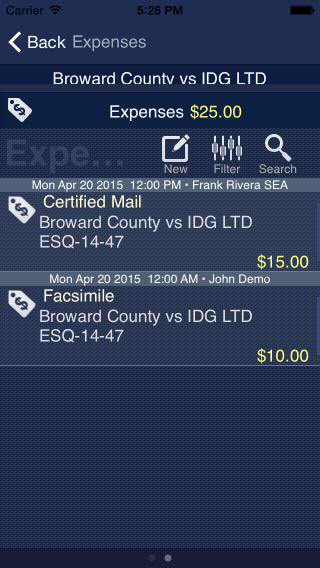
Un-billed Expenses
To view un-billed expenses swipe left. To return to the un-billed events, swipe right. The image below shows the billable expenses associated with the selected Matter.
Managing Exhibits
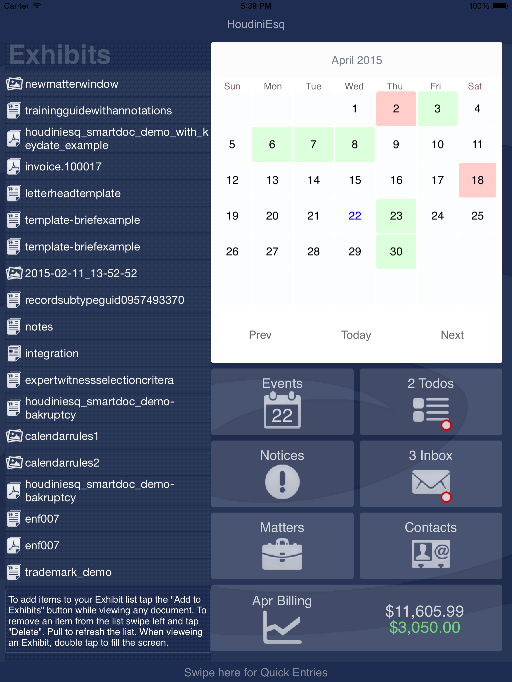
The following image depicts the Exhibits view. In this example we are using an iPad since it shows both the home screen and the exhibit list together.
IMPORTANT: You can refresh the Exhibits list at any time by pulling down on the list or tapping the word Exhibits at the top of the screen.
You can tap any document in the Exhibits list to revel the document. To remove a document form the Exhibits list swipe the name left to reveal a delete button. Verify the document and tap the delete button to remove the document from the Exhibit list. The home screen will take its place until you select another document. On smaller devices such as the iPhone the Exhibit list is displayed after a item is deleted from the list. The Exhibits list and a document are depicted in the image below.
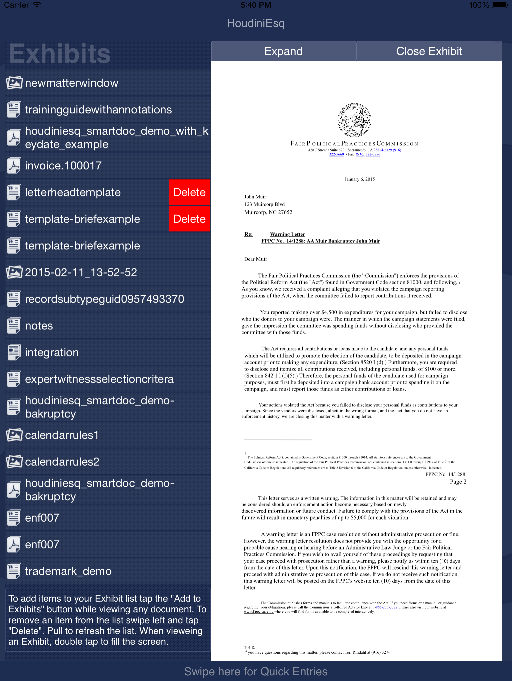
Above the document you will find two buttons. One is labeled Expand and the other is labeled Close Exhibit. If you tap Close Exhibit the document will be closed and the home screen will take its place.
The image below depicts a document that has been expanded to fill the screen. Tap the Close Exhibit button to come the document and return to the previous screen.
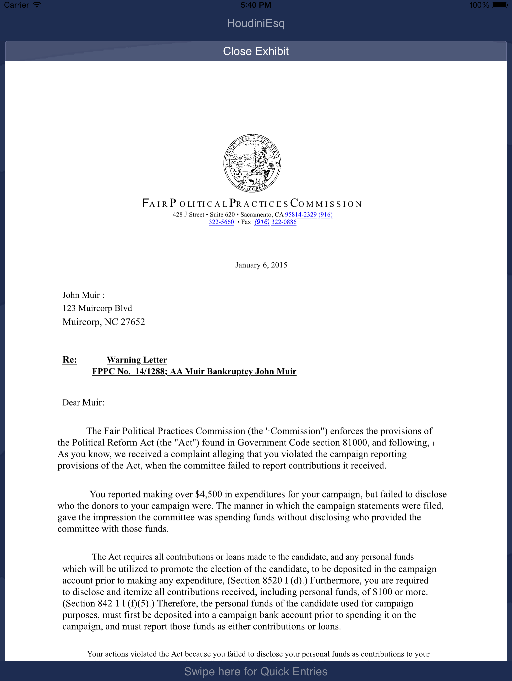
IMPORTANT: On smaller devices like an iPhone the Exhibit list is displayed not the home screen when you close a document. You must tap the Exhibit button at the top of the App to toggle the Exhibit panel on and off on smaller devices.
You can toggle the Exhibits panel on and off by tapping the Exhibit button located in the upper left hand corner of the App as depicted in the image below.

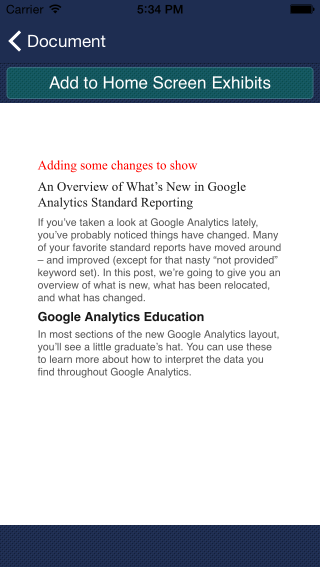
To add a document to your Exhibit list open any document and tap the “Add to Home Screen Exhibits” button located at the top of the screen as depicted in the image below.