
While HoudiniEsq is a Matter-centric system, Contacts are undoubtably the most important record in the system. Contacts in HoudiniEsq can be classified in any way you wish, and can further be related to Matters in a variety of possible relationships. While one Contact may be a client on a particular case, they can also serve as an expert witness on another, for example. HoudiniEsq 2.0 allows you to quickly and effectively view all of your Contact’s relevant information via the Contacts Dashboard.
To access the Contacts dashboard of HoudiniEsq, simply click the “Contacts” link at the top right of the main interface. Below, we’ll get an overview of the possible options for the Contacts Dashboard, as well as provide an overview of all possible Contact options.
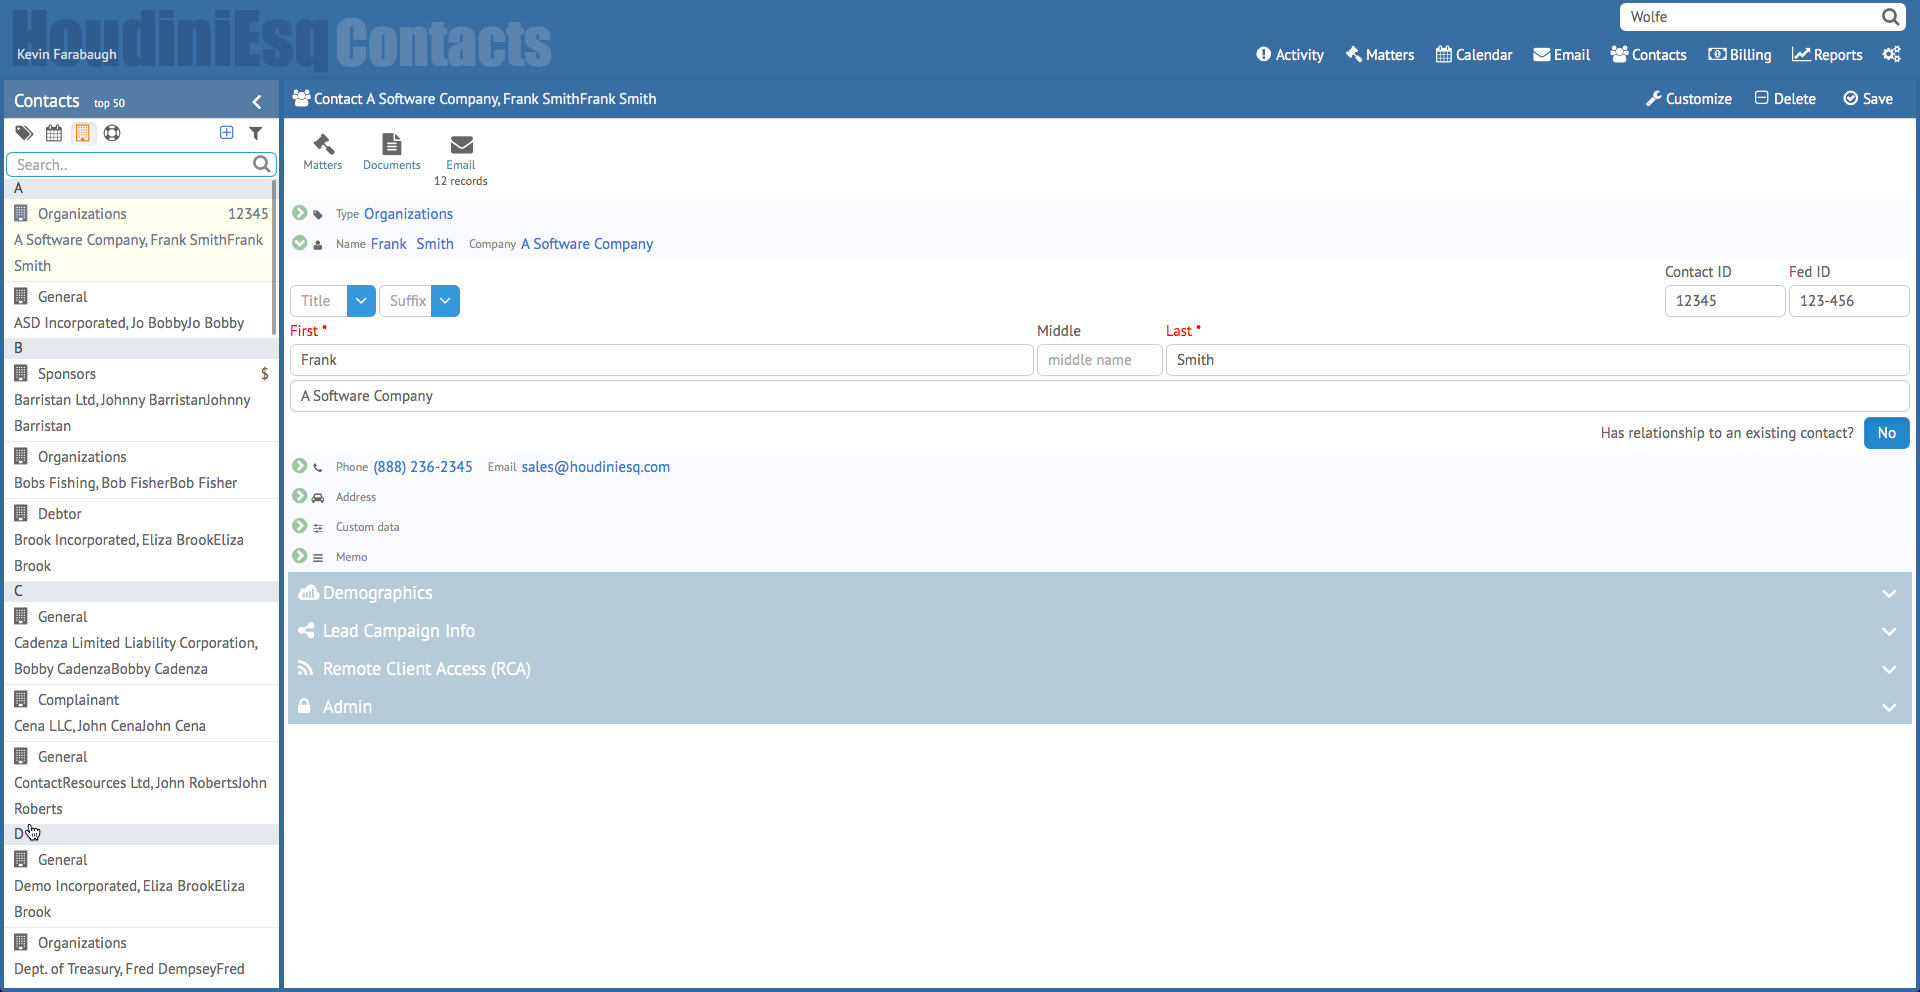
The Contacts Dashboard will allow you to select or search for a specific Contact at the left hand side. The right hand side will display all relevant information for the selected Contact, as well as offer toggles at the top left to view related records. Let’s start with the list at the left.
Contacts List
The Contacts list is displayed on the left hand side. By default it will display the first 50 records alphabetically, which can be extended in the Advanced Filter section. You will also have several icons to change the sort order of the Contact list, as well as the ability to Search for Contact name, phone number or email.
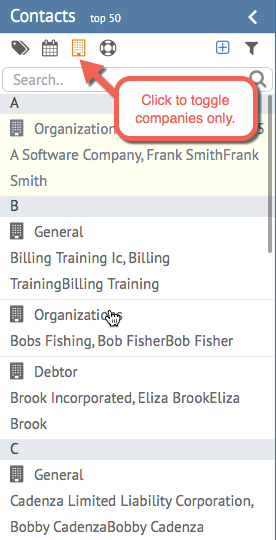
The icons for sorting the current Contacts list are explained in detail in the Navigation section, with one exception; the orange icon noted above will allow you to toggle on and off the ability to view only Contact records associated with a Company. This toggle is unique to the Contact list.
At the top right is the Advanced filter, which will allow for additional searching and filtering options. We’ll talk about them below.
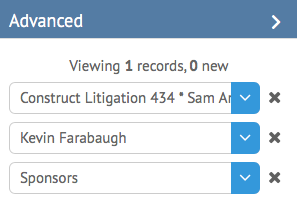
The first field in the Advance filter allows you to search for Contacts related to a specific Matter record. The second field allows you to search for Contacts created by a specific Staff member, and the last field allows you to filter the list by the selected Type for a Contact. As we can see above, the fields can be combined to form more specific filtering options. Clicking the (X) next to a field will clear its specific value, and the (>) icon will contract or expand the Advanced Filter. Clicking the icon in the top of the list will toggle it on and off altogether.