
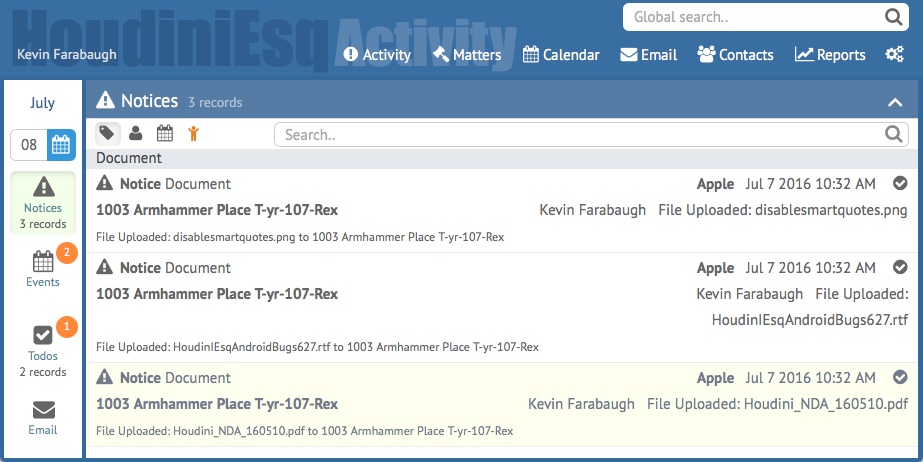
In this article, we will detail how to create a Notice record with a trigger action. Notices can be viewed from the Activity Dashboard at any time by clicking “Activity” and selecting “Notice” from the side bar. Typically, notices are sent out from actions in the system such as document uploads to cases which you are a Matter Member of, and other case updates. Notify as a trigger action can allow you to send updates when additional actions are taken in the system as well.
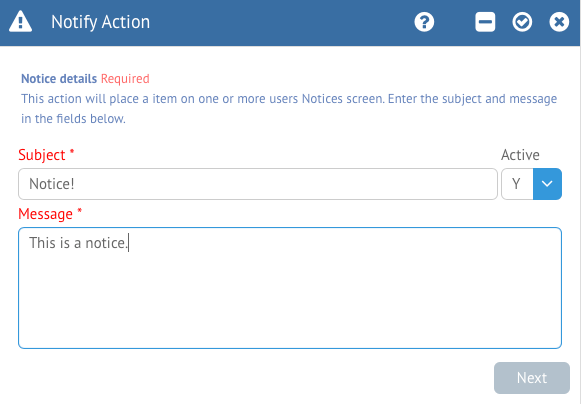
Selecting the Trigger Action from Customize Mode’s Trigger tab will prompt you to enter information about the Notice that you would like to appear. This consists of a Subject and a Message, which will both be displayed as seen above.
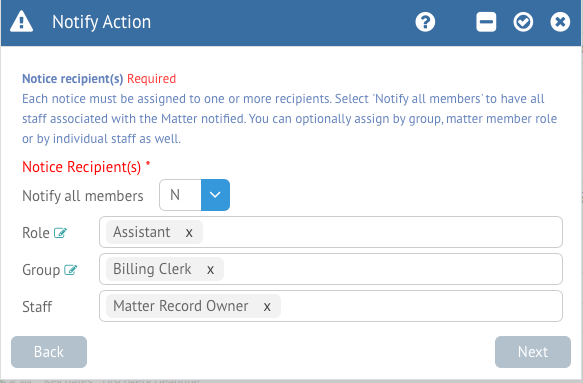
Clicking Next will allow you to specify which users you want to see the notice. You can automatically send the notice to all Matter Members, or a specific Matter member based on their selected Role. Additionally you can send the notice to an entire Staff Group, or just a specific user.
Finally, after clicking Next you can specify an Acknowledgement Receipt. This will create an additional Notice record when the original Notice is acknowledged. You can specify which users will receive this “bounce back” notice, again by Role, Group or specific Staff. When finished defining the Notice, click the Checkmark at the top right to save the action.
