Welcome to an overview of the HoudiniEsq QuickBooks Connector. The QuickBooks Connector is a “bridge” that allows you to post information from HoudiniEsq to QuickBooks in real time. In this article, we will explain how to install the Connector, set it up in HoudiniEsq, post to it and finally uninstall the Connector if necessary.
Note – The Quickbooks Connector is for Windows only.
What does the Quickbooks Connector Do?
HoudiniEsq supports tight integration with QuickBooks. Since HoudiniEsq can exist anywhere HoudiniEsq uses a intermediary app that is installed on the same machine where QuickBooks is running. This intermediary app allows HoudiniEsq to communicate securely with QuickBooks. How it works is, the intermediary app called HoudiniEsq-QuickBooks-Connector talks to QuickBooks locally since the intermediary app is installed on the same machine as QuickBooks. HoudiniEsq communicates with the intermediary app directly which will in turn communicate with QuickBooks.
Go here to download the Quickbooks plugin. Scroll down for the Quickbooks plugin download.
Note – The connector has to installed on a machine that has Quickbooks installed on it.
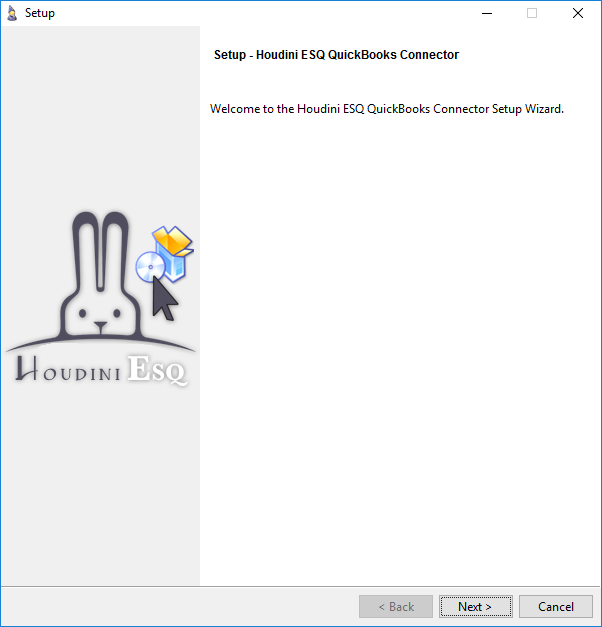
Once downloaded, run the installer: HoudiniESQqbc_windows_installer.exe. You will be asked a few things during the installation.
Note – Quickbooks should not be running when you run this installer.
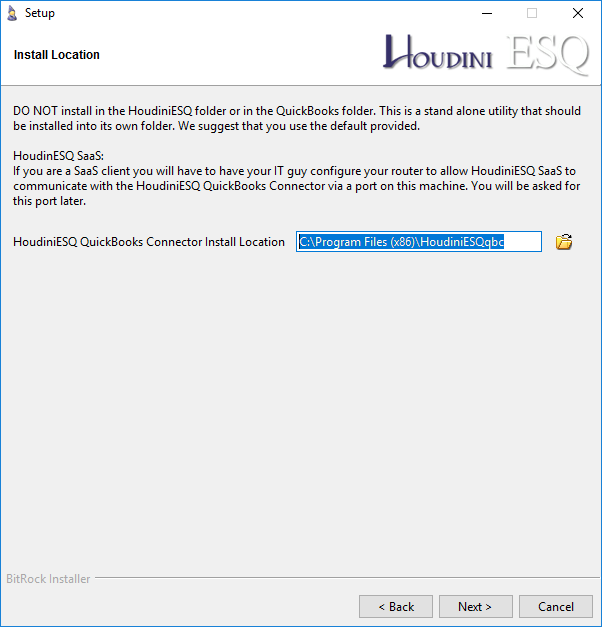
- Plugin installation location. We recommend leaving this set to the location the installer suggests.
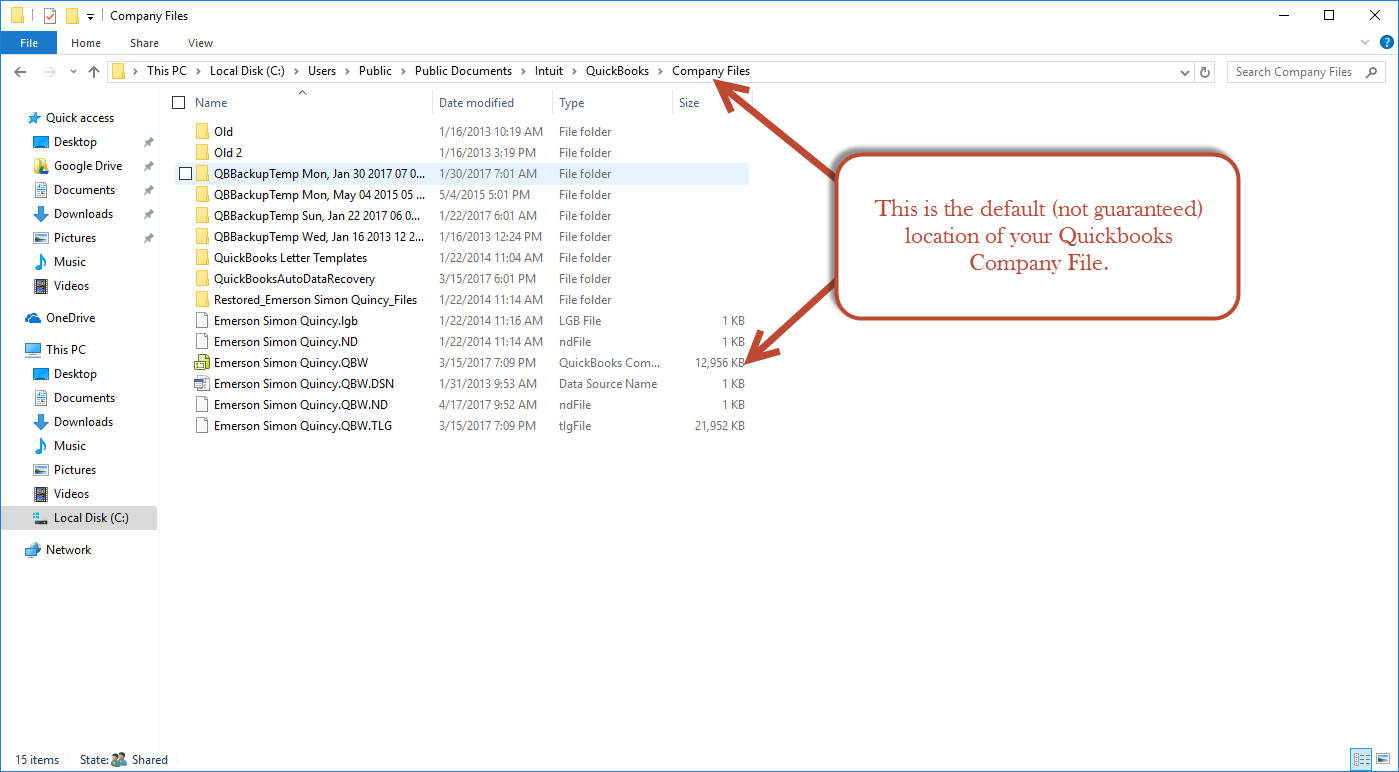
- Next point the HoudiniEsq Quickbooks connector to your Quickbooks company file.
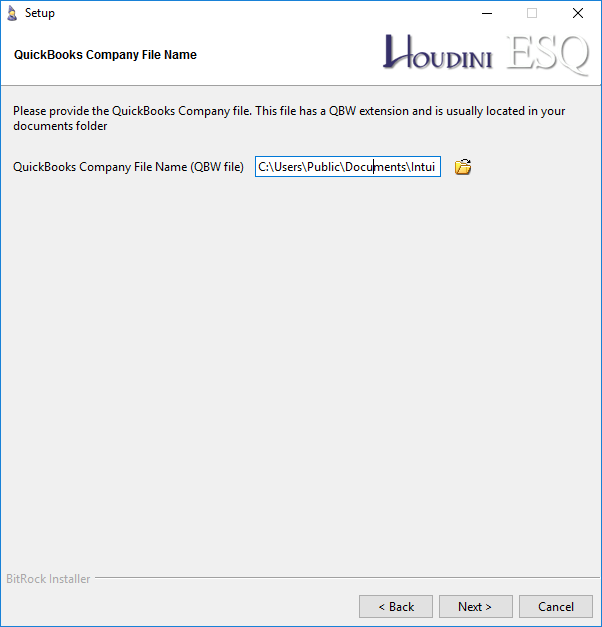
This file is usually in your Documents folder, possibly in an Intuit folder. The location may not be the same as the one in the picture below. A company file always has the file extension QBW.
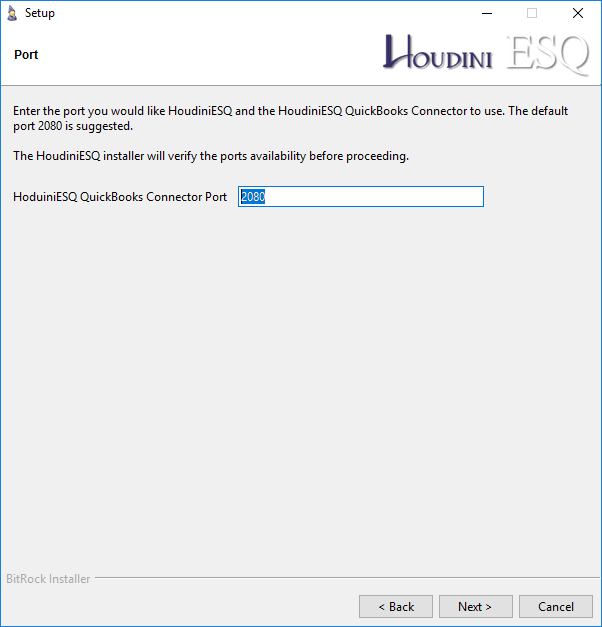
- The Quickbooks connector port.
Again, we recommend leaving this set to the default 2080, if you need to switch it to another port, that is fine.
- The Connector User Name
By default it will be ‘qb’. We prefer to keep it simple, you can change it if you wish.

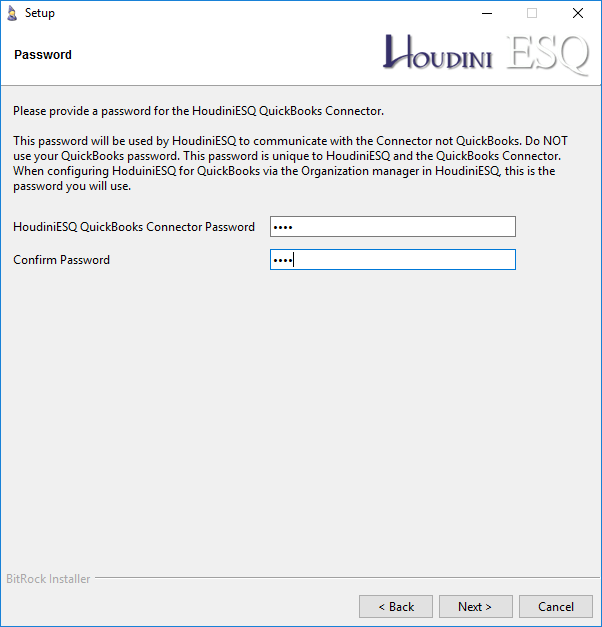
- Quickbooks Connector Password.
This password is up to you to determine. Its main purpose is to prevent unauthorized connections to the QBC port, protecting your computer and company file.
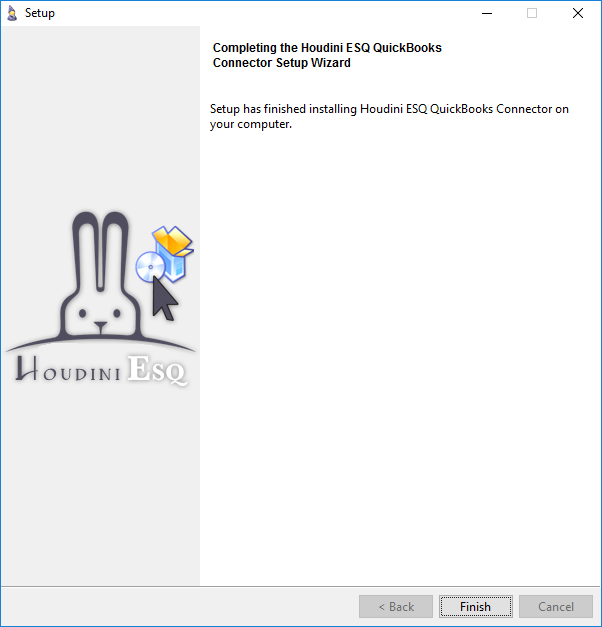
After this screen the installer will do its job and you will have the connector installed on your computer. Now we need to set it up in HoudiniEsq.
To get HoudiniEsq pointing to the Quickbooks there are several steps you need to take.
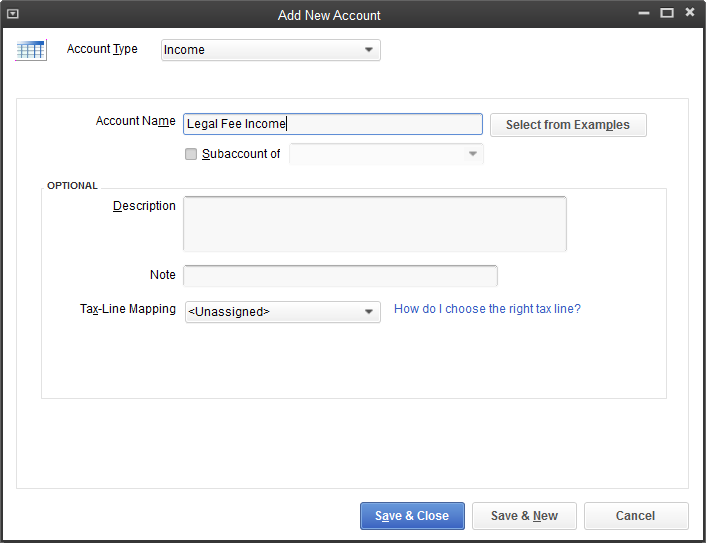
- Step 1 – Open Quickbooks and create a Root-Level account in Quickbooks called ‘Legal Fee Income’ (no single quotes). This has to be a main account, not a sub-account in your Chart of Accounts. Keep Quickbooks open for the rest of the setup.
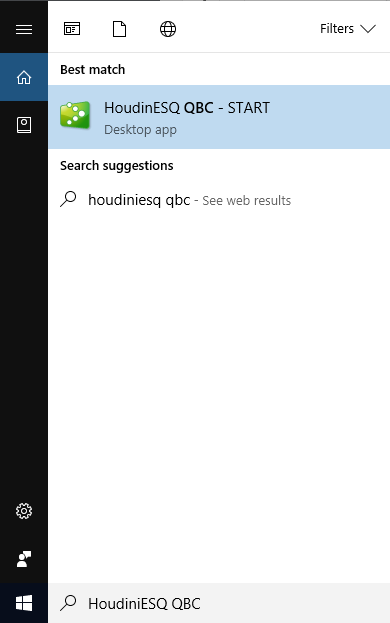
- Step 2 – Start the Quickbooks Connector.
- You can do this from the windows start menu. Simply search for “HoudiniESQ QBC” to jump directly to it.
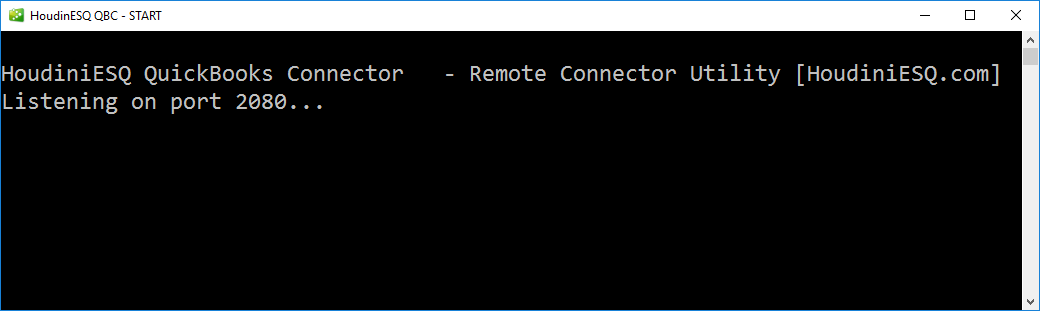
Once started you will see a black window open. Leave this running, you can let it run in the background.
- Step 3 – Obtain the following information about Quickbook and the machine it is installed on.
- Quickbooks company file name.
- This is the file you linked to in the installer that ends with QBW. You can verify this by pressing F2 in QuickBooks at any time.
- Quickbooks company file name.
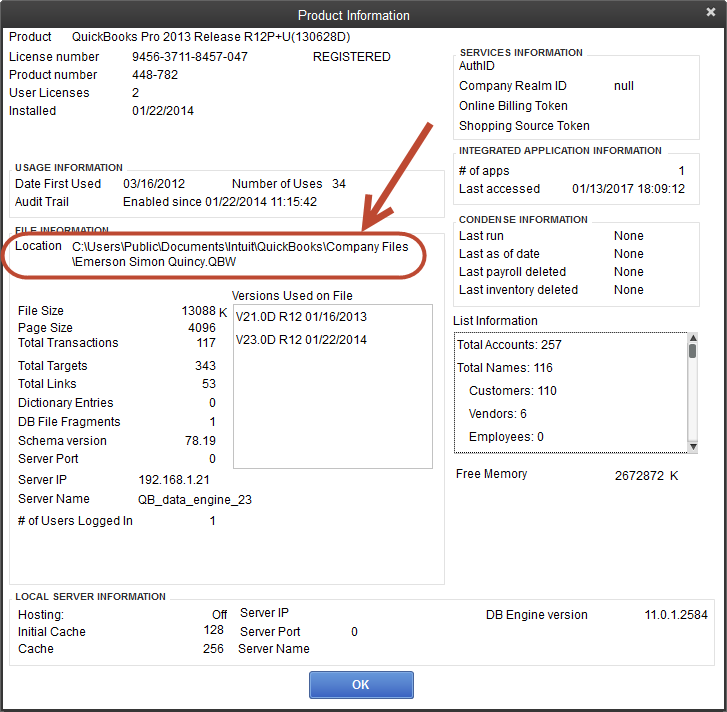
- Quickbooks operating account name.
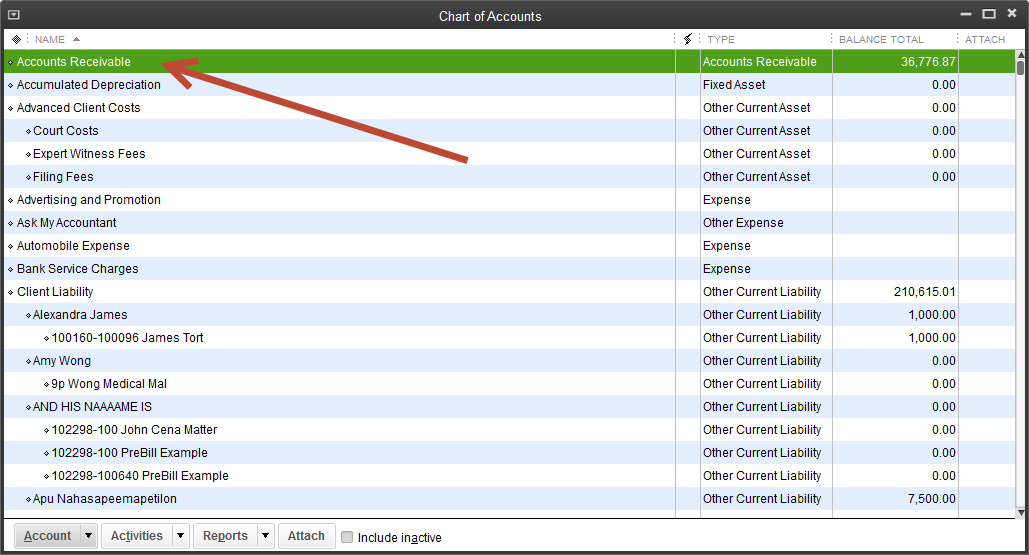
- Look in your Chart of Accounts. This will usually be your Accounts Receivable.
- IP Address of the machine Quickbooks is installed on.
- If you have HoudiniEsq, Quickbooks, and the Quickbooks connector installed on the same machine your IP address is ‘localhost‘.
- If HoudiniEsq and Quickbooks are on two different machines you need to find the IP address of the Quickbooks host machine. You can also use the hostname (or computer name) in a pinch.
- Step 4 – HoudiniEsq Setup
- Log into HoudiniEsq 2.0 and go to the Settings Dashboard General tab. Note: You must be an Admin to enter this part of the program.
- Select the Quickbooks portion of the General tab and fill in your settings. See below for an example.
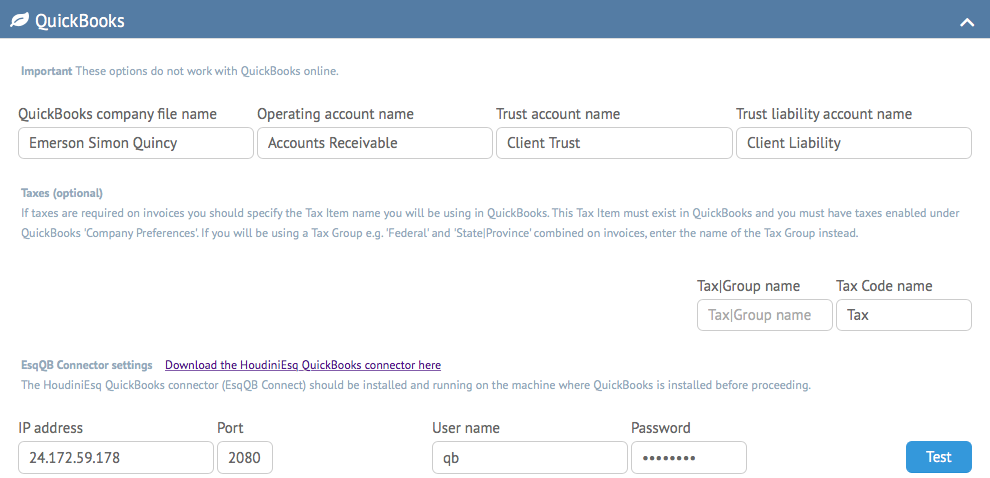
- The Company File Name is the name of the company file that is open. If you have any doubt as to this name, you can press F2 to find out the exact name of the file you currently have open while in Quickbooks. Do not include the .qbw in the file name.
- The Operating Account name is the name of the operating account in QuickBooks where you want HoudiniEsq to place payments and fees earned. Typically this will be your “Accounts Receivables” type account. If you have any doubts, you can access the Chart of Accounts by pressing Control+A while in QuickBooks.
- The Trust Account name is the name of the Trust Account in QuickBooks. This will typically be a Bank account and is used to handle your Trust transactions.
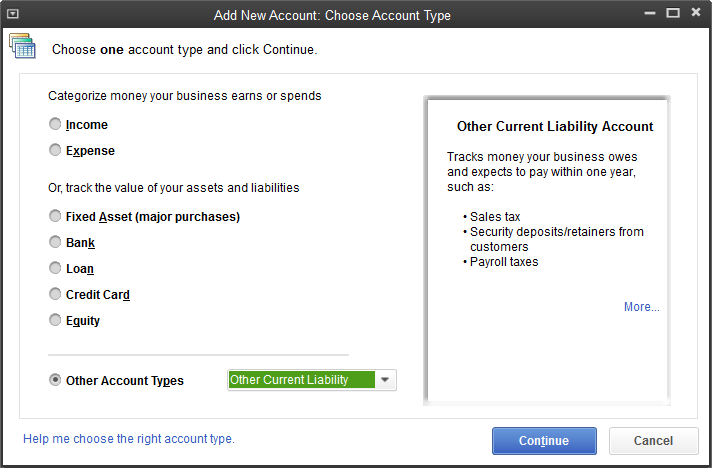
- The Trust Liability name is your Trust Liability account in QuickBooks. This is an Other Current Liability account that mirrors the Trust account, making sure you have a balanced ledger and properly keeping track of all additions and subtractions to the Trust accounts.
- Tax settings will be set up according to your Tax Code and Tax Group names in your company file. They are completely optional, but if you use tax, refer to your QuickBooks settings for that information.
- IP Address is either the IP address or hostname of the computer that is running the QuickBooks Connector. If you are using HoudiniEsq Cloud, this is going to be the address of your router that is providing port-forwarding services.
- Port is typically going to be set to port 2080 by default, unless you’ve chosen a different port for the Quickbooks Connector during install.
- User name is going to be the user name specified when installing the QuickBooks Connector.
- Password is also going to be the password specified when installing the QuickBooks Connector.
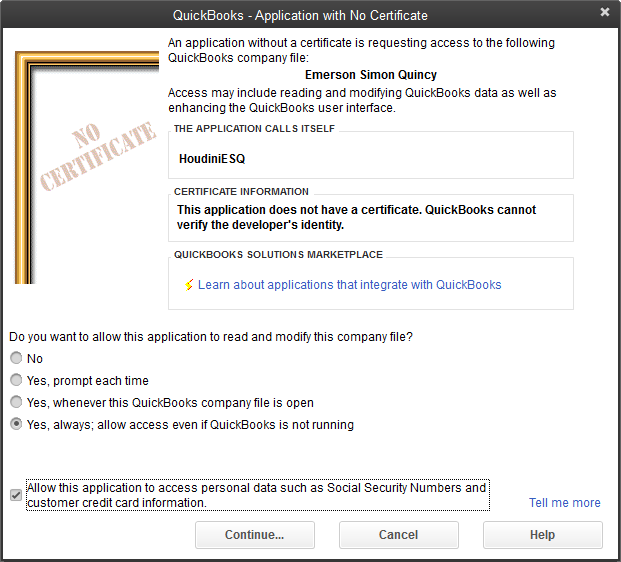
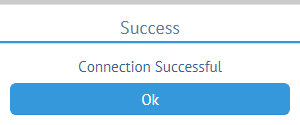
- Step 5 – The first time you connect Quickbooks will throw a warning at you stating a third-party application is trying to connect. You need to authorize it. You won’t have to do this again.
- Tab over to Quickbooks and see if there is a warning message like this. If so click Yes, Always Allow and press continue.
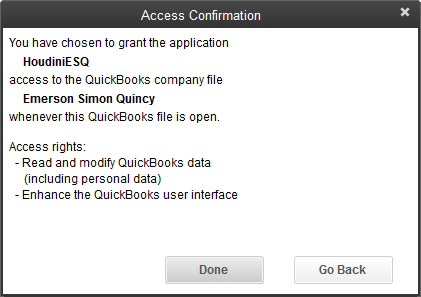
- Once done you will get a confirmation screen. click Done.
- If everything is correct you will see the message ‘Connection Successful’. Press the Save button to save these settings.
Setup and Configuration – Advanced Tips
The simple setup if just the basic, but most law firms also want Quickbooks to handle Trust, tax information, and Liability.
- Trust and Liability
- HoudiniEsq follows the industry standard of Lynette Benton’s “Trust Accounting Using QuickBooks: Sixth Edition” book. You can visit her website at www.attorneysechnology.com or email her at lynette.benton@comcast.net.
First create a bank account for Trust and/or liability in QuickBooks.
In the Quickbooks setup screen in HoudiniEsq add the account names to Trust Account Name and Trust Liability Account Name.
- Click Test and then Save if your Test is successful.
- Collecting Taxes
- HoudiniEsq calculates taxes and you can optionally have the Fed State/Prov Tax items printed on the invoices however, HoudiniEsq does NOT post taxes to QuickBooks. QuickBooks has its own Tax features and Options that you must enable for Taxes to be calculated properly. Since QuickBooks calculates tax you must make sure you have things setup correctly in QuickBooks.
- Enable Sales Tax – To start, you need to enable the sales tax preference. Select Edit then Preferences and select the Sales Tax preference. Click on “Yes” for the question “Do you charge sales tax”.
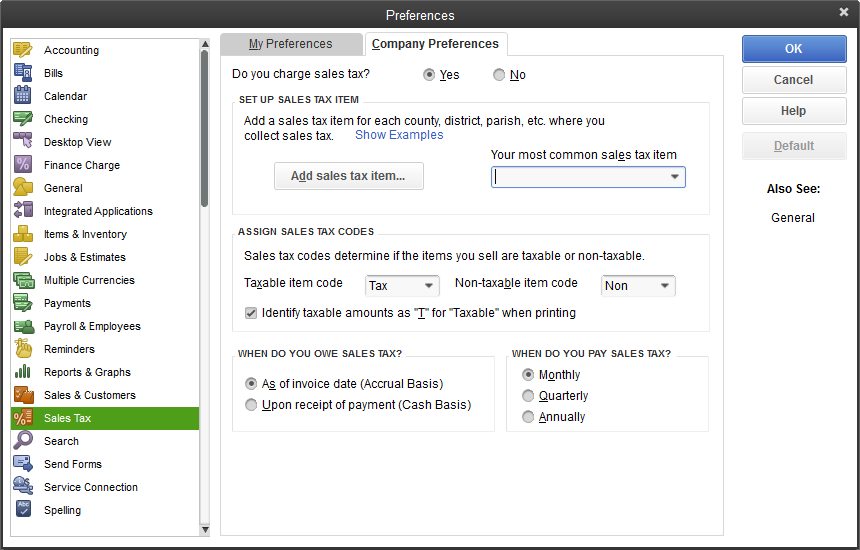
- In the lower half of this screen there are several options to review to make sure they are set properly for your business (how often you pay sales tax, and so forth).
- Sales Tax Items – As you probably know, all charges that you add to an invoice must have an entry in the item list. Sales tax is the same. You will create one or more sales tax items in the item list. You can do this by clicking on the add sales tax item button in the preferences screen, or by adding an item to the item list in the normal way
- Enter the percentage for the sales tax, and a vendor for who you pay that sales tax to (typically your state sales tax agency)
- Multiple Jurisdictions – So what do you do if you have multiple jurisdictions? You could have a situation where you have a state tax, a county tax, a city tax or even more. When you file your reports to the state tax agency you need to split out the amounts by jurisdiction, usually.
- To manage this, create a sales tax item for each jurisdiction. One for the state, one for each county you work with, one for each city. However you need to break it down for your reporting. Then, create a sales tax group item and add each of the jurisdiction taxes:

- If you use this sales tax group in an invoice the rate will be 8.1%, but the program will report each tax separately.
- Please note that if you have a large number of taxable jurisdictions this can become very complex. You need to have a sales tax item for each jurisdiction, and a sales tax group for each “nexus” or location that has different combinations. There are third party add-on products that help with sales tax tracking, but these usually are reasonable only if you have a large number of invoices to process.
- Back in the preferences section, in the dropdown list Your most common sales tax item you can select the sales tax item or group that you most commonly use.
- Customers and Items – Now, let’s look at your customers and items. Some customers are taxable, others are not. Some items and services are taxable, others are not. We will set up both to have the usual value for taxation, although you can always override this when needed.
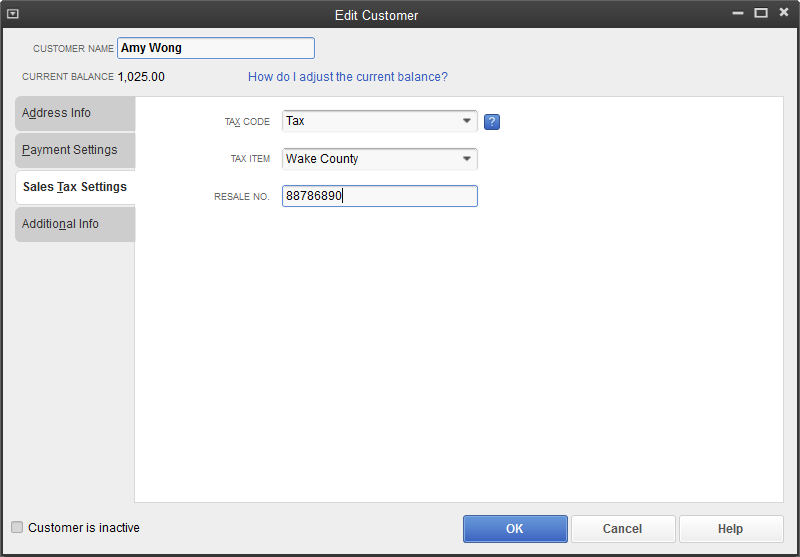
- Edit your customer, you can specify which sales tax item or group to use for this customer. Also, the tax code needs to be set – it should be set to tax
- Edit your items to specify if they are taxable or not – select the tax code of tax.
- Putting It All Together – When you post a invoice from HoudiniEsq taxes should be calculated for you. The default values for the tax related questions are used from the customer record and item records.
- Three things must be set to have sales tax calculate:
- The customer tax code must be taxable.
- The tax item or group must be selected.
- The tax setting on the item must be selected.
- If this all happens, sales tax is calculated properly.
- Three things must be set to have sales tax calculate:
Remember, you can override these if you need to change something for a specific situation. If one line isn’t to be taxable for some reason, change the tax setting on that line to non taxable. If the customer should get a different tax rate, change the tax item or group for the invoice. You can also change the customer tax code.
Posting TO QuickBooks From HoudiniEsq
Any time that the QuickBooks Connector is able to post to QuickBooks from HoudiniEsq, you will see an icon indicating that the connection is active and ready.
This includes the Pre-Bill, Invoice Payment, and Trust screens.

Clicking this icon will toggle whether the item you are about to add will be posted to QuickBooks. Otherwise, simply add the entry as you normally do in HoudiniEsq.
IMPORTANT NOTE: For security reasons HoudiniEsq cannot process transactions which have special characters in them. This includes #, @ and !. Please avoid using these characters in your naming conventions and postings, including account names in Quickbooks, and Matter names.
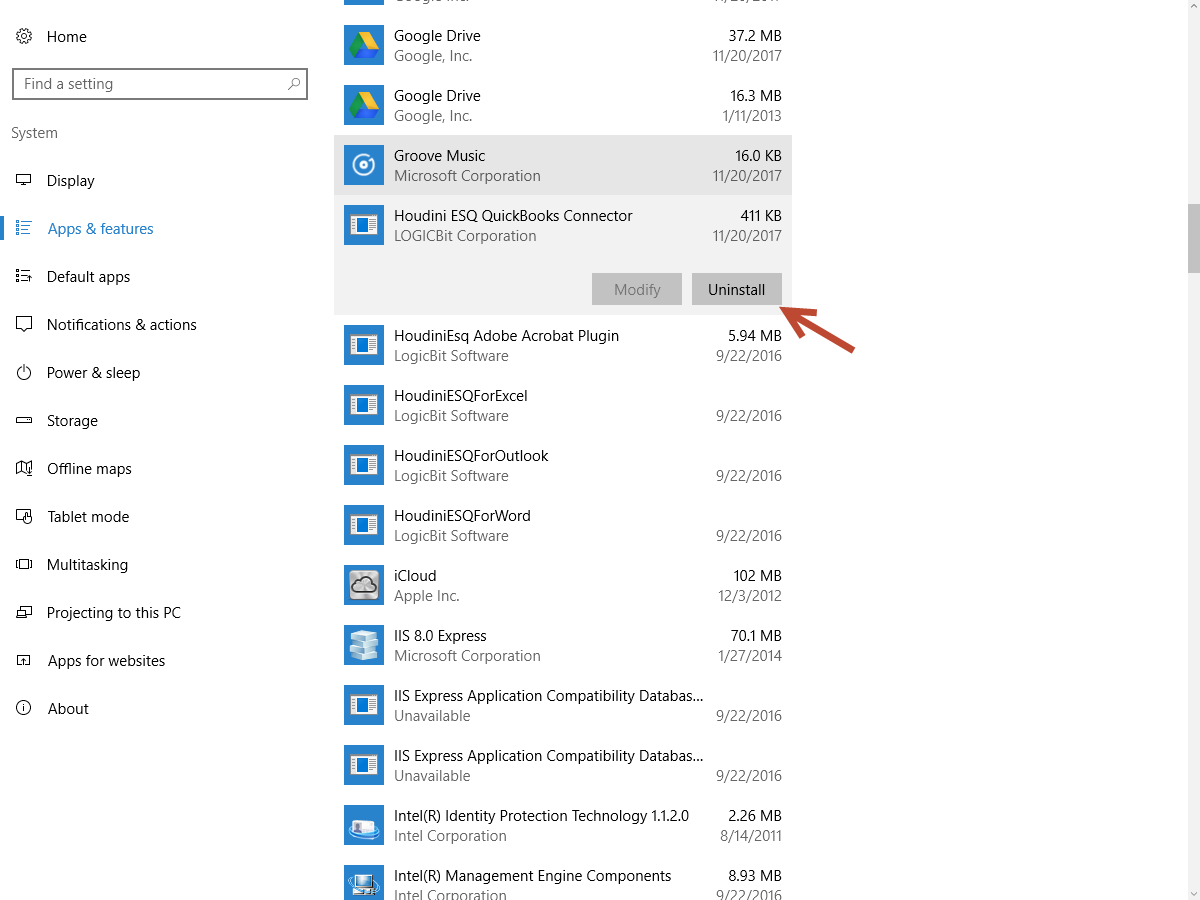
Uninstalling the Quickbooks Connector
To uninstall the HoudiniEsq Quickbooks Connector go to the Control Panel. Open Programs and Features, and find Houdini ESQ QuickBooks Connector. Right-click and choose uninstall.