
This article will explain how to request, manage and approve expert contracts using the HoudiniEsq 2.0 interface.
Settings/Requirements
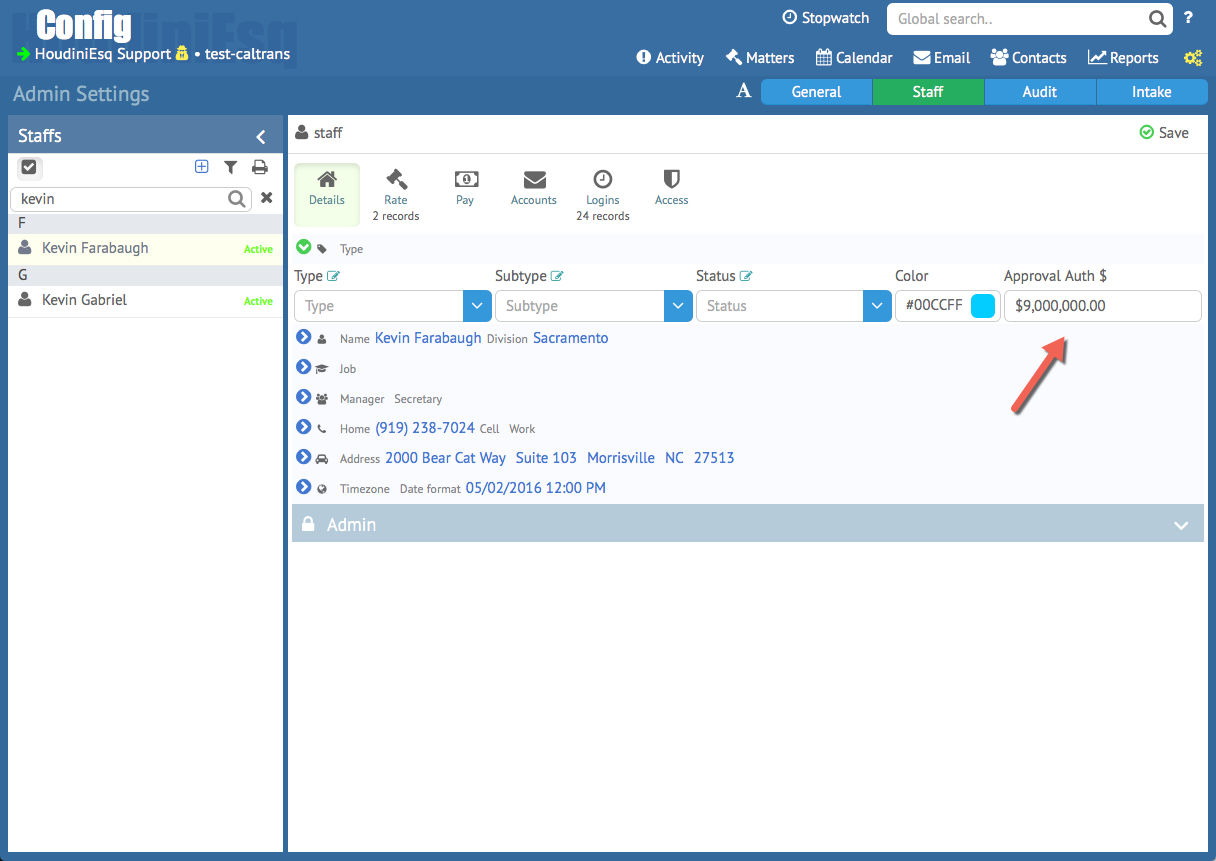
Any user in the Caltrans HoudiniEsq 2.0 system can request contracts. However, in order to approve them, a few settings must be enabled in your Staff account. In the Details tab, ensure that your Contract Authorization Amount is properly set to the correct amount.
Next, ensure that you are a member of the correct groups in the Access tab.

The specific required groups and their permissions are:
Contract Analysis: This allows users to open, view and edit Contract Details.
Contract Document: This allows a user to create and print out Contracts via templates in the Documents tab of the Contract record.
Contract Approvals: This group gives specific access to approve requested contracts. The approval amount is controlled by the corresponding field noted above in the Details tab of the Staff record.
We will be covering the full process of requesting, approving, and printing a Contract in this article from start to finish.
Requesting Contracts
To request a Contract, select the appropriate Matter from the Matter Dashboard. Then select the Contracts tab.
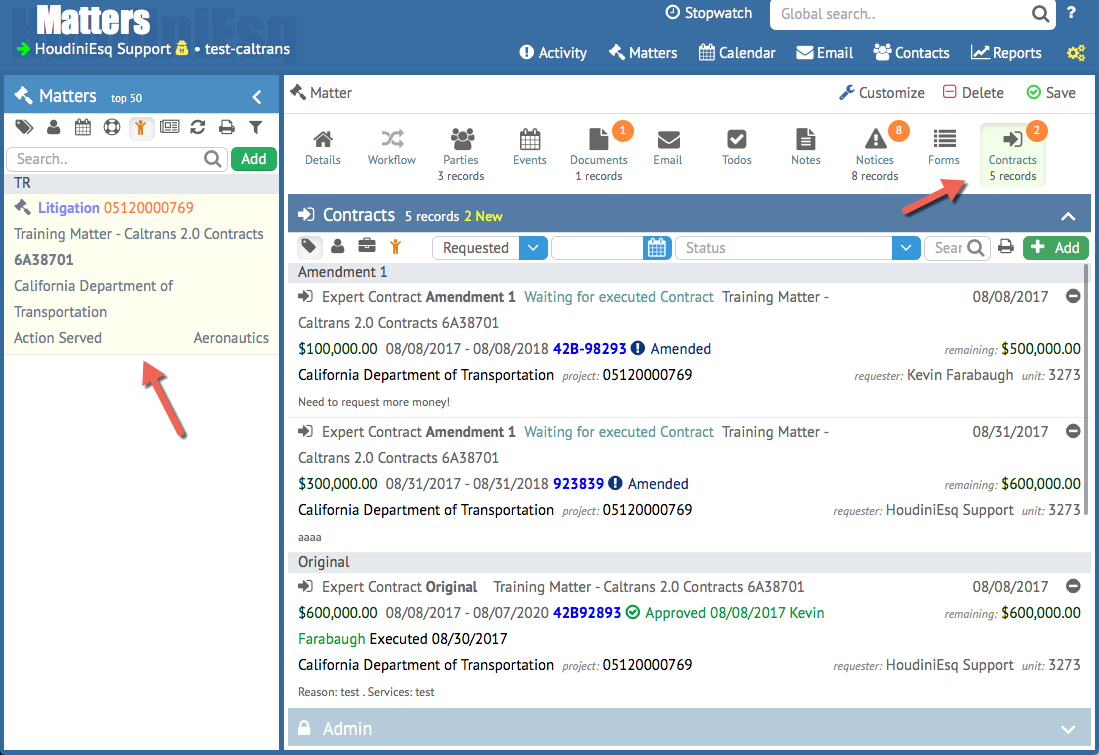
The Contracts tab of a Matter will allow you to view all currently active and inactive contracts for a specific case, along with their status, reminding amount, requestor and other critical information. Click the +Add button at the top-right to request a new Contract.
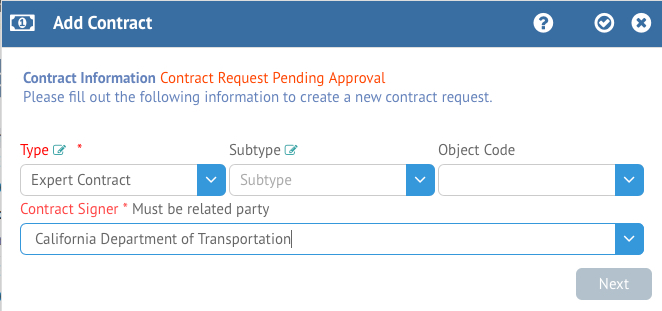
This will open the Add Contract Wizard. The first screen of the wizard will ask you to define the Type of Contract (and subtype/status code, optionally). Additionally, the Contract Signer must be selected. This Contract Signer must already exist as a related party to the Matter. Click Next to continue.

Next, select the criteria which apply to this contract from the list. Note that selecting certain options will cause additional sub-options to appear. Once you have selected the appropriate criteria click the Next button to continue.
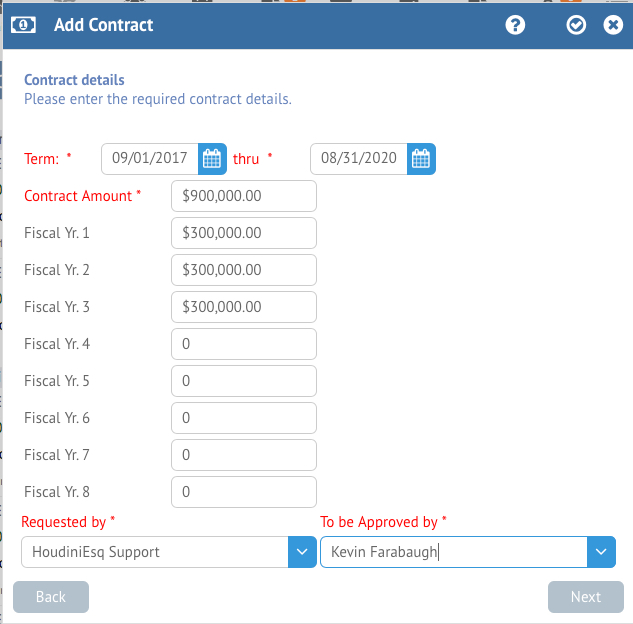
The next screen allows you to set the Contract details. Enter the date range for the Term, and then a Contract Amount. HoudiniEsq will automatically attempt to divide the Contract Amount evenly across the number of fiscal years specified in the Term range; in the above example, the term is 3 years (the default) so the $900,000 amount is split evenly into $300,000 across 3 Fiscal Years. These Fiscal Year amounts can be edited to fit your request needs, but each yearly value must add up to the total Contract Amount to proceed.
Additionally, you can specify who is requesting the Contract, and who will be approving it from the list of appropriate Contract Approval staff. The “To Be Approved By” dropdown will ONLY show Staff who are members of the Contract Approval group and are authorized to approve the total Contract amount listed in your request. Click Next to continue.
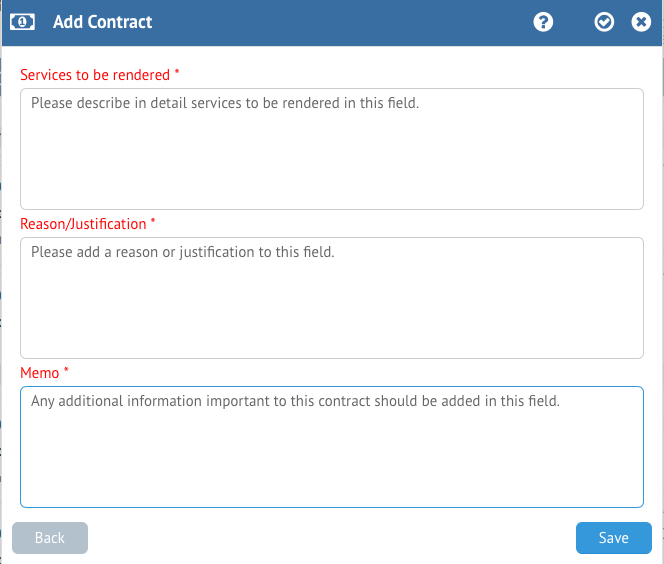
The final screen of the Add Contract wizard requires you to add information about the contract. Enter the services to be rendered, a reason/justification for the contract, and a memo with any additional information about the contract. Once you’ve entered the appropriate information, click Save to request your contract.
Approving and Reviewing Contract Requests
Any incoming Contract requests will appear in the Notices tab of the Activity Dashboard.
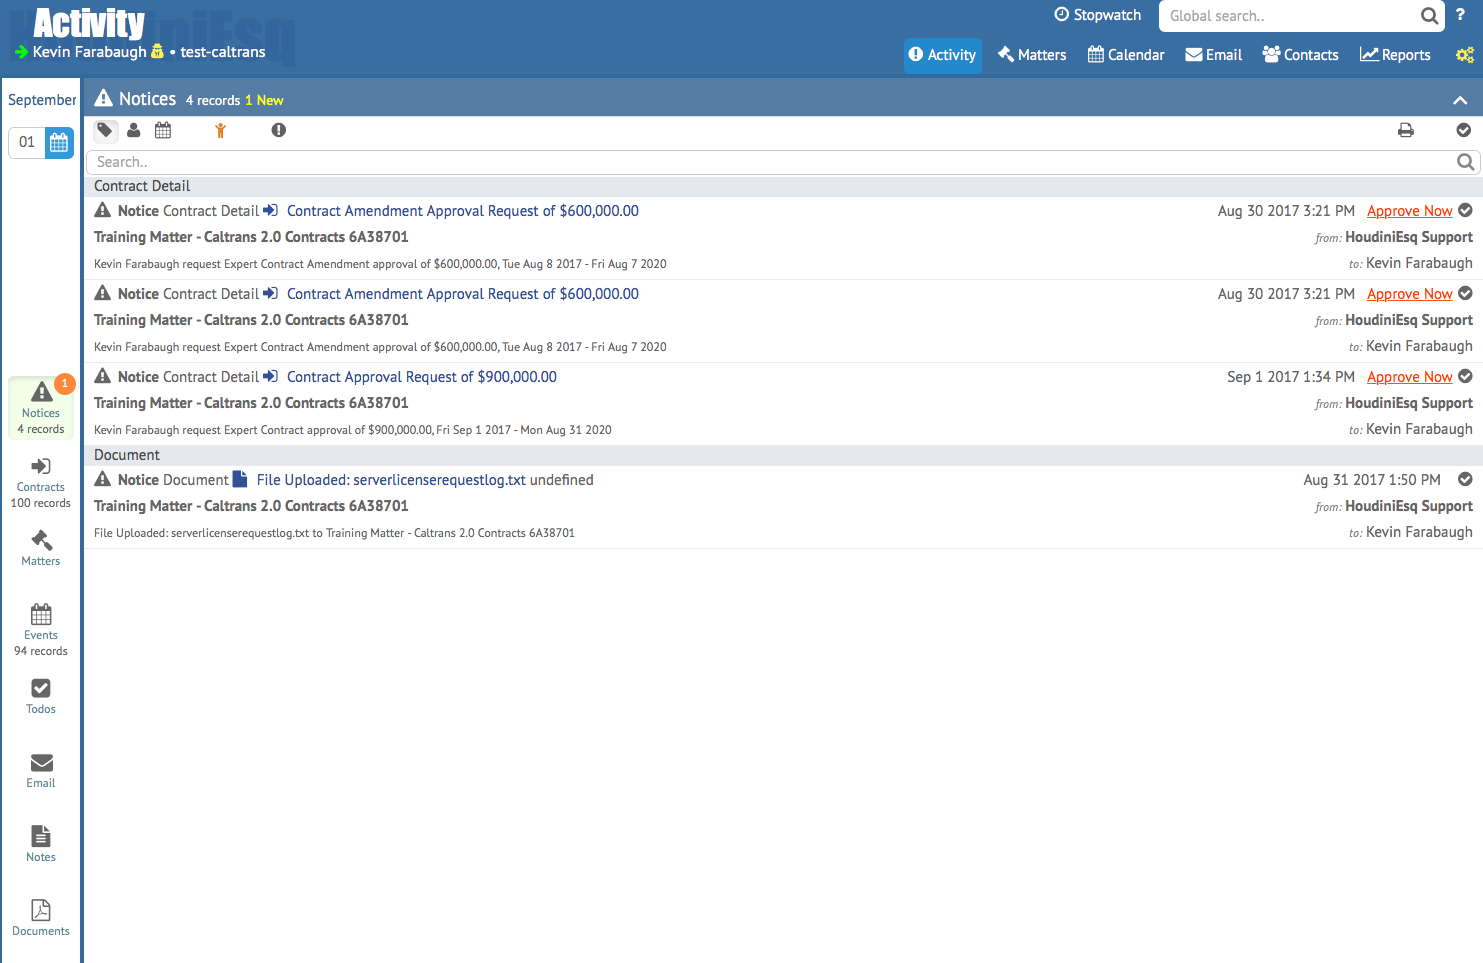
To approve a contract request, simply click the “Approve Now” link next to that Contract.
Once the contract has been approved, it will appear in the Contracts tab of the original Matter with the status “Pending Creation.” It can also be found under the Contracts tab of the Activity panel, which can be searched by Contract Number and Status, as well as date and Contract Number.
Contract Analysis staff can then open the Contract record to review the information.
The first step will be to assign an Agreement Number to the Contract. You can do so in the field noted above.
Next, we will review the Contract Detail. Go to the Details tab above, and double click to open the Contract Detail. Note that it is tagged as “Original” as this is not an Amendment.
Of note on this form is the Routing section. Entering a set of Routing dates will change the Status of the Contract to correspond with the dates entered.
For example, entering a set of dates on which the Contractor was assigned will result in the detail status changing to “Waiting for Contractor”.