
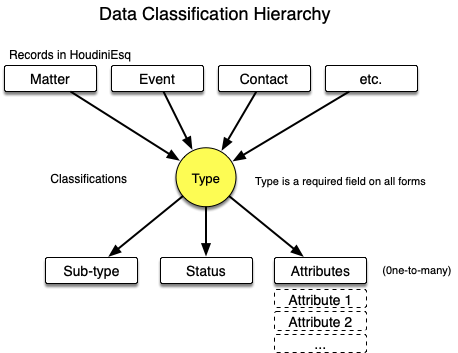
All Matter records in HoudiniEsq have three primary classification fields. These fields are Type, Subtype, and Status. Every record in HoudiniEsq must have a Type assigned. A Subtype and Status Code is not required. Each type can have Subtypes and Status Codes but Subtypes and Status Codes cannot exist without a parent Type. The image below depicts this relationship.
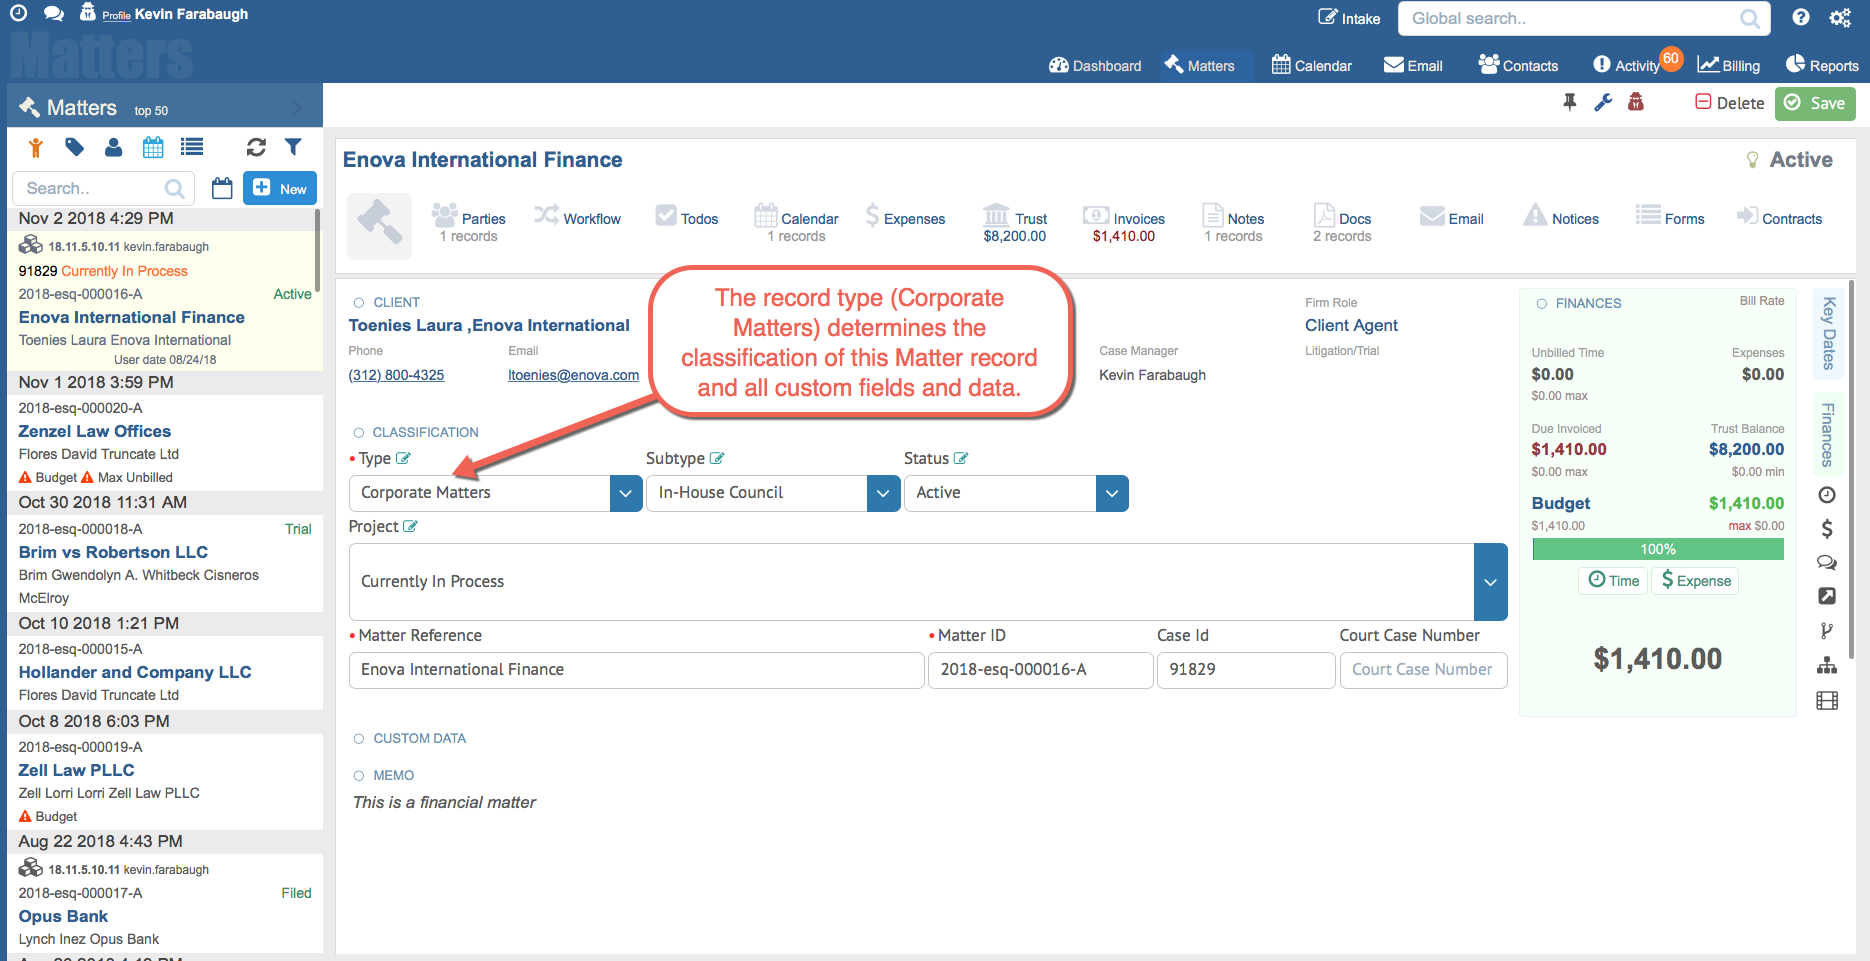
These classification fields in HoudiniEsq are used to categorize, sort, filter, customize, and apply rules. For an example of where you can find them in the application, see the image below.
The “Type” data element on a Matter must be the its practice area e.g. Bankruptcy, Eminent Domain, etc. This is best practice. Special care should be taken not to define your Matter record types using broad legal case types such as “Civil”, “Litigation”, etc. These areas are too broad and should be granulized. For example “Contract Dispute” or “Tort” is better than setting a Matter’s type to just “Civil”. In this way your cases can be broken down further for example, a Bankruptcy case could then have a Subtype of “Chapter 13”, “Chapter 11”, etc. The same is true for Status Codes. In the case of our Bankruptcy example a Bankruptcy Chapter 7 case could have such status codes as “Petition Prep”, “Filed”, etc. and a complete different set of choices for Bankruptcy Chapter 13 cases.
When adding custom fields they are assigned to the forms Type, Subtype and Status Code combination. For example, a collection of data elements can be displayed for all Bankruptcy cases but other data elements may only apply to Chapter 13 type cases while other data elements may only be valid for Chapter 11 type cases. This not only eliminates the clutter on forms it provides fine grained flexibility so forms collect and display relevant information based on the type, subtype and status of a case.
This is an important concept because practice areas can have their own distinct rules, triggers, custom fields, and workflow in HoudiniEsq.
How To Customize Classifications

If you are an Admin user in HoudiniEsq, chances are you’ve seen this icon next to several selection fields in the application, including Type, Subtype and Status Code. This icon can also be seen in Demographics specific fields such as Court and County, as well as Staff Groups and Calendars. What this icon signifies is that the field can be edited.
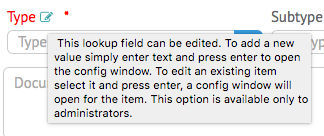
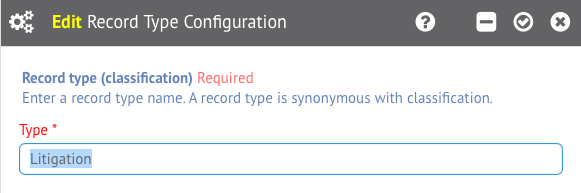
Whenever you find a field with this value, you can enter your desired value and press the Return key to bring up a form to add that selection to the list of values. To save the value, click the Checkmark at the top right of the resulting Configuration window. All users will then be able to select the value you add to the field. Below is an example of adding a Matter Type.
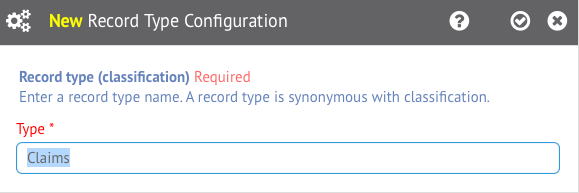
You can also select an existing option and press Return to edit or delete that value. To remove the value entirely, click the Minus [-] icon shown at the top, otherwise input the new value and press the Checkmark icon again.
Again, keep in mind that only Admin users will be able to make these changes. If you do not see the icon shown above, you do not have Admin privileges.