
UPDATE: All versions of HoudiniEsq 2.0 later than Build 224 use a new method to edit and create Workflows. However, the old method detailed in this article is still able to be used to create and edit Workflows, so it is still relevant.
Workflows in HoudiniEsq 2.0 are a sequence of steps through which tasks pass from initiation to completion. Tasks can be assigned to one or more Staff, and the progress of each Task can be tracked in real time for any Matter which they are assigned. Workflows allow you to use a Kanban-style chart to display your key tasks for each case in a more natural manner, and each “step” in a Workflow allows you to assign Triggers that occur when the task is moved to it on the chart.
Workflows use Todo types as their Tasks, and Todo Status Codes as their Steps. However, you can add these during the creation process of Workflows, so do not worry if they are not already predefined; you can simply create them as you proceed with the customization process. See the image below for a simple example of what a Workflow looks like.

To get started creating Workflows, select a Matter of a specific Type and then click the Customize button at the top right. Then select the Workflows tab at the top left. Note: you must be an Admin to enter Customize Mode.
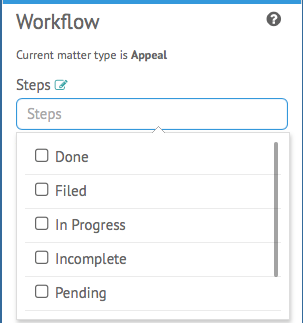
First, you must select your Steps from the list. You can select multiple Steps, and the order they are selected in will dictate the order in which they appear on the resulting Workflow chart. To add a step as a selection option, simply type it in the box and press Enter. Once you have selected your steps, click out of the field to continue.
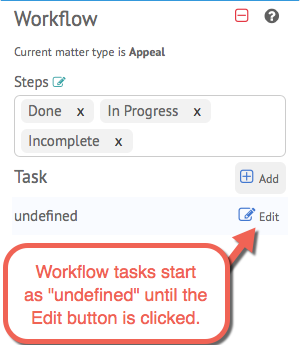
Next, we will select our Tasks. To add a task to the list, click the Add (+) button. Workflow tasks will start in an “undefined” state until you click the Edit button to define them (see above). If you wish to clear out all Workflow options and start over, click the minus (-) icon at the top. Next, click the Edit on your task.
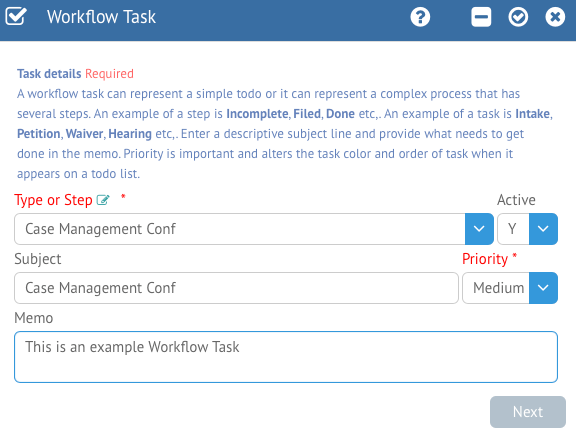
You will then be able to update the Type (or Step) of the Task, Subject, Priority and Memo. The Type can be defined from a list of current Todo types, or you can simply add a new Type by entering the value you’d like and pressing enter. You can temporarily deactivate this Task in the Workflow process without removing it entirely by switching Active from Y to N as well. Once finished, click Next to move on to the next Screen.
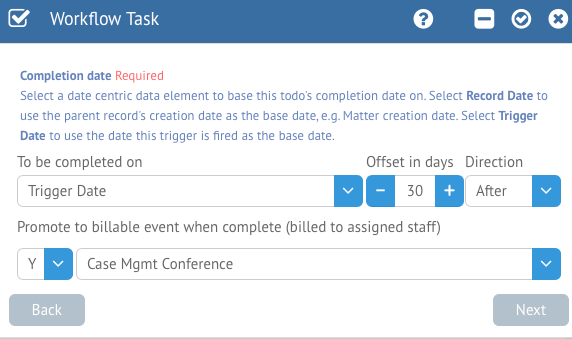
Next, you can determine the due date of this Task by selecting the Base Date, Offset and Direction in the first line. The Base Date can be a Trigger Date (i.e. when you create the Workflow) the Record Creation Date (in this case, the Matter’s original creation date), or a Key Date from the Matter. Setting it to a Key Date is the most flexible option, as you can freely change that date before creating the workflow. Offset will allow you to set a value in days, and Direction lets you determine Before or After. For example, if you have a Statute of Limitations, you’ll want the offset to be your number of days and the Direction to be After. For tasks leading up to a Court Date, usually you’ll use the Before option.
You can also optionally promote the task to a Billable event once it reaches the final step. Switching the toggle box to “Y” will indicate you wish to do so, and additionally you can define an Event Type for the created Event.
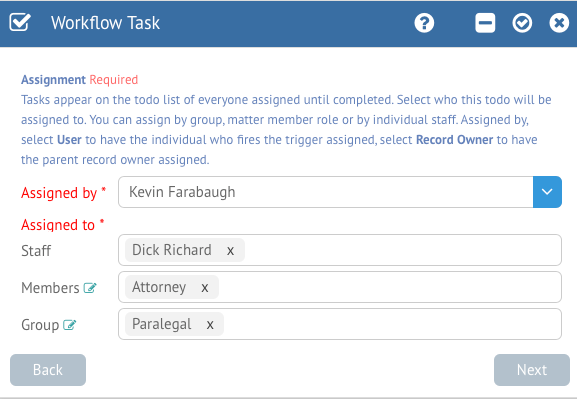
Next, we will determine who is assigned to this task. Much like the Todo trigger action, you can determine who this Todo will be assigned by, and can then assign to specific Staff members, Matter Members by role (such as Attorney or Assistant), or Group (such as Paralegal or Admin). Multiple Staff, Members or Groups can be selected. Click Next to proceed.
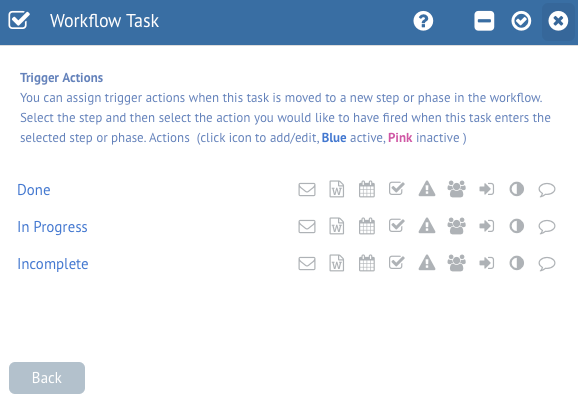
Finally, you will be able to create Trigger Actions for each of the steps defined on this Task. When the Task is moved to that Step by a user, the actions specified here will occur. For more information on how to set up Trigger Actions, refer to the Trigger Actions Overview page. Keep in mind that the actions specified will only fire once per Workflow per Staff, so unless the Workflow is deleted and recreated, they will not occur more than the first time the Task is moved to that step by a Staff member.
Once you are finished, click the checkmark at the top right to save the Workflow definition for this Matter Type.
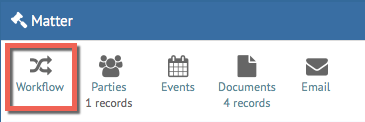
To access your newly-created Workflow, click on the Workflow icon in the Matter record. This will not be available on Matter Types where a Workflow is not currently defined.